
What is Bokeh?
In this discussion, we will learn how to get bokeh effect in photography. The word bokeh comes from the Japanese dictionary.
It signifies the quality of the out-of-focus effect of your photos and not just the out-of-focus effect itself.
The terms background blur and bokeh are used interchangeably. But as we have just learned, there is a subtle difference between the two. For the sake of this discussion, we will only use the term bokeh and not background blur.
What Lens Is the Best for Shooting Bokeh
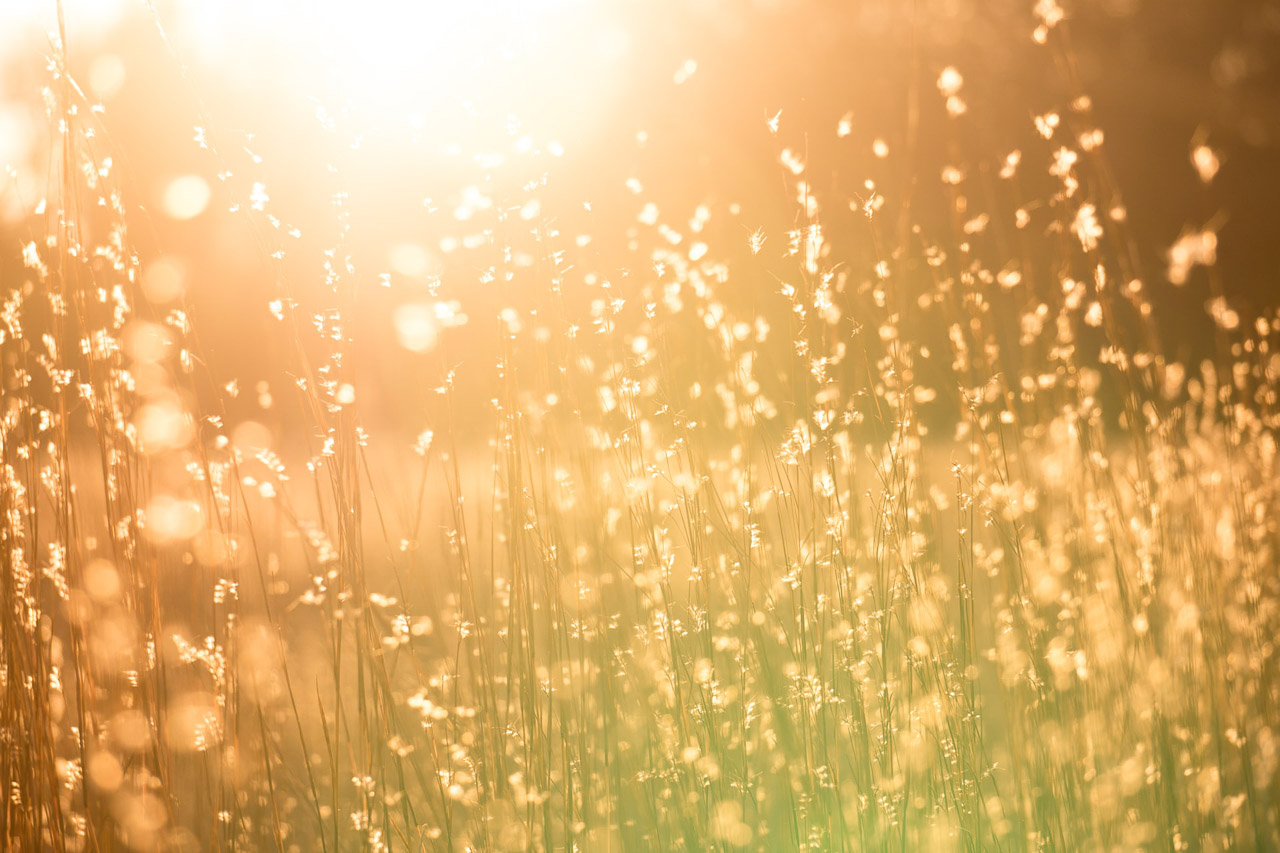
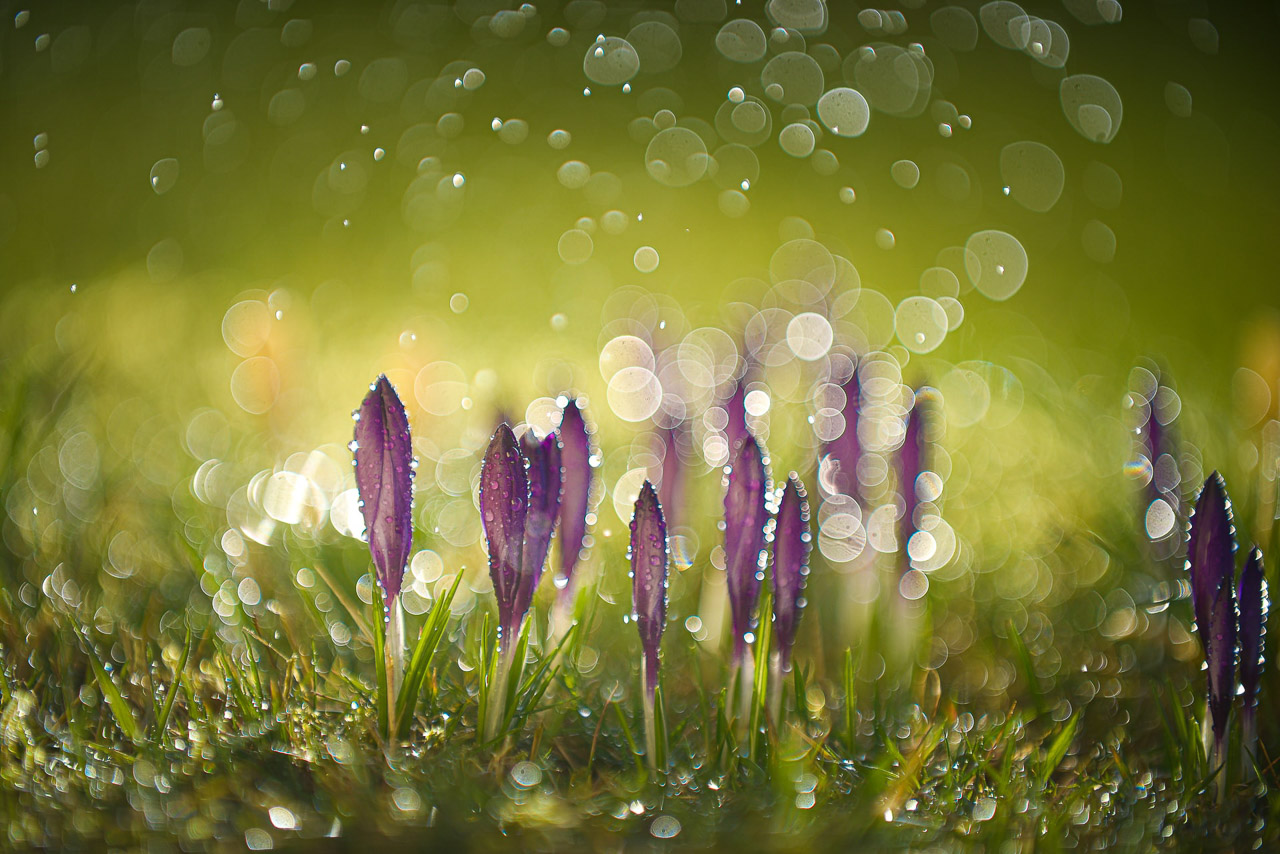
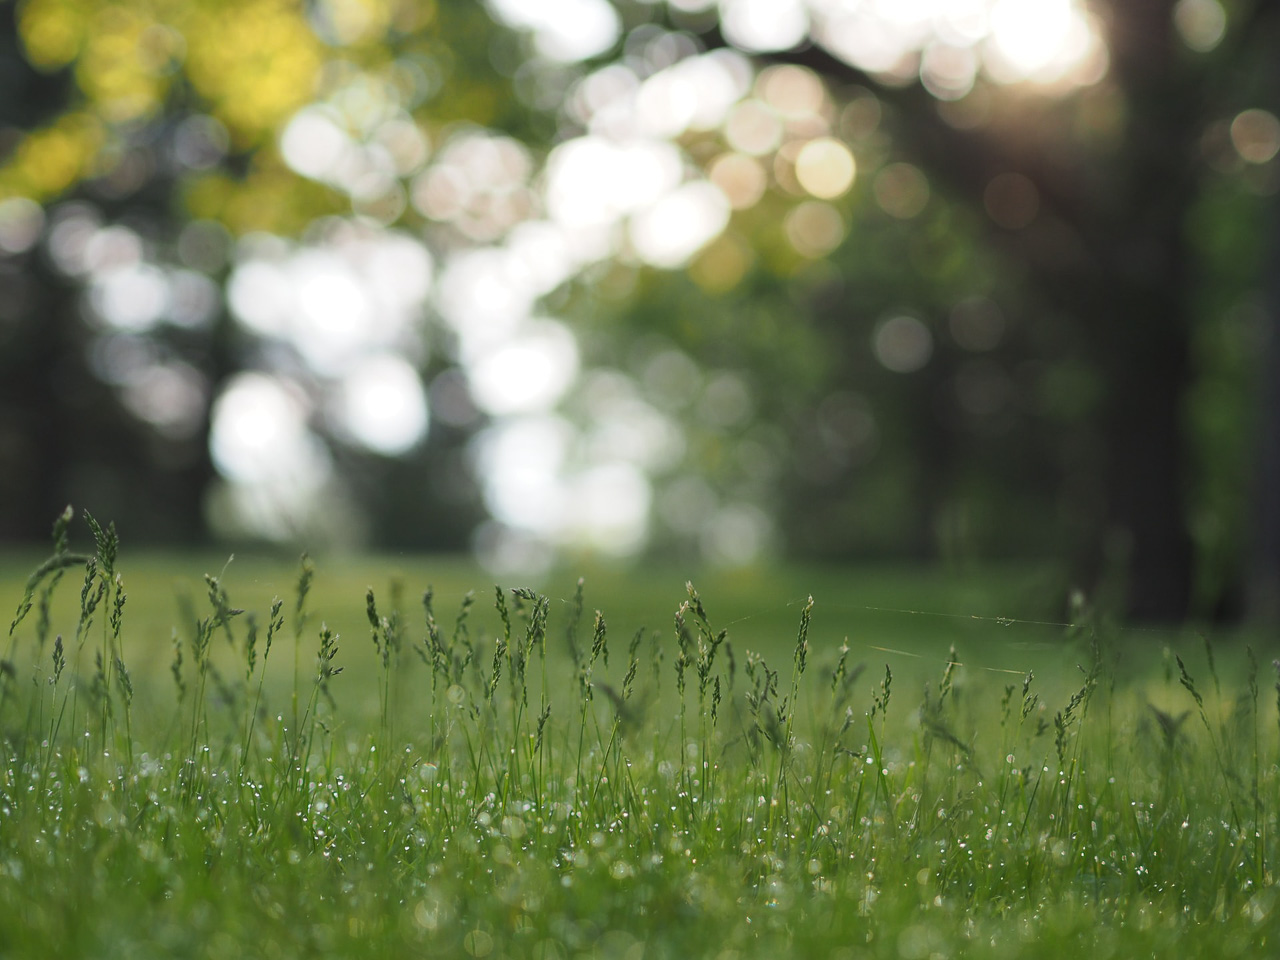
It is easy to see bokeh in action when looking at portraits, flower photos, macro photos, or even bird photos with a creamy background and a sharp subject in focus.
In more specific terms, we’re talking about blurry circular shapes appearing in the background of a subject while the subject is in focus.
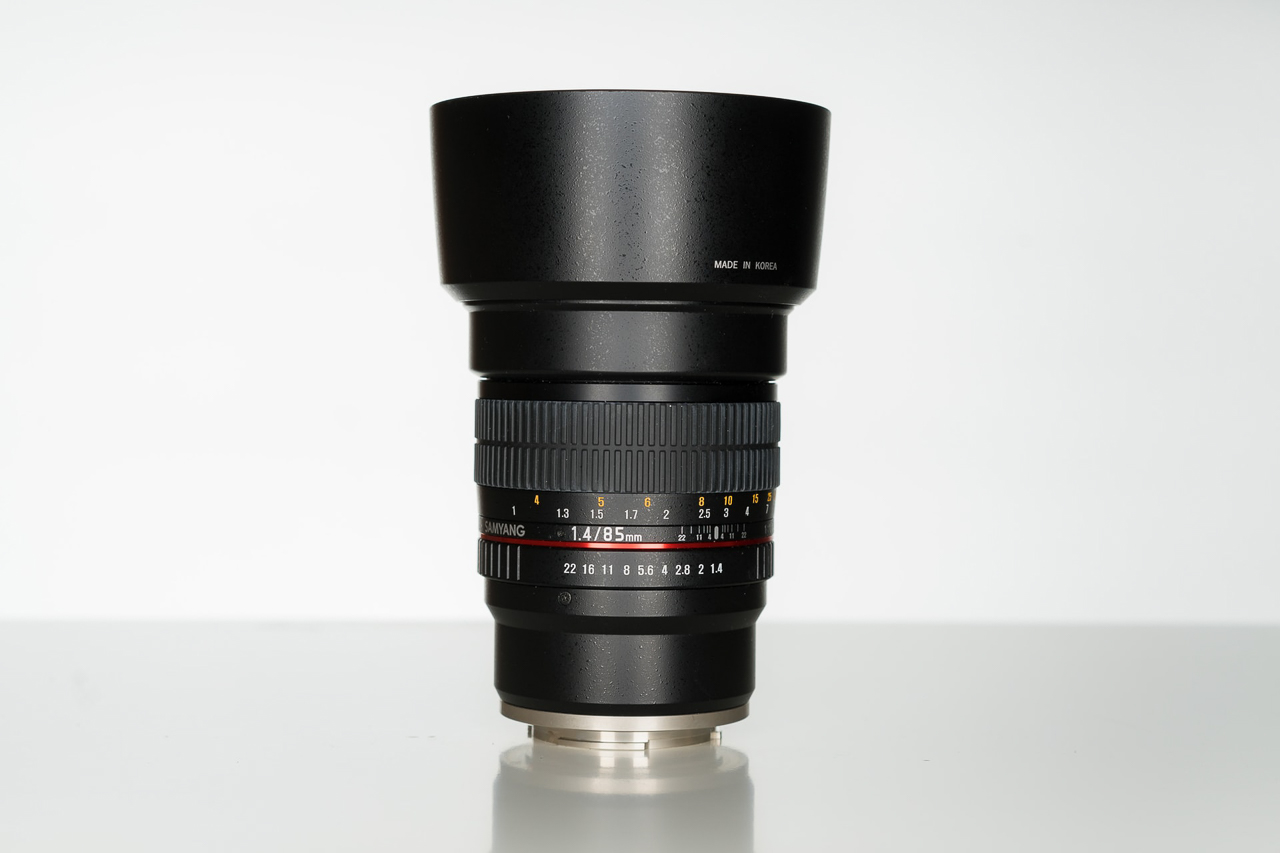
The lenses perfect for shooting excellent quality bokeh usually come with a wide-open aperture. Anything f/4 or faster (or wider) is ideally suited for creamy bokeh.

In other words, bokeh is controlled by the lens’ ability to produce a shallow depth of field. We discussed shallow depth of field in a previous article.
There is a specific advantage when using a lens with more diaphragm blades. A lens with eight or more diagram blades is likely to produce a better, more circular-looking bokeh than one with a lens that has fewer diaphragm blades.

Another thing to note is that the bokeh quality is better if the lens’ diaphragm blades are rounded. So, the likes of the Canon EF 85mm f/1.2L II USM or the Sigma 35mm f/1.4 DG HSM ART are great lenses to capture bokeh.
Effects of Aperture and Distance on Bokeh
We have already learned that a wide-open aperture positively impacts bokeh. Wider the aperture, the smoother the bokeh because wide open apertures produce a shallow depth of field.

The second thing that controls the quality of the bokeh is the distance between the camera and the subject as well as the subject and the background. We have discussed these aspects in a previous article on shallow depth of field.
If you leave sufficient space between the subject and the background, you can produce nice bokeh even without a fast aperture.
Also, when using a tele lens you need to leave sufficient space both between the subject and the camera and the subject and the background to produce beautiful bokeh.
How to Get Bokeh Effect – Primary Conditions
To summarize what we have learned thus far, the nicest bokeh happens when all these parameters are fulfilled:
- It would help if you worked with a fast wide-open aperture
- The lens should ideally be a telephoto unit
- The lens has eight or more aperture diaphragm blades
- The aperture diaphragm blades should be rounded
- Do leave sufficient space between the subject and the background
We have already learned which is the best aperture to shoot the nicest bokeh. We also learned that if the aperture diaphragm is composed of 8 or more rounded blades, the bokeh is nicer.

The need for a telephoto lens comes from the fact that you need to leave out space between the subject and the camera. With a telephoto lens, you’re forced to take a few steps back for you to get a decent composition.
You need to leave out space between the subject and the background with it. It won’t matter if you shoot with a telephoto lens and the subject is standing almost the same distance as the background.
Additional Conditions

These conditions are not necessary to be fulfilled for producing bokeh. That said, when they’re fulfilled, they can add to the overall quality.
Textured Background
When you’re trying to get the bokeh effect, make a conscious choice to place the subject against a textured background, such as trees, leaves, twinkling lights, etc.
Avoid placing your subject against a solid textureless background because you won’t get nearly the same bokeh effect you can with a textured background.
Use Color Contrast
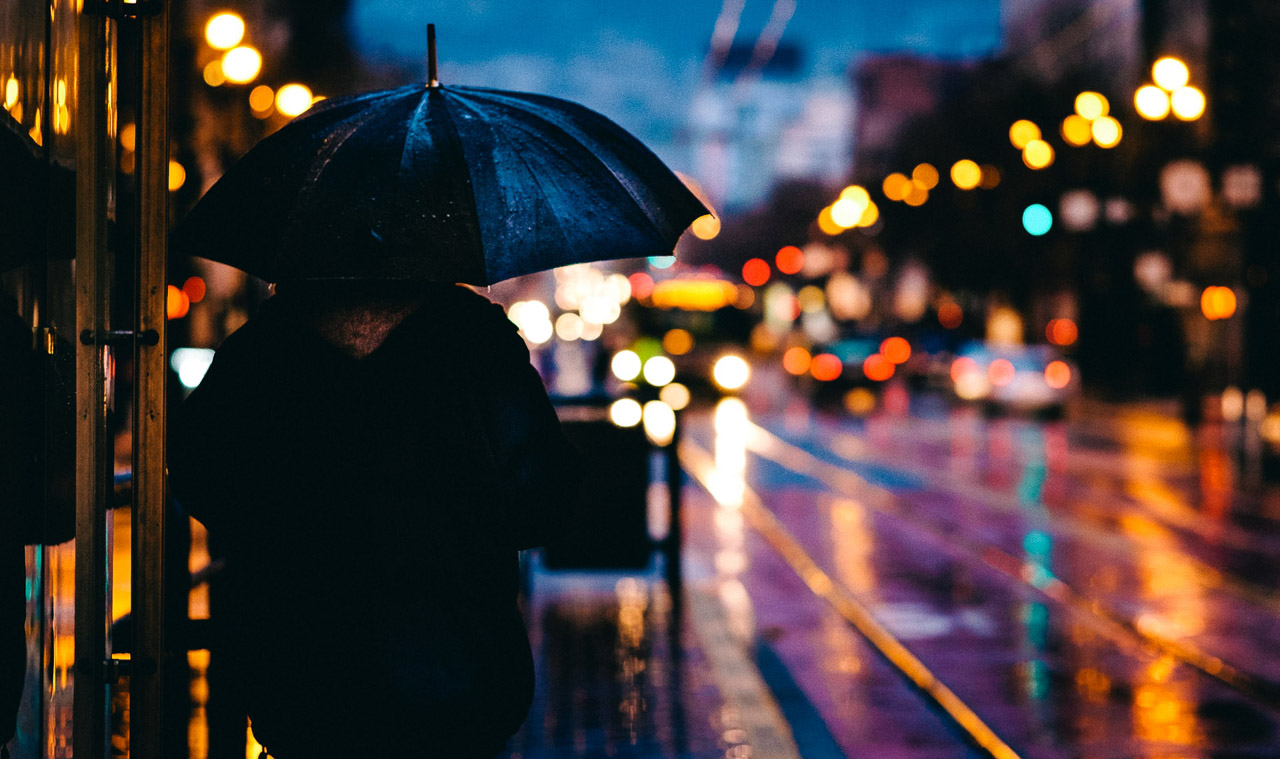
Try and incorporate scenes that have contrasting colors appearing naturally in the frame. For example, in this image, there is a lot of contrast in the scene, and the bokeh appears beautiful.
You can also enhance the colors of your image and, in the process, accentuate the bokeh effect using Colorcinch.
There are many tools in Colorcinch that you can use to accentuate your photos. Vibrance, Color, and Exposure are your primary tool tabs.
We don’t recommend the Vibrance slider because it only affects the mid-tones and is therefore unsuitable for our purpose.
We recommend just tweaking the exposure a bit so that the background blur looks better.
The best tool would be the Exposure slider because it allows you to work the Brightness, Contrast, Highlights, and Shadows giving you more creative space to manipulate your photos.
Ok, upload the photo using the Upload option on this page. You don’t have to register for that.

Once the image is ready for edits, navigate to the Exposure tab.

There are four options under the Exposure tab – Brightness, Contrast, Highlights, and Shadows.
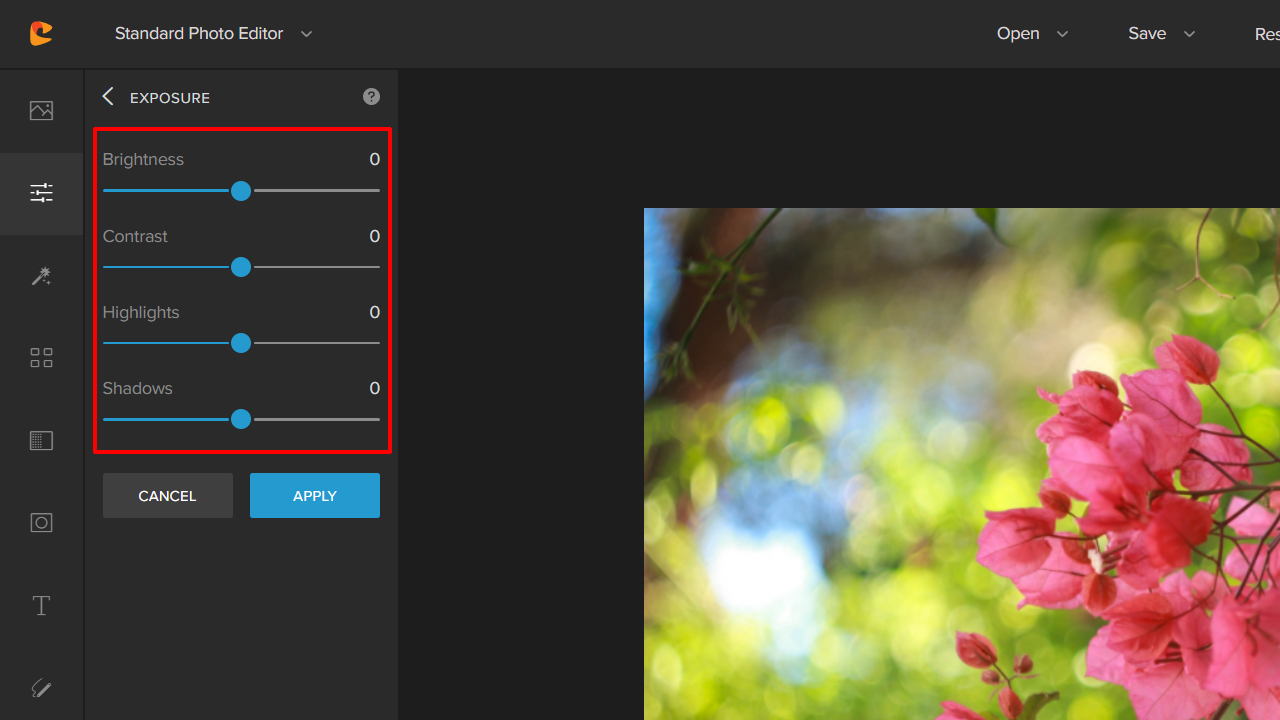
We will tweak each of them a bit to fine-tune the image.
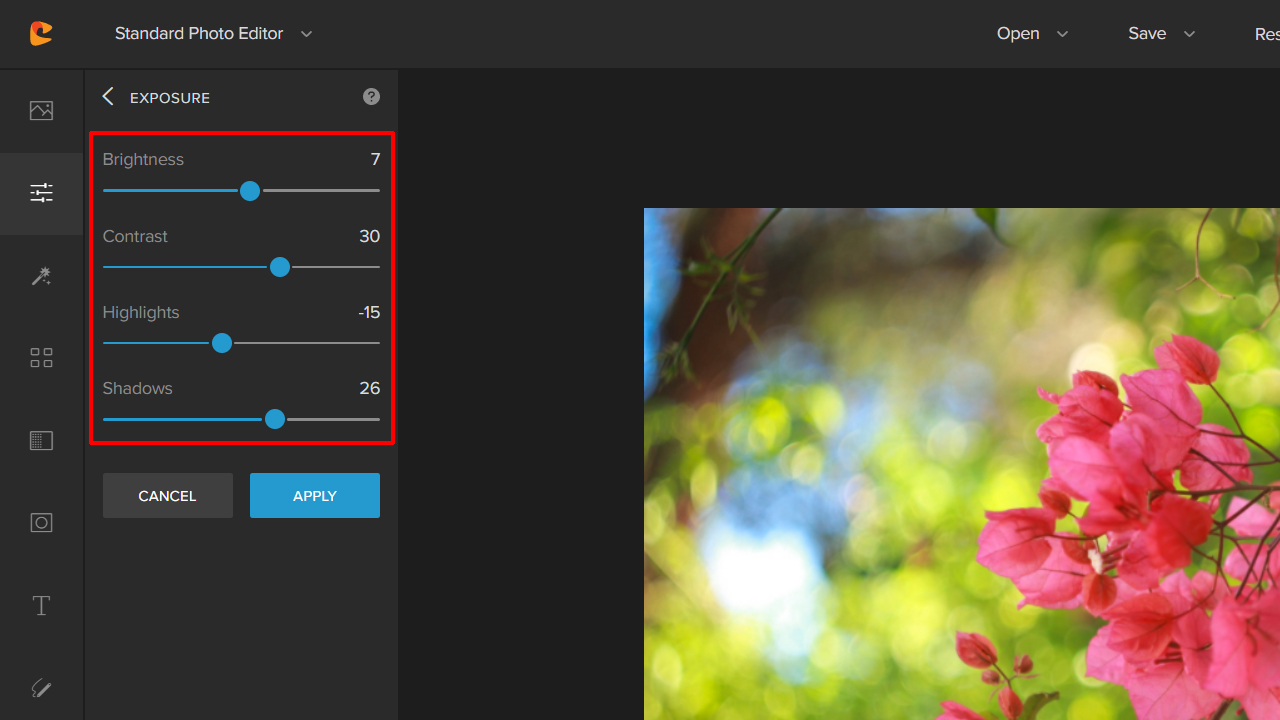
The changes are very subtle. Here is a side-by-side comparison of before and after the changes are made.


You perhaps would prefer to use a different approach, and it’s perfectly ok because there is no such thing in photography as the only way to do something.
Concluding Thoughts
As you have just learned, bokeh is about the quality of the background blur you capture with your camera and not just the background blur itself. Some lenses produce horrible background blur, which does not add to the photo. So picking the right equipment is essential.

But it’s not always about picking the right equipment. The answer to how to get bokeh effect in your photography lies more in the technique. So, our final tip is – to get your technique right.
Don’t fret that you don’t have a fast lens or the best camera for low light. Master the basics of exposure to play around with the depth of field, fine-tune your compositions, and only then if you need move on to better equipment.
Till then, keep clicking and keep reviewing your work.