Resize your images for free.
Resize images quickly and easily with our fast and free online photo resizer.

How to resize an image in three simple steps.
Upload your image to Colorcinch.
Choose a size template or create your own.
Instantly download your resized image.
Instantly resize images – all in one place
Looking for a quick and easy way to resize images? With our free and easy to use online photo resizer, you can quickly adapt your photos to any size. Simply define your custom dimensions and the image resizer will make the adjustments instantly.

Frequently asked
questions
Image resizing is the process of altering the original size of a picture or image.
Depending upon where you want to use your image (e.g. social media pages like Facebook), you may need to change its dimensions; you can do so by resizing it.
Resizing an image is also an effective way of reducing the file size of a photo or illustration. Images that have a smaller size load quick and can improve the performance of websites, without compromising on quality. You may also need to resize images to create headers or profile images for your blog, Twitter page or other online sites.
On the same note, if you’re short of storage space, you can resize your images to save some valuable space. With Colorcinch, you can resize or create images for free, online. Your images will always retain their quality.
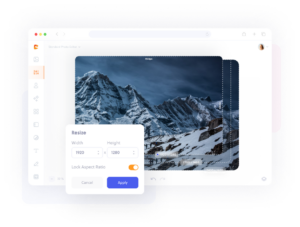
Upload your picture to Colorcinch and navigate to the Resize option in the Basics menu. Here you will find all the tools you need to change the size of your images or logo, with compromising their quality. You can also download your resized images or photos to use offline or on a social media page.
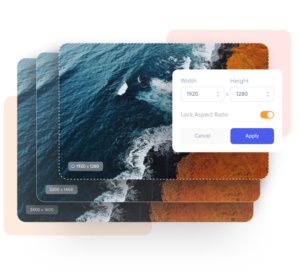
With the Lock Aspect Ratio option enabled, manually enter either the Width or the Height of the image (in pixels) to resize your images.
If you choose to disable this option, you’ll need to enter both the width and the height manually. It’s one of the simplest tools you can use to create and download the images you need.
The term refers to the ratio of the width of an image to its height. It is represented with two numbers with a colon in the middle – for example, 4:3.
Keep in mind that the numbers do not represent the actual width and the height of your images. Rather, it’s only their proportion.
For instance, if an image is of size 6000 x 4000 pixels, you can calculate its ratio as 6000:4000 which is 3:2.
Images can appear disproportionate after you resize them if you manually entered the width and height that have an aspect ratio which is different from that of the original image.
To overcome this issue, simply enable the Lock Aspect Ratio option in the image resizer.
Having done that, you’ll need to enter only the width or the height and the resizer will calculate the other parameter automatically for you.
This way, your original aspect ratio will be maintained and the image won’t appear disproportionate.
The image resizer supports JPG/JPEG (the most commonly used extension for photos), BMP, PNG, and GIF file formats.
There’ll be no loss of image quality as long as you choose to reduce the image dimensions using our tools.
You should, however, be careful if you’re looking to enlarge the image. While the editor will do its best to add-in the extra pixels, the image sharpness may reduce if there’s a huge size difference between the original image size and the target image size.
When you use our tools, resizing your image will not change any of the content in your images. Resizing is completely different from cropping. It’s only while cropping that you should be careful about the image being clipped.
You may need to adjust the size of your photos to create headers for social media pages like Facebook, YouTube or Linkedin. You can also create a thumbnail of your logo for your website, or make an online banner. With our free image resizer, you can adjust the image with a simple drag and drop action and download your resized images to use offline.
Most of us need to resize images to create a stunning profile picture for social media, but there are good business cases for image resizing as well.
You’ll need to use the exact dimensions when you are creating a thumbnail for YouTube videos or your WordPress blog, using a logo on your website or business card, or creating an online banner.
There are some word processing tools that will let you do this, but there’s usually a trade-off in terms of quality.
Always use a resizer tool (like the one on our website) to resize your images for your website or blog.
With Colorcinch, you can do so much more with your resized image or photo.
Our platform is packed with free features, tools and resources to create impactful custom pictures for your blog, website or social media platform without any coding or design knowledge.
You can even download your images after using the resizer tool to use your pictures offline.
Every tool was designed to be easy to use, so you can create, resize or edit an image in png, jpg or other format using simple drag and drop tools in seconds.

