
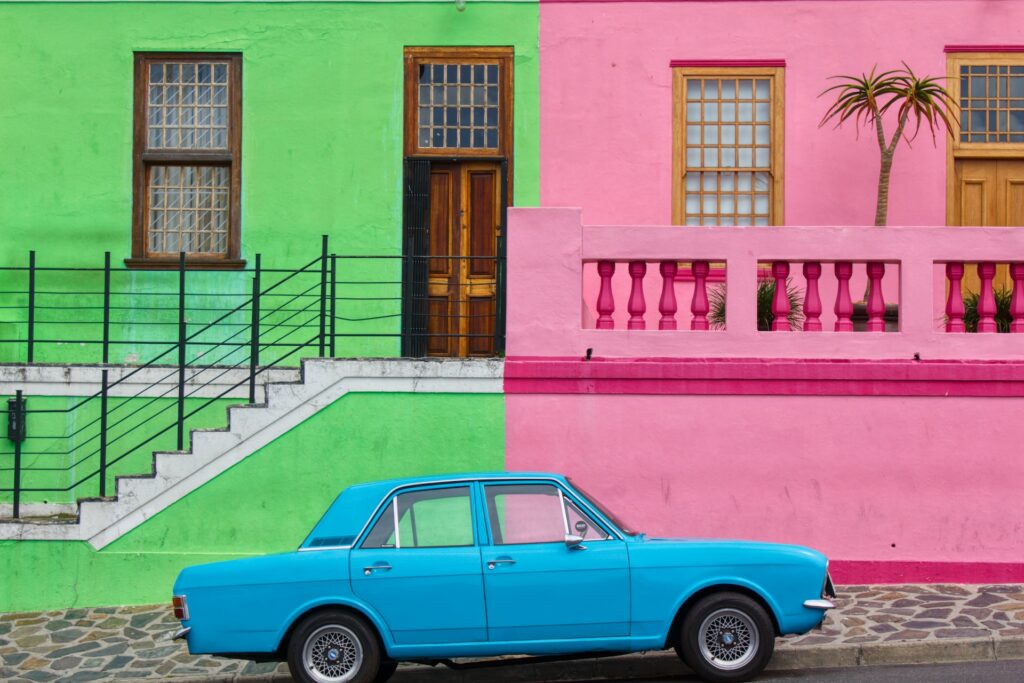
Captivating visuals are the heart and soul of impactful storytelling. Just as words weave a compelling narrative, high-quality images possess the power to bring that narrative to life.
The result? The ability to transform your brand’s message into a tangible and immersive experience. Whether you’re using photos for social media, your website, ads, or other marketing touchpoints, ensuring that your photos are eye-catching and appealing is absolutely key.
The good news? Creating stunning, high-quality images is not an exclusive craft reserved for professional photographers or graphic designers. There are tons of free and premium photo editing tools that are accessible to people with all levels of photography, editing, and graphic design backgrounds.
So regardless of your expertise, you can tap into these resources to unlock the full potential of your images, enhancing their quality to captivate your audience effectively.
In this blog, we’ll dive into the best practices to enhance your photo quality, ensuring every shot you take and the final edit is nothing short of spectacular.
So, let’s explore how to enhance photo quality with ease.
Understanding the basics of photo quality
Before we get too far ahead of ourselves with enhancing photo quality, let’s peel back the curtains and discover what “photo quality” really means.
Simply put, photo quality is a measure of the visual aspects that make an image appealing and engaging. These elements include clarity, resolution, color accuracy, and the presence (or absence) of digital noise or artifacts.
But it doesn’t stop there. The context of the image, the emotion it evokes, and its composition also contribute significantly to the perception of quality.
As the saying goes, a picture is worth a thousand words. They hold the potential to create lasting impressions, drive engagement, and stir emotions in both personal and professional landscapes.
In the personal realm, high-quality photos bring our cherished memories to life, preserving moments in time with remarkable detail and vibrancy.
In a professional or business context, they establish brand identity, reinforce messages, and often shape the first impressions that your audience has about your products or services.
Unfortunately, several stumbling blocks can hinder the quality of your photos. Common culprits include:
- Lack of understanding of composition and perspective
- Improper camera settings
- Poor lighting conditions
Not to mention, inadequate post-processing or over-editing can degrade your photos, leaving them less than perfect. If the picture is made with AI and you don’t want to expose it, you should be even more careful with the editing process. As a final step, you should also make sure it passes the AI generated image detector examination to exclude problems in the future.
But don’t worry. These are hurdles that can be readily overcome with the right knowledge and techniques. With that said, here are 13 techniques to help enhance your photo quality.
1. Use Blurring
Many photo editors include blurring tools that allow you to blur out any part of your image. While blurring your photo when you’re trying to improve the quality sounds counterintuitive, it’s a technique that can truly come in handy.

The main benefit of blurring is that it allows you to put the subject of your image in focus. You can mute out things that don’t add value to the photo to shine the spotlight on what matters most.
2. Adjust the Brightness
There are a few common color-correcting techniques that you can use to improve the quality of a video, and adjusting the brightness is one of these techniques. As the name suggests, this setting allows you to control how bright your photo is.

This would come in handy if the photo wasn’t taken in the best lighting. It also comes in handy if there are light parts of the image that you’d like to brighten more or mute.
Take some time to experiment with brightness and the other color-correcting settings to see what looks best. How you adjust these settings will help control the mood and aesthetic of your photos.
3. Tweak the Saturation
Tweaking saturation is another option for color-correcting your photos. Saturation is how bright or dark colors appear in the image. An image with no color, such as a black-and-white image, would have the lowest saturation possible. Making the saturation higher creates a brighter, more colorful image.
Adjusting the saturation can help create a more optimal appearance with an image. The technique can also be used to ensure that a photo has the right amount of color for your desired aesthetic.
For example, if you’re trying to create a moody or vintage feel with your image, you could turn the saturation down to replicate the effect of a vintage film. If you’re trying to create something more bright and vibrant, you could turn the saturation up.
4. Adjust the Contrast
Adjusting the contrast is another simple color-correcting technique that photo editors use to enhance their photos. Contrast is the ratio between different tones in a picture.
 By making the contrast high, the tones become more distinguishable, and by making the contrast low, the tones are less distinguishable. Higher contrast almost washes tones out, while lower contrast adds more shadows.
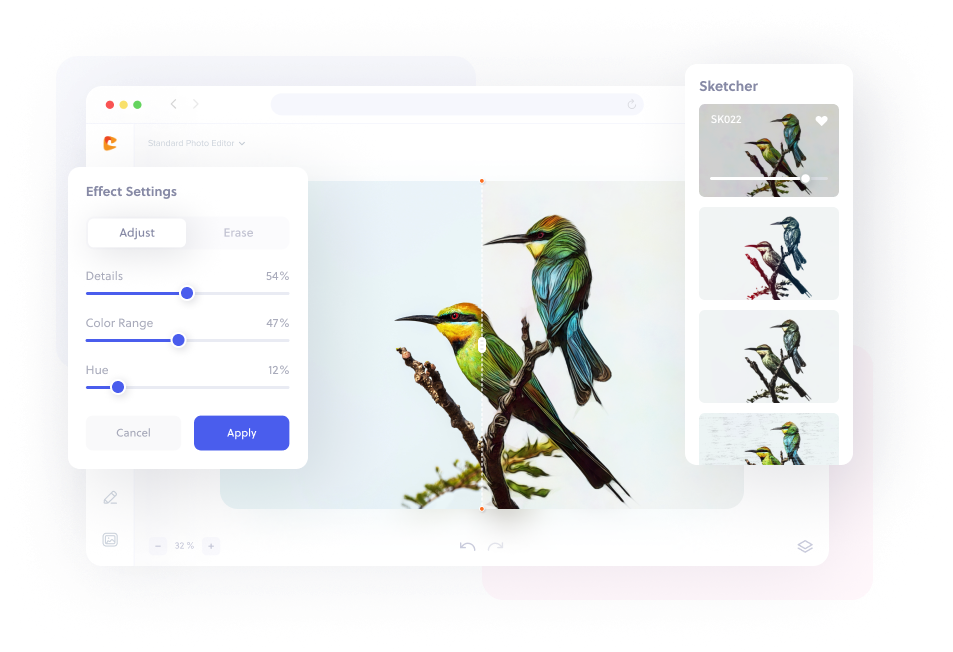
5. Use Filters
Filters are an easy way to change the aesthetic and spice up your photos.
And we have social media apps like Instagram and Snapchat to thank for making these mainstream. These apps make filters accessible to everybody with a smartphone. But if you’re looking for options for professional use cases, there are other apps, like Photoshop and Lightroom, that are slightly more advanced.
In addition to simple color filters, some filters add more obvious special effects. On Colorcinch, for example, you can cartoonize your image or turn it into a sketch. Some effects are fun, whereas some are geared toward creating a more professional final product.
6. Add Overlays
Overlays are another easy way to enhance your photo quality. You can overlay text, stickers, or even GIFs (depending on where you’re distributing the images). This is a super quick way to spruce things up since it can be done on tons of free tools.
The key to adding overlays is to make sure that the colors work. Your overlay colors should match the color pallet of the image and not clash in any way. There should also be enough contrast between the overlay and the image colors so that shapes or text are visible.
If you’re adding text, experiment with text backgrounds and drop shadows so that the text is 100% legible. If you can’t read the text, it won’t enhance the photo in any way.
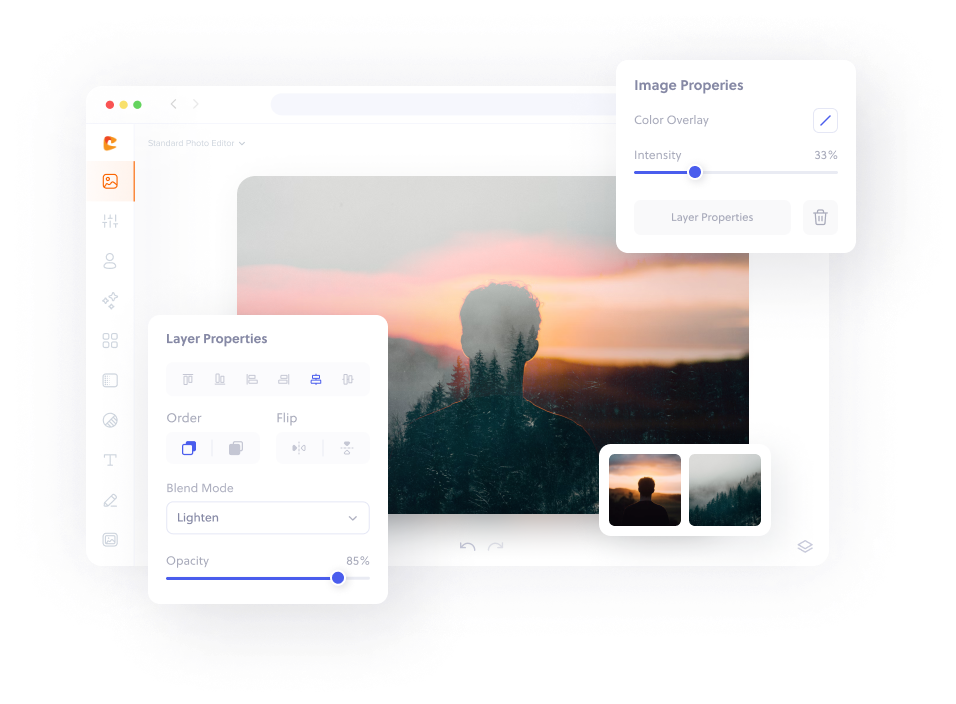
7. Experiment With Layering
Another way to add dimension to your photos with effects is to use layers. You can layer multiple photos with different opacities or incorporate solid colored layers.
Layers can cover the entire image to add texture, or they can cover only part of the frame to draw attention to a specific focal point.
If you want to use layers to enhance your photos, the best way to perfect this technique is to experiment. Add in brand colors, tweak opacities, use different textures, and reorder the layers until you figure out what looks best.
Once you find the perfect layer formula for your aesthetic, it’ll be easy to enhance other images to create the same look and feel.
8. Crop Strategically
A simple crop can go a long way when it comes to enhancing your photo quality. You can cut out parts of the images that aren’t great or don’t serve the image’s purpose.
As you crop your image, you can also rotate it to get the perfect frame. Like some of the other techniques we’ve mentioned, this takes some experimenting. Remember to crop a copy rather than the original so you don’t lose the photo if you make a mistake.
However, don’t crop your photo so much that it becomes pixelated. If you crop the image too small, the photo will be too zoomed in, and the quality will likely be lost.
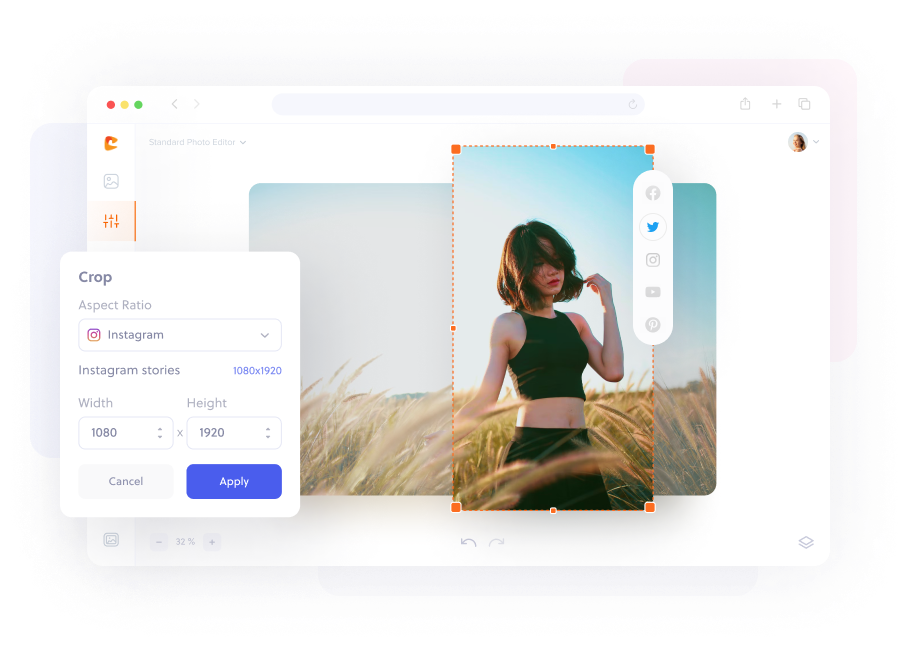
9. Optimize for Specific Distribution Methods
An important part of enhancing a photo’s quality is ensuring that it is appropriately set up for the place where you plan to distribute it. With this, size and dimensions are the most important considerations.
For example, a 1:1 aspect ratio is fine for the Instagram grid, but it’d look as nice on the vertical Instagram story. LinkedIn, Twitter, Facebook, and other platforms have specific aspect ratios and size restrictions to keep in mind, as well.
In addition to ensuring the aspect ratio is appropriate for your distribution strategy, an important part of your social media approval process should include ensuring that your photos are properly edited to match your brand’s aesthetic.
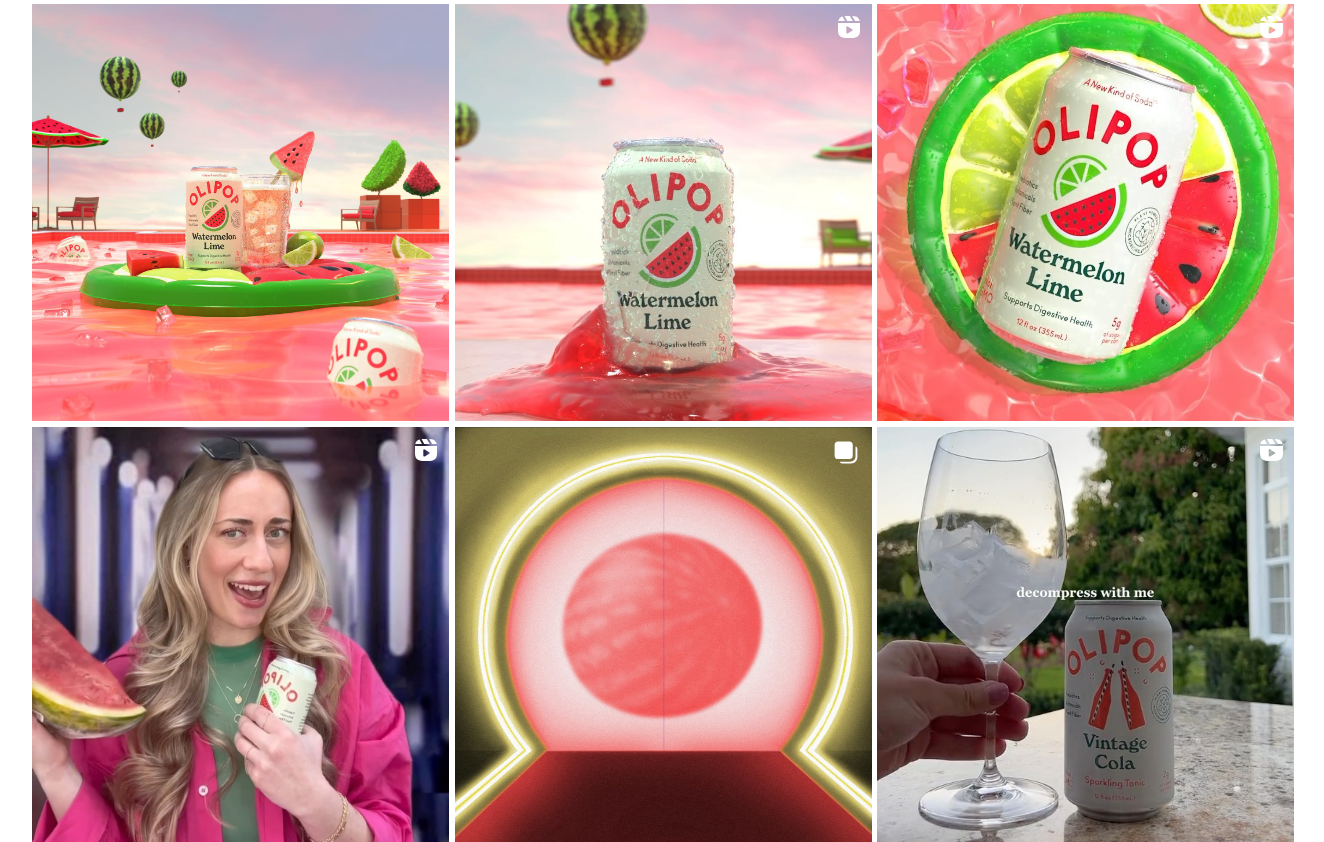
For instance, Olipop goes above and beyond to maintain a watermelon (pink and green) color scheme to announce the new flavor on its Instagram profile. An image that lacked the pop of color wouldn’t fit in with this aesthetic.
Since different social media platforms have their own “cultures,” it’s also important to ensure that your graphics are designed accordingly. Using AI image generation for this purpose can come in handy to ensure your branding stays on point, without having to physically capture the perfect shot.
10. Improve Resolution
Although expecting a blurry photo to become pristine is a bit far-fetched, it’s possible to improve the resolution to some extent.
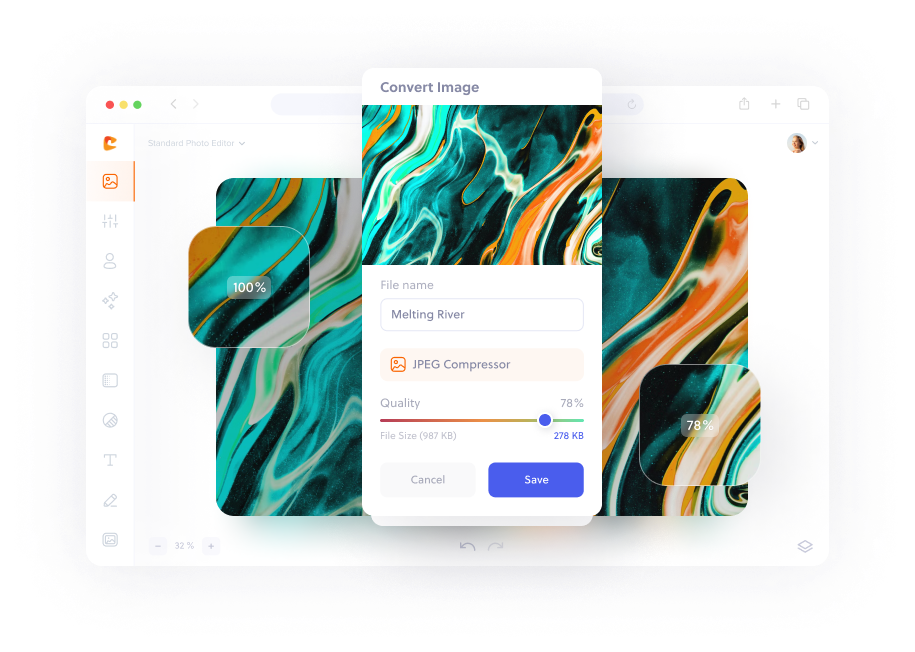
There are a few ways to do this. This first is with a digital resolution improvement or image compressor tool. There are also tons of free AI tools for improving resolution that you can test out.
Another way to do this is by using Photoshop to resample the image. This takes some Photoshop skills, so if you’re not familiar with the software, testing automatic tools that rely on artificial intelligence may be a better approach.
11. Remove the Background
There are tons of scenarios where the background is key to telling a photo’s story. However, there are also many instances where the background can be distracting or off-putting.
You can improve the photos’ quality by removing the background and overlaying the subject on something more appealing. For example, if there are strangers or misplaced objects in the background of a photo, it may be easier to remove the entire background than to remove the unwanted objects.

Once you remove the background, you can replace it with just about anything. You could use something abstract or something more realistic. Whatever you do, make sure it matches your brand.
12. Add Virtual Frames
Another easy way to spruce up your photos is with virtual frames. You can add a frame to commemorate an occasion or simply add a little spice.
Virtual frames are particularly great for changing things up on your social media feed. Frames are typically quick and easy to add to images, which is great if you’re looking to improve your images in a time crunch.

13. Take Better Pictures
While there are a lot of tools and techniques for enhancing the quality of a photo after it’s been taken, there’s so much value in improving your photography skills and taking better pictures.
Some ways you can sharpen your photography skills include:
- Understand how to focus on the subject
- Study work from other photographers
- Explore your camera settings
- Learn about lighting
- Work on your angles
Like most skills, photography is something that you can work on. If you want to improve the quality of your images, break out your camera and start practicing. Even if you don’t have a professional camera, you can start practicing with your smartphone.
Final Thoughts
Whether you’re creating images for social media, ads, or blog posts, there are many easy ways to enhance your photo quality. A great image will enhance the quality of your social media and writing blog for your brand.
You’ve tons of options to clean up or spice up your photos, ranging from simple color filters to more advanced color correction techniques.
Photography, much like any other art form, is a continuous process of learning and experimentation. Try new techniques, play around with different settings, and don’t shy away from making mistakes. After all, each misstep is an opportunity to learn and grow.
In the grand scheme of visual storytelling, every image you create adds a unique perspective. So, go ahead, pick up that camera, harness the power of the techniques you’ve learned, and unleash your creativity! The world is your canvas.
How will you turn an average photo into a visual masterpiece?
About Guest Author: Catalina Grigoriev
Catalina is an incurable optimist with a bubbly personality. That’s what her colleagues say. Secret mission: cat lover disguised as a dog person. Ex law student who switched into the digital marketing lane. Currently delving into the depths of SEO and content marketing at Planable.