
Smoke bombs definitely top the charts when it comes to the list of things that can make your photography much more exciting. Seriously, who wouldn’t love the ability to add excitement to their photos with colors of their own choice.
The use of smoke bombs for photography has been on the rise in recent times, and for good reason. This small and safe pyrotechnique is not just fun to shoot with but also makes a whole lot of difference to your photos when used the right way.
As fun and rewarding working with smoke bombs are, there are a few things that you must be familiar with. We have prepared this extensive guide on how to use smoke bombs for photography that’ll help you out as you pull the pin on your first smoke bomb.
How to Use Smoke Bombs for Photography
1. Safety First
Smoke bombs are fireworks after all. Therefore, it is essential that you follow some guidelines for the safety of the model, yourself, and the people that are around you.
- Use the smoke bombs in an open space with proper ventilation
- Ensure that there are no inflammable objects around
- Always keep the smoke bomb pointed away from the body to prevent getting burnt from any accidental flares
- Avoid close contact with clothes as the dye can leave a stain on the fabric
- As the smoke bomb can get a little warm, hold it at the base to prevent any accidental burns
- While you’ll be able to breathe fine when using a smoke bomb, feel free to use a face mask in case you feel uncomfortable with the smoke
2. Wind and Smoke Bombs Don’t Go So Well
For quite obvious reasons, it is definitely a good idea to schedule your smoke bomb photography on a windy day. The breeze will easily blow the smoke away and dilute the effect of the smoke. If it’s windy, wait for the wind to settle or postpone the shoot if required.
To reduce the effect of wind on your smoke bomb photography session, plan your shoot in areas that have some sort of wind shelters like buildings, a tunnel, or a forest.
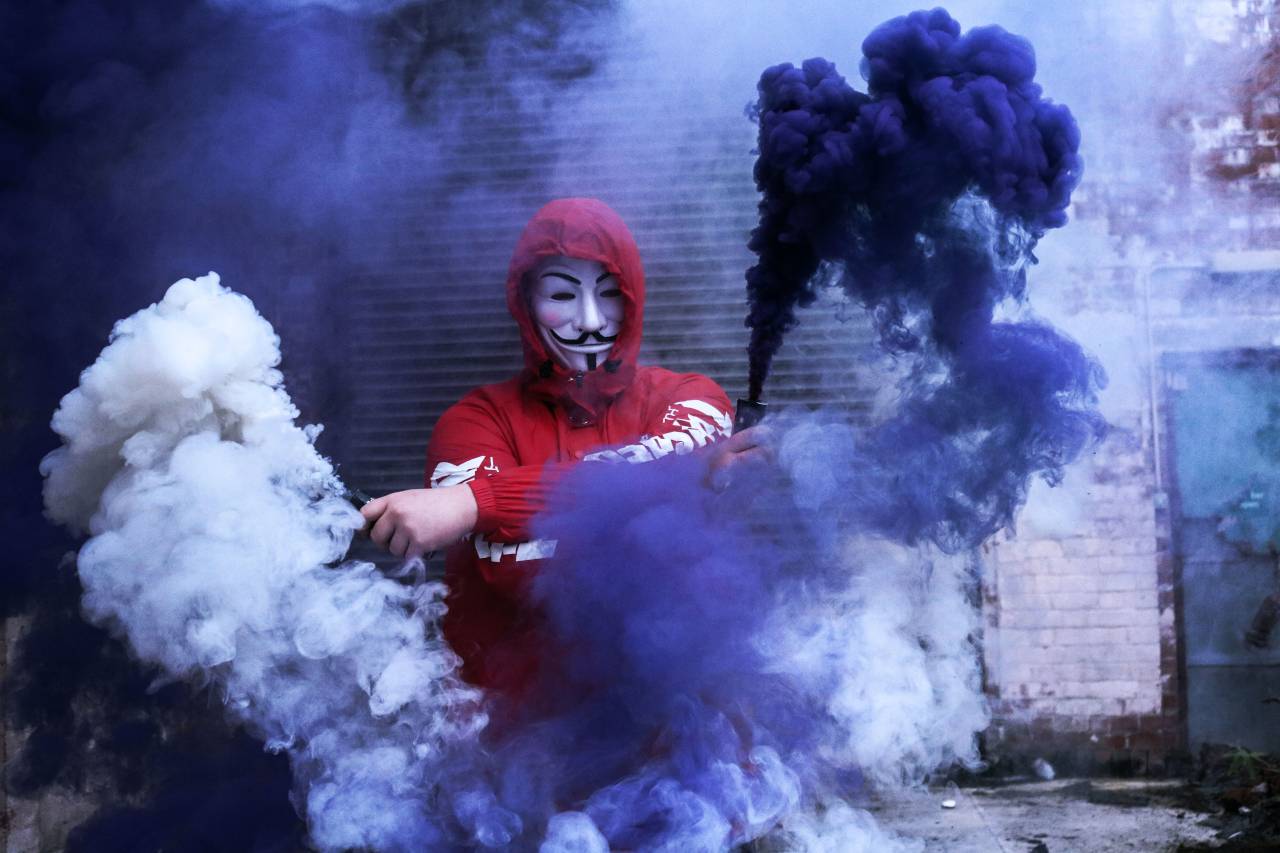
3. Get Multiple Smoke Bombs for Photography
Don’t make the mistake of getting yourself just a single smoke bomb for photography purposes just because it’s your first time. To be honest, the first few smoke bombs that you’ll use will probably end up getting wasted as you practice with them.
It’s also worth noting that each smoke bomb lasts for about 60-90 seconds depending on which one you get. You may or may not be able to get your shots during that window of time. So, it helps having a few extra smoke bombs in the inventory.
It also makes a whole lot of sense to get different colored ones as you can create more vibrant images that way.
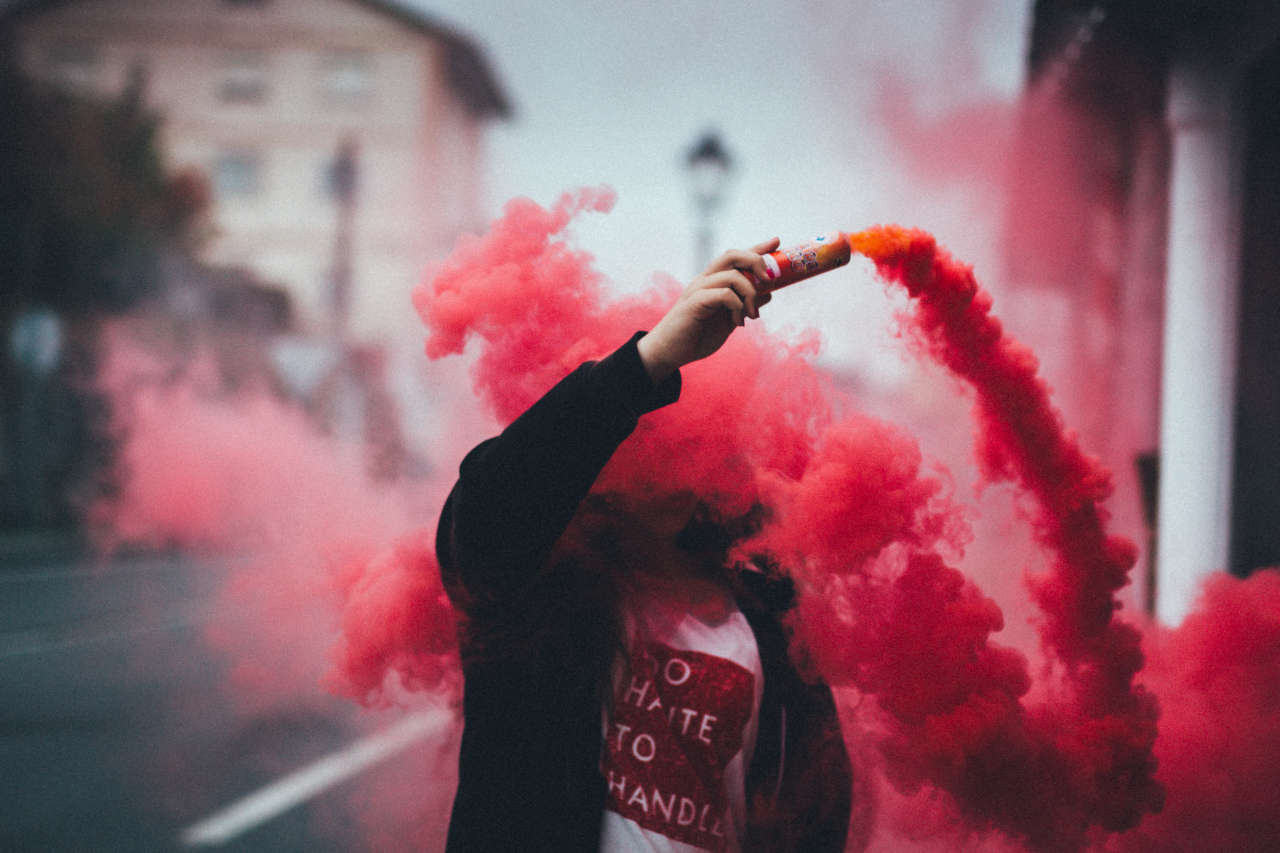
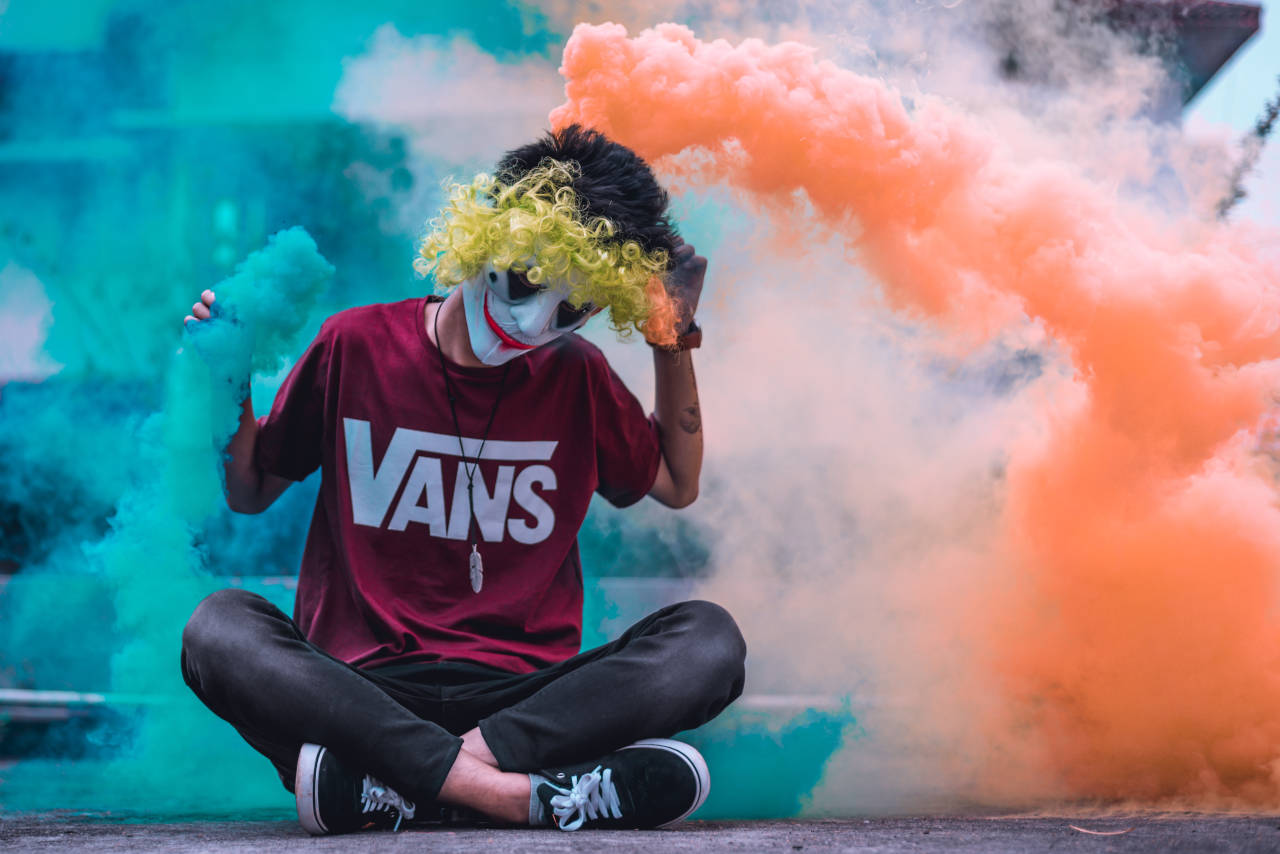
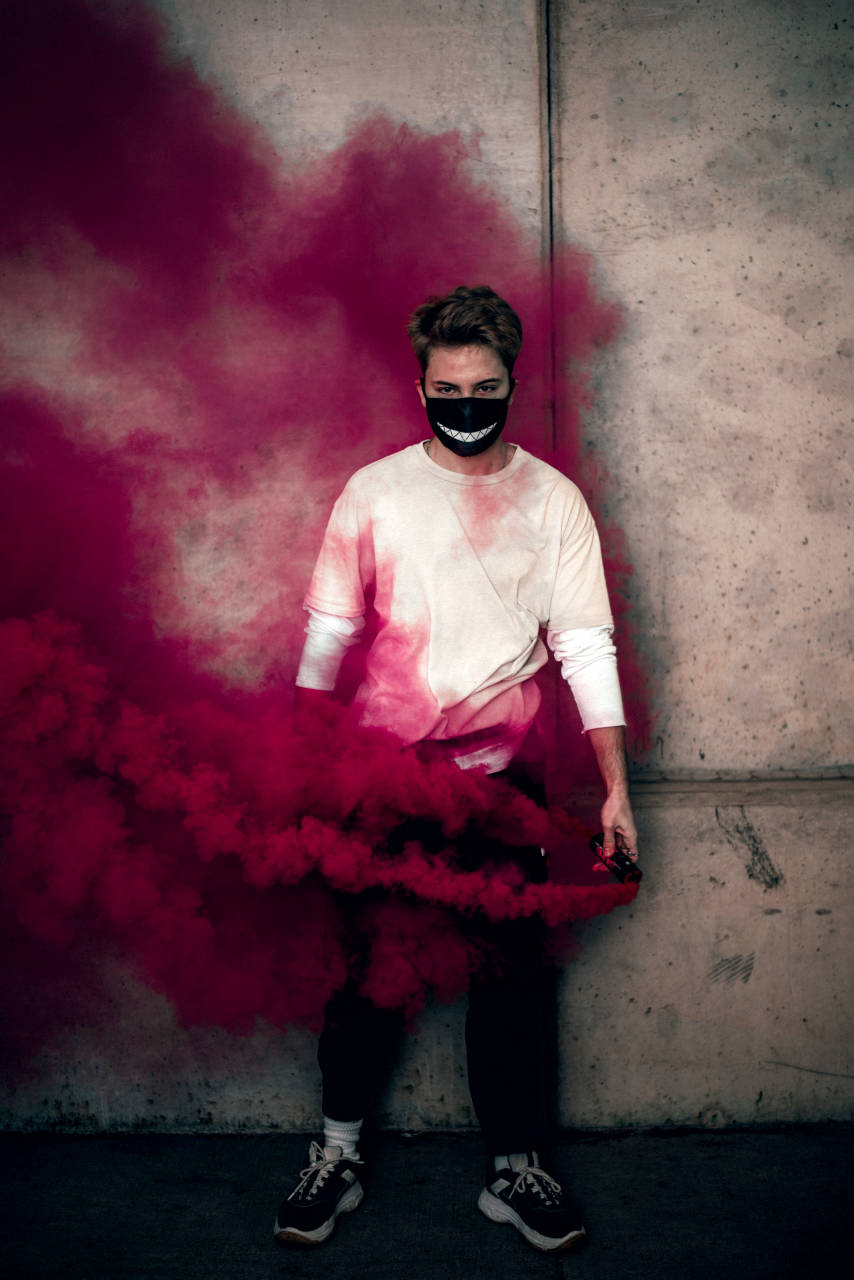
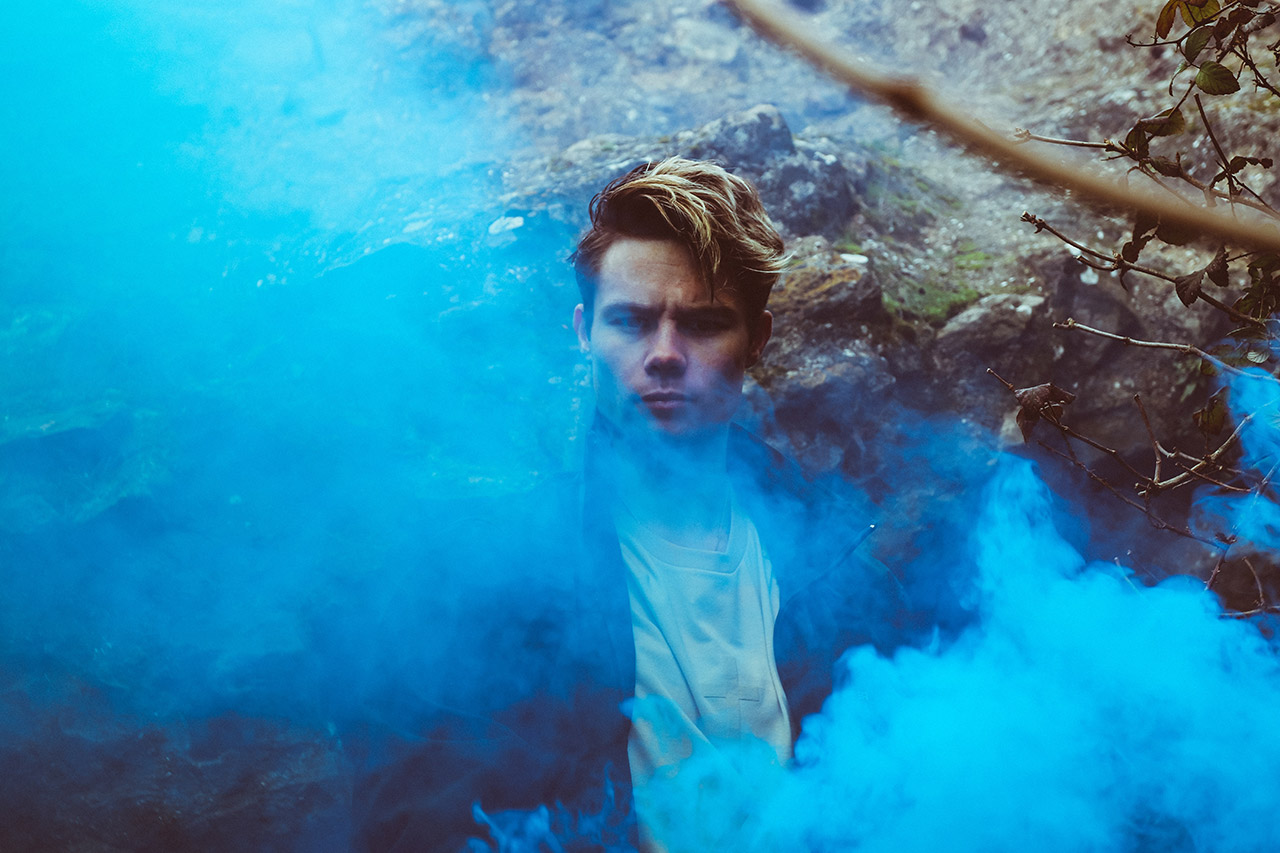
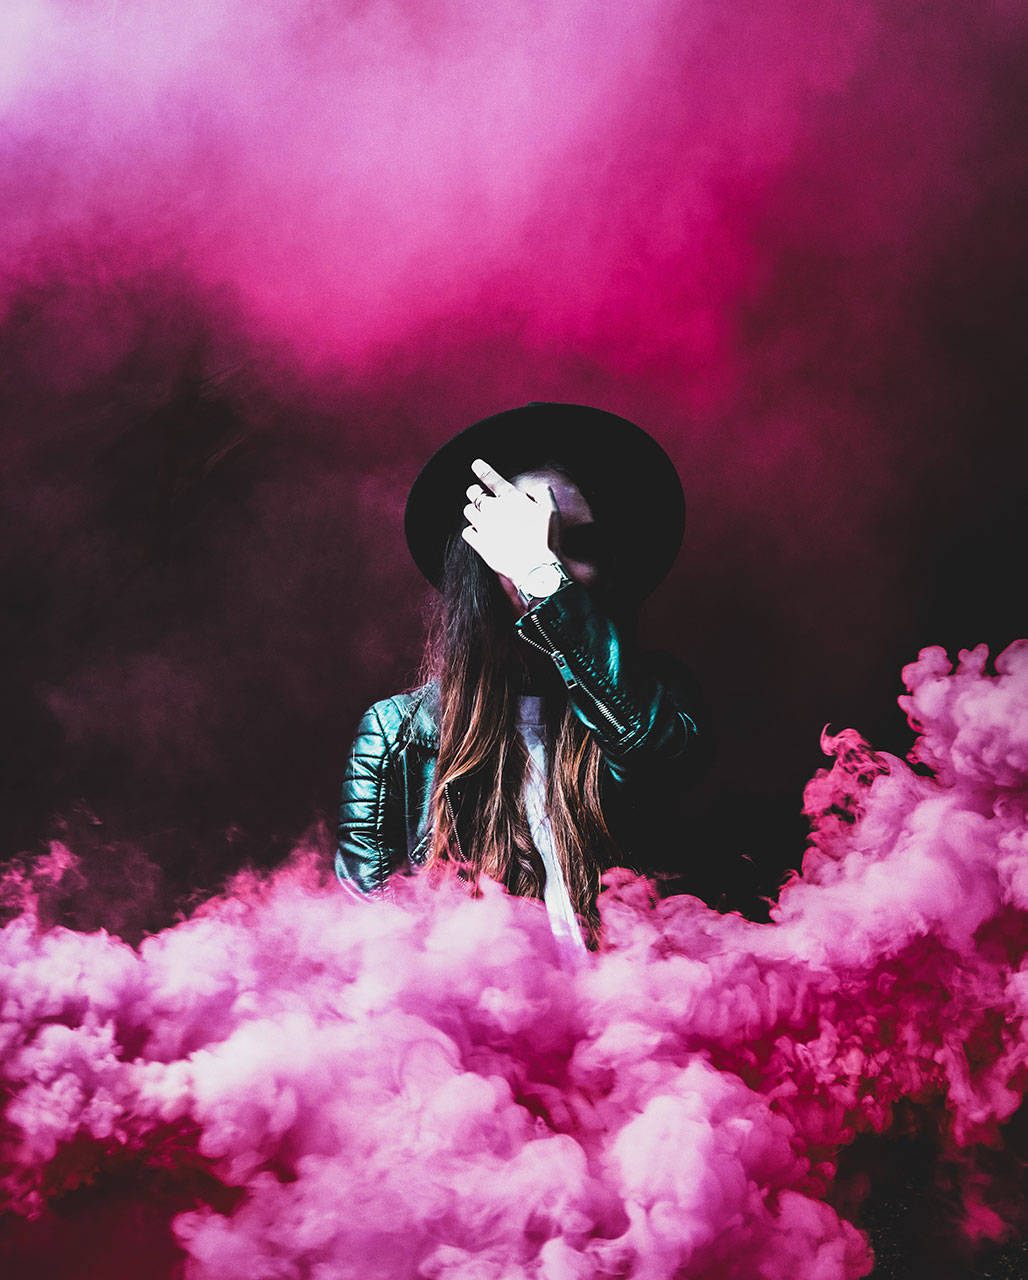
4. Shoot Against Neutral Colored Backgrounds
If you want the colorful smoke to really stand out and become the focal point of the image, a great idea is to shoot in front of a background that’s free from any sort of distractions. Backgrounds that are plain and neutral colored work best.
It also helps if the color of the smoke bomb contrasts greatly with the color of the background.
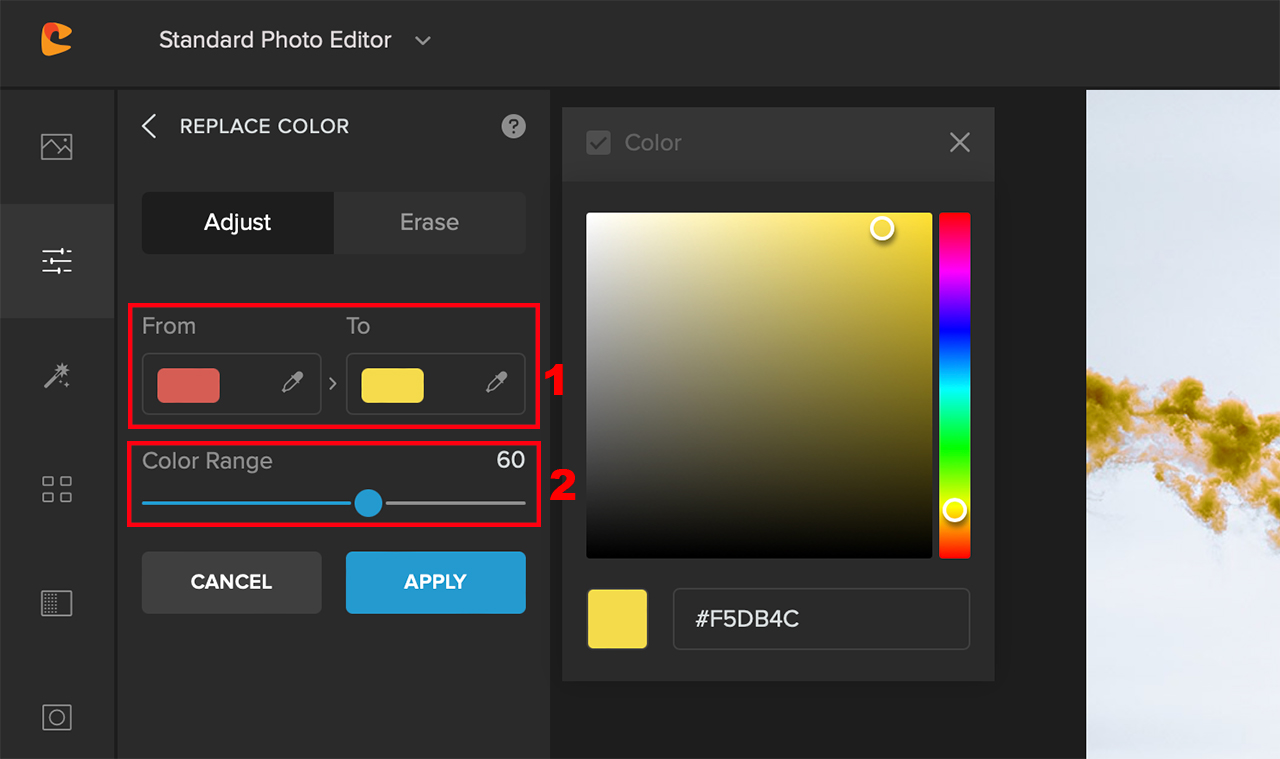
But if you didn’t get the color that you would’ve wanted to use, there’s absolutely no need to worry. You can easily change the color of the smoke to your liking using the color replacement tool in Colorcinch. Here’s how.
Step 1: Upload the image to Colorcinch.
Step 2: Navigate to Edit – Replace Color. You can then choose your target and destination colors.
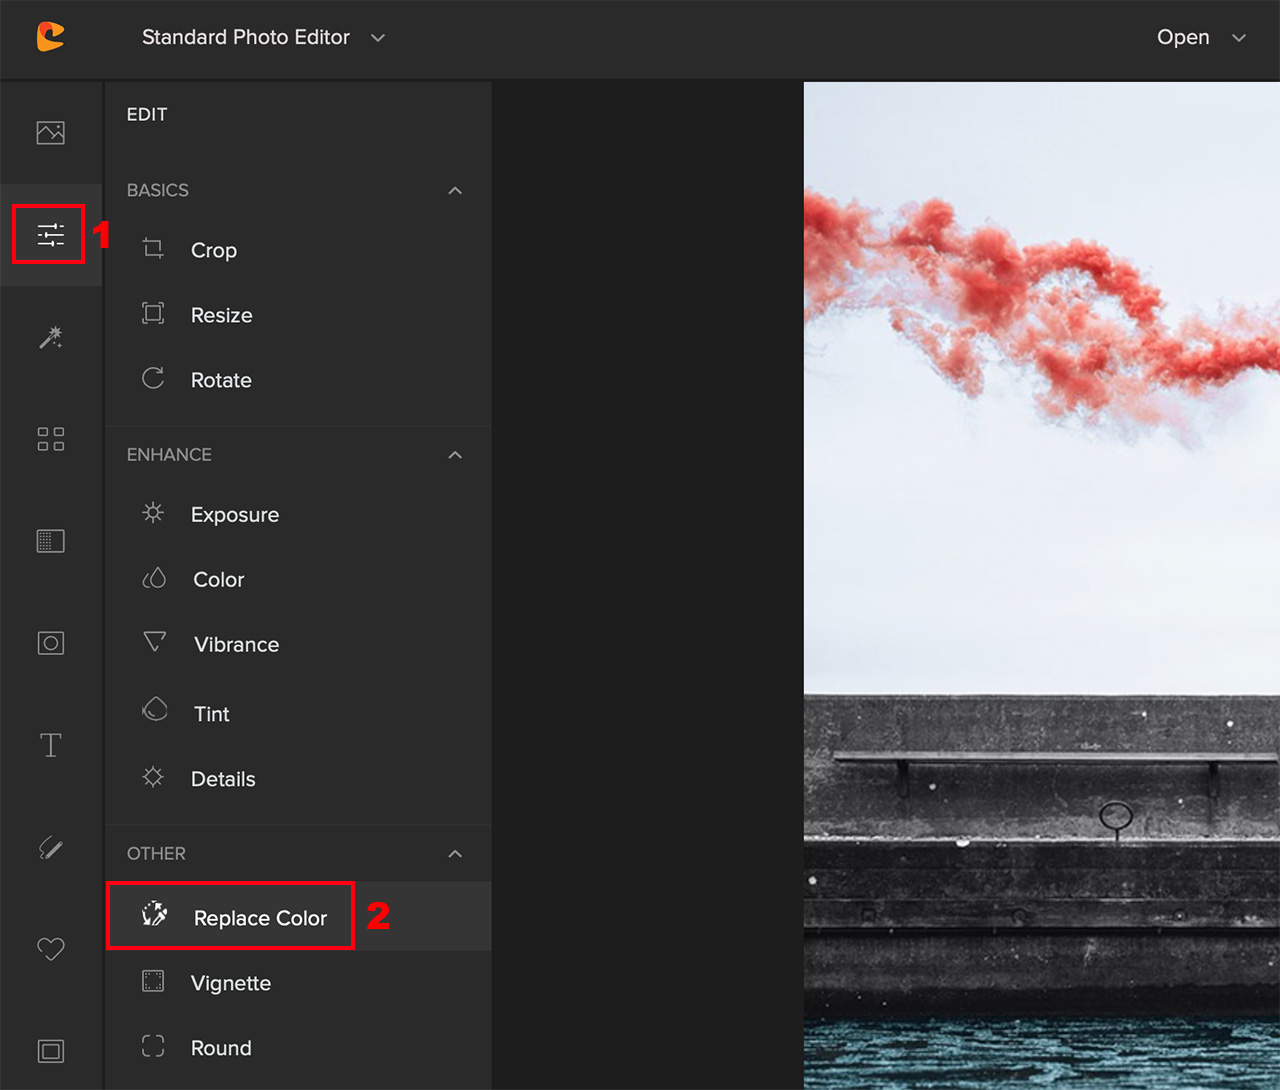
Step 3: Using the Color Picker in the From option, click on the smoke to grab its color. Then, using the Color Picker in the To option, choose your preferred color. This will instantly apply your preferred color to the smoke.
You can use the Slider to adjust the Color Range and exclude unnecessary regions using the Erase option.
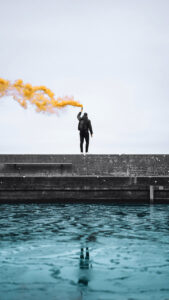
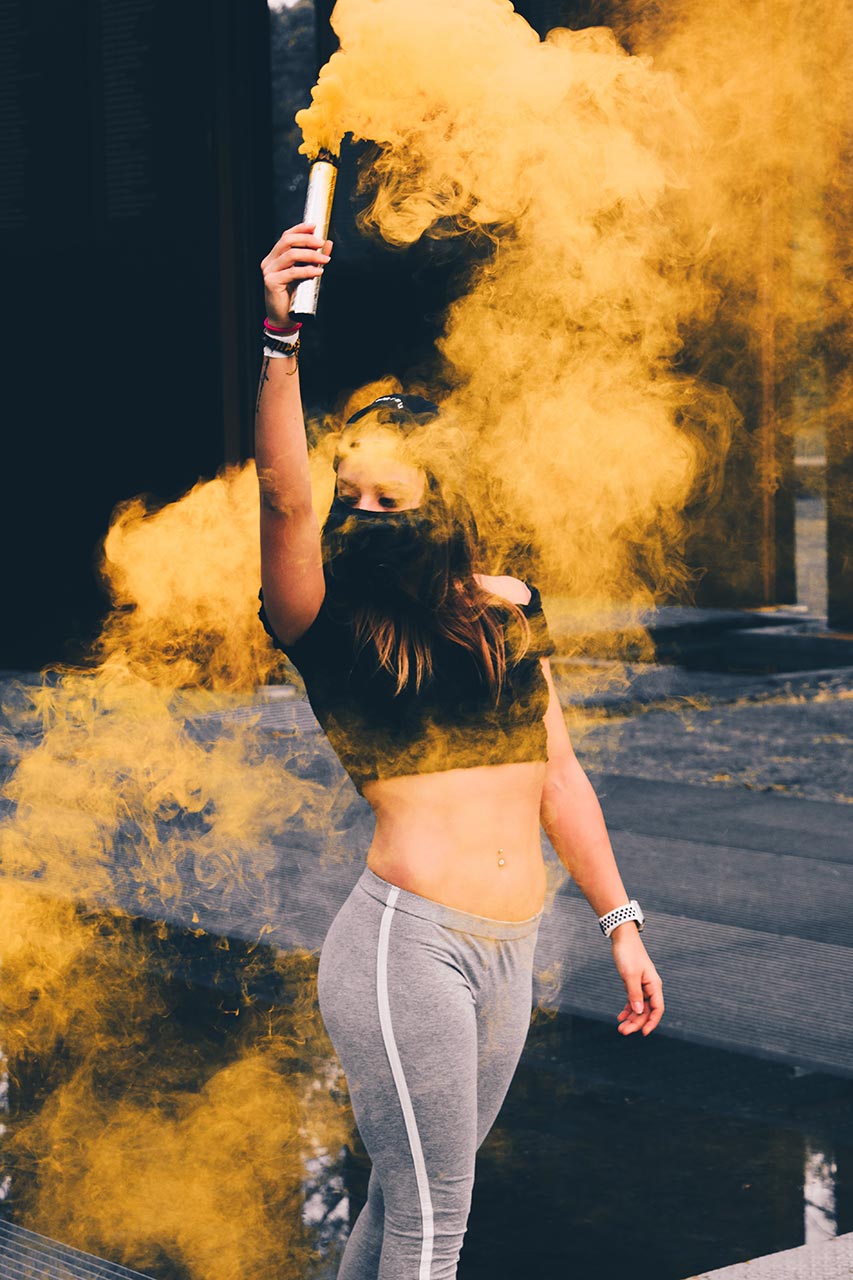
Here’s a quick before/after for comparison.

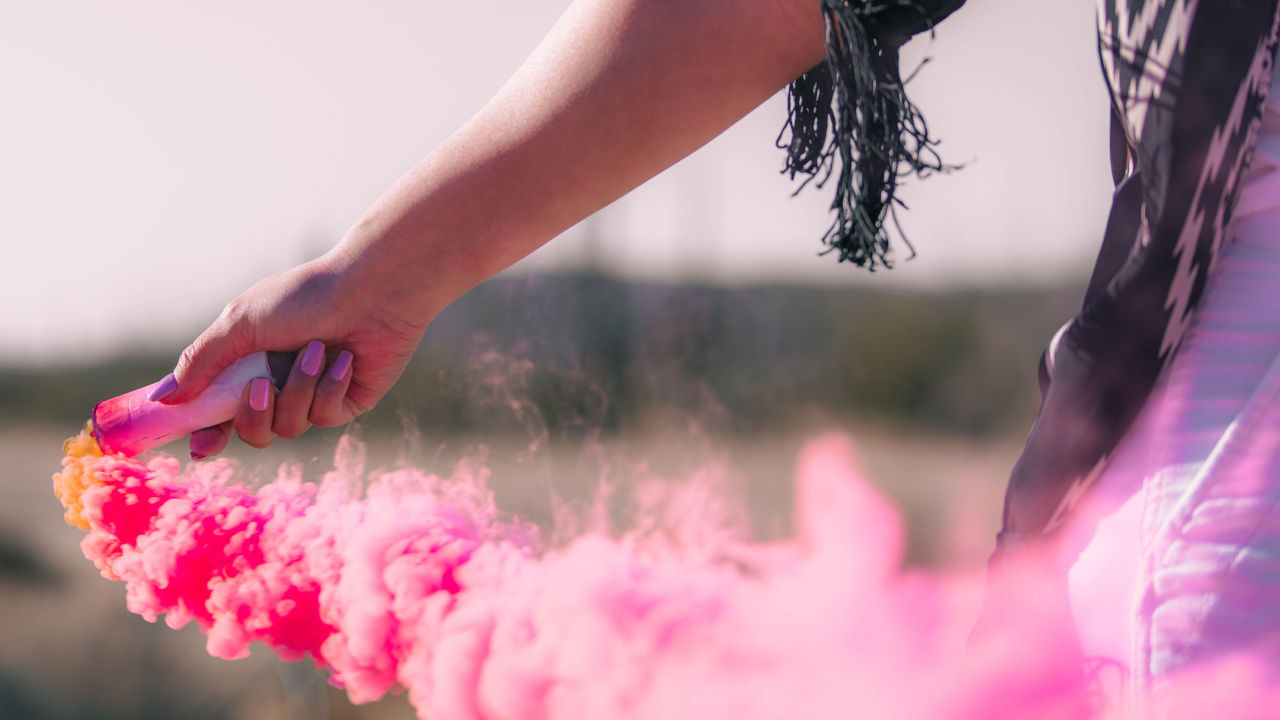
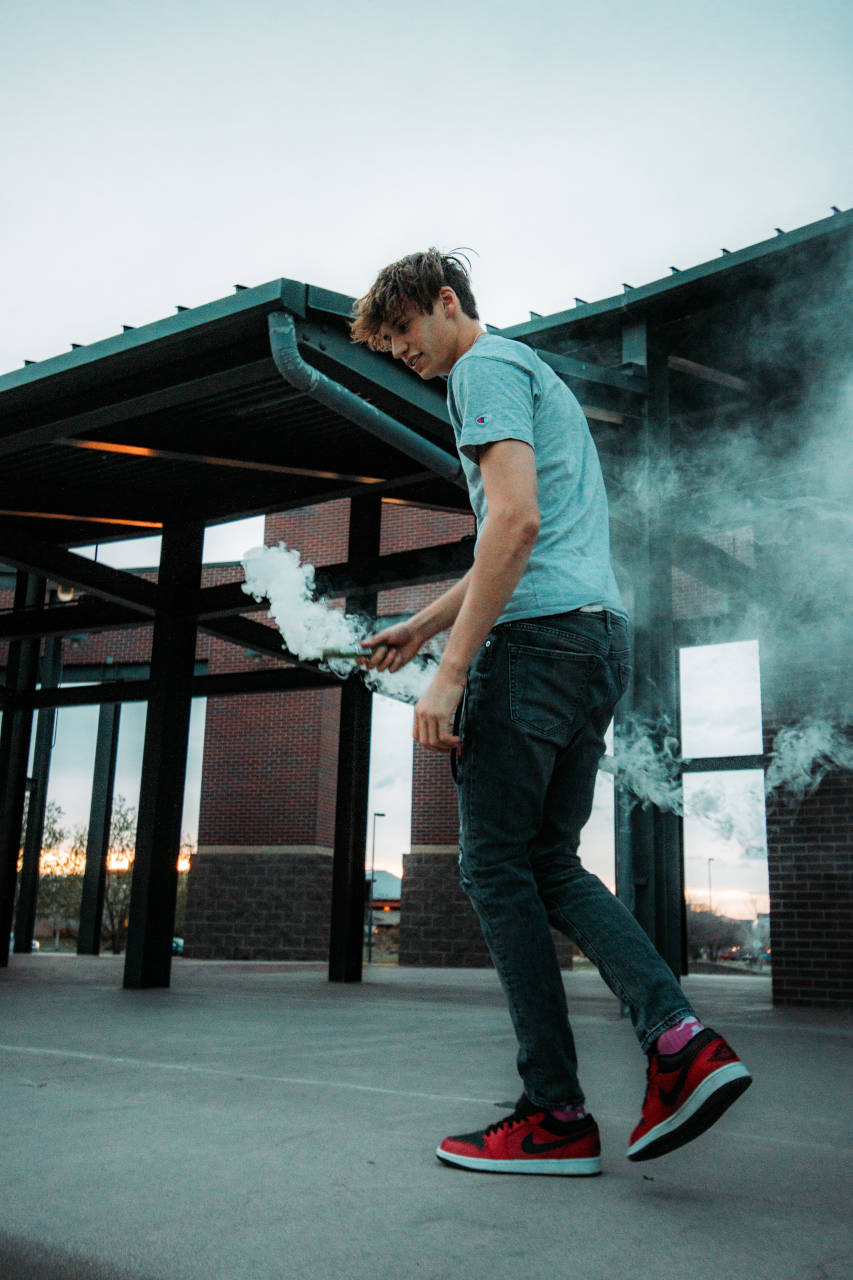
5. Move the Smoke Bomb Around
The trick to getting the most voluptuous smoke is to move the smoke bomb around. Big movement at a medium pace creates the best results. You can either ask the model to move the smoke bomb around or have an assistant do it.
Big movements create a longer trail for the smoke to follow and medium speed gives the smoke enough time to billow and grow. Before you start taking the pictures, be sure to practice the movement with the model or the assistant.
6. Camera Settings for Photography Using Smoke Bombs
There are a few important things with regards to camera settings that you want to keep in mind when working with smoke bombs.
Shutter Speed
Since the smoke will be gushing out of the smoke bomb, be sure to use a fast shutter speed. Something in the range of 1/1000s will let you capture the crisp textures in the smoke while also having the model in sharp focus.
Using a slower shutter speed will make the smoke appear thin like a fog which is not something that we’d want.
Aperture
When taking portraits, we usually set our aperture to the widest setting like f/1.8. However, that might not be a good idea when you’re using a smoke bomb for photography.
That’s because your camera can focus on the thin layer of smoke that’s in front of the subject and result in a soft-looking image which is undesirable. Have the lens a few stops narrower instead to have a slightly greater depth of field.
7. Use Smoke Bombs With Flash
Using a flash in smoke bomb photography makes the image more dynamic. By doing so, you can not only add drama to the image but also create a clear separation between the subject and the smoke.
Results come out the best when the flash is placed at the sides. And be sure to avoid placing the flash at the back as it dilutes the effect of the smoke bomb considerably. Also, set the flash to a lower flash power as you can freeze the smoke and the subject better at low power.
To Sum It Up
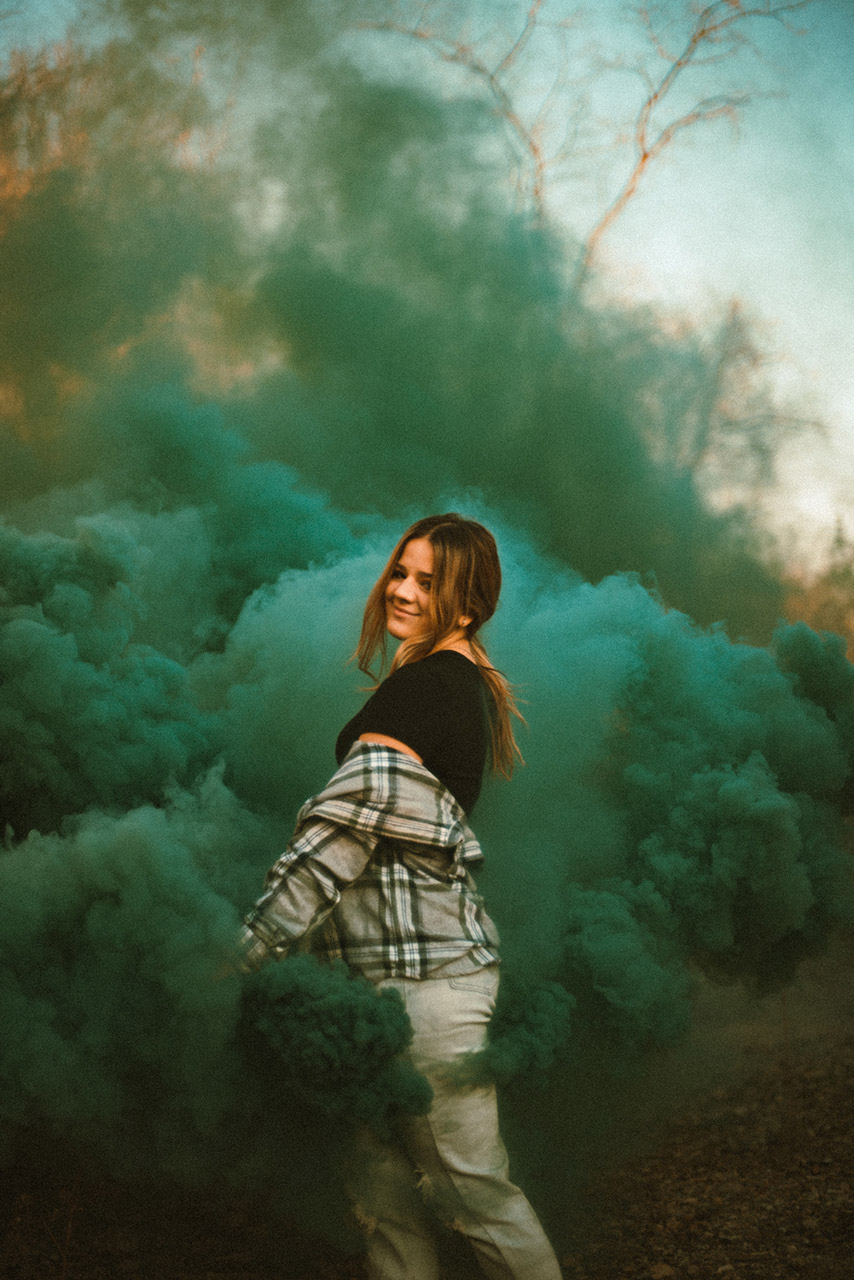
Working with smoke bombs for photography is a fun and creative way to take your photography to the next level. As you must’ve noticed in the images above, the colors and textures they add to the image are just amazing.
If you’re someone who loves to have bright and vibrant elements in the images, we highly recommend that you use smoke bombs in some of your photos. They’ll definitely be a valuable addition to your portfolio.