• AI Tools
    • Face Restoration
    • Inpainting & Removal
    • Background Removal
    • Image Upscale
    • Image De-oldify
    • Face to Sticker
    • Prompt Generation
    • Photo to Anime
  • Tools
    • Column 1
      • Essential
        • Photo Editor
        • Background Remover
        • Image Cropper
        • Image Resizer
        • Image Flipper
        • Image Brightener
        • Image Darkener
        • Text Editor
        • Color Replacer
        • Photo Blur
    • Column 2
      • Filters & Effects
        • Photo Cartoonizer
        • NFT Maker
        • Photo to Painting
        • Photo to Drawing
        • Photo to Sketch
        • Image Posterizer
        • Color Inverter
        • Sepia Converter
        • Grayscale Images
        • Photo Filters
        • Photo Frames
        • FX Cartoonizer
    • Column 6
      • Overlays & Masks
        • Image Masking
        • Mystical Fog
        • Falling Rain
        • Falling Snow
        • Add Glitch
        • Add Bokeh
        • Add Light Leaks
        • Image Blender
    • Column 3
      • Social Media
        • Profile Picture Maker
        • Avatar Maker
        • Meme Generator
        • Watermark Photos
        • Twitch Banner Maker
        • Photo Combiner
    • Column 4
      • Converters
        • PNG to JPG
        • JPG to PDF
        • PNG Converter
        • PNG Maker
        • Image Compressor
    • Column 5
      • Creative
        • Image Pixelator
        • Color Splash
        • Draw on Pictures
        • Background Changer
        • Hair Color Changer
        • Color Picker
        • Circle Cropper
  • Features
  • Pricing
  • Learn
  • Support
  • More
    • About us
    • Affiliate program
    • Contact us
  • Ghibli
© All rights reserved.
Photo to Cartoon – Cartoonize Yourself & Create Avatar Characters for Free Photo to Cartoon – Cartoonize Yourself & Create Avatar Characters for Free
Get started
Sign in

Sign in

Photo to Cartoon – Cartoonize Yourself & Create Avatar Characters for Free

How to Quickly & Easily Blur a Photo

Home / Learn / Blog / How to Quickly & Easily Blur a Photo
By Editorial inBlog, Tutorials

Have you ever taken a picture of something, only to realize that it was just too crisp? Maybe the background behind your subject is distracting, or maybe there are too many details in the image. In either case, you could use some blurring to make things look better.

Blurring is also useful for hiding unwanted objects in photos or creating artistic effects. With this guide on how to blur photos, we’ll show you how easy it can be!

What is Image Blur?

Blur is a word that is used in photography and post-processing. Blur can be used to show motion or create abstract art, as well as help create depth of field.

In the context of photography, blur refers to an out-of-focus area. It can be caused by moving the camera while it’s set on auto-focus or taking a photo too close up with a zoom lens. Blur is also something that can be achieved in post-production when you’re editing your photos using software like Photoshop.

Why Blur Your Photos?

If you have a photo where the background is not in focus and the subject is, this can be an interesting approach.

Blurring can make details stand out and draw attention to them, so if you have a sign or something else that isn’t important to the story of your picture, but that looks cool, blurring it can help it become more noticeable.

On the other hand, if there are parts of your photo that contain information that shouldn’t be visible—like private information about an individual in your photo—blurring those parts of the image will keep them hidden from viewers’ eyes.

Finally, blurring can add mystery to a picture by hiding details from view without actually making them impossible for people to see; this makes viewers want to know more about what’s happening in the scene by making them curious as they try to guess what might have been blurred out.

2 Ways to Achieve Blur Effect Using Colorcinch

The Blur effect can be made in different ways. We’ll show you two ways to do it. One is the classic Blur effect, and the other is a more stylized way to get a similar effect.

1. By Adding a Classic Blur

Step 1: Open Colorcinch and Upload an image.

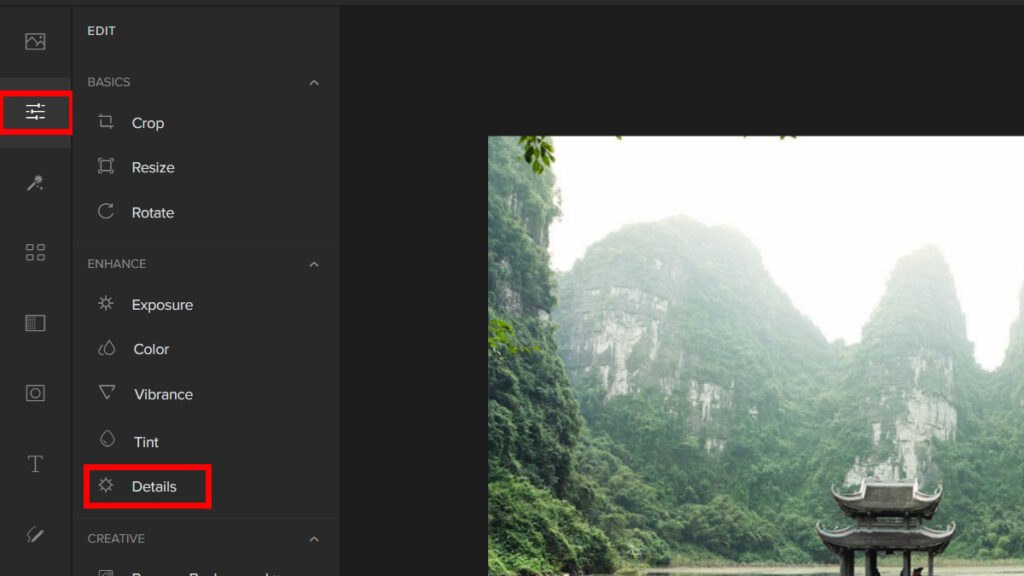
Step 2: Go to Edit — Details.

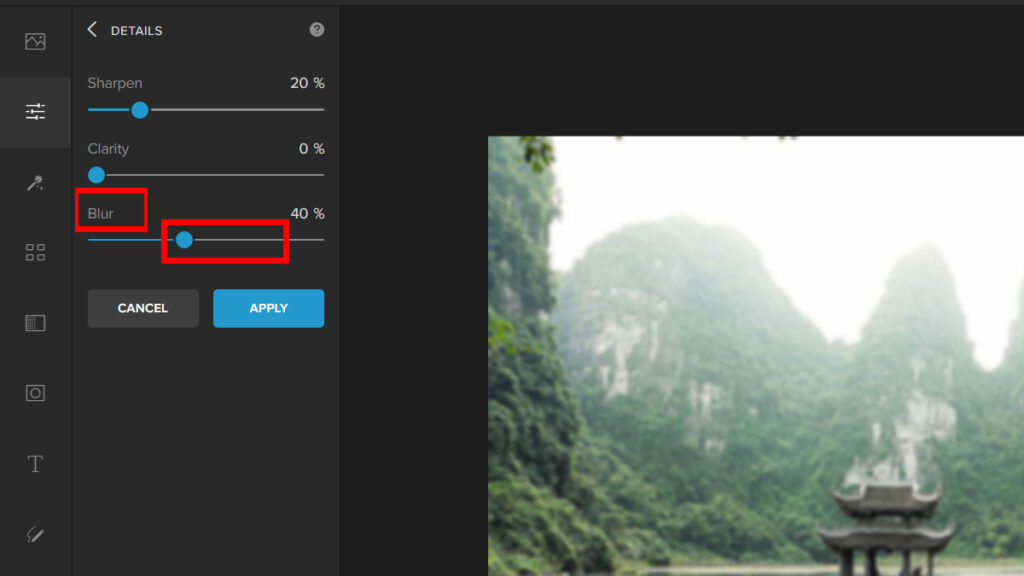
Step 3: On the Details panel, adjust the Blur Slider to get the desired intensity.

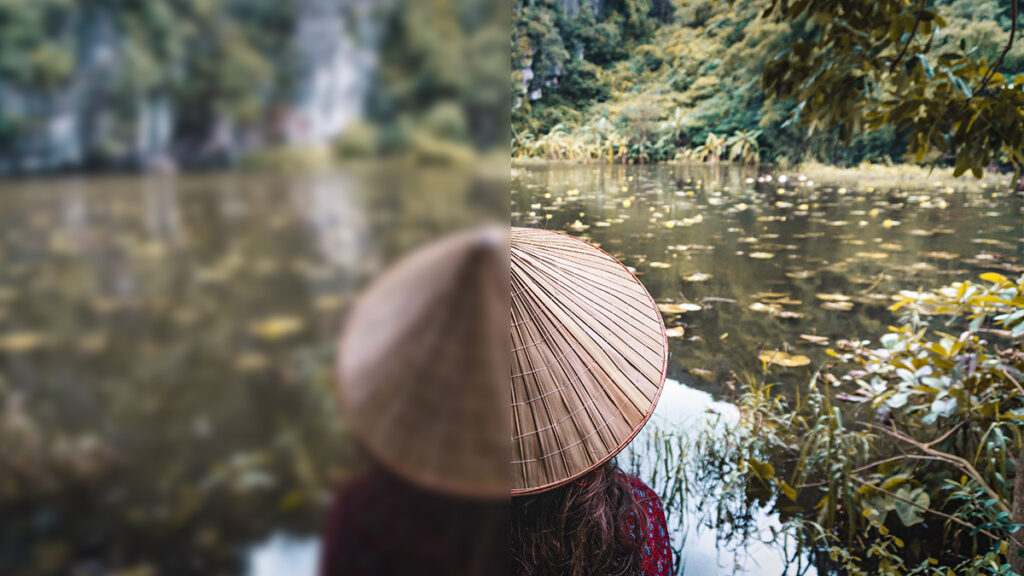
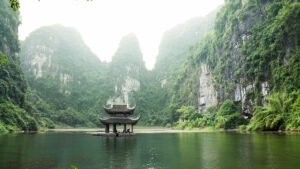
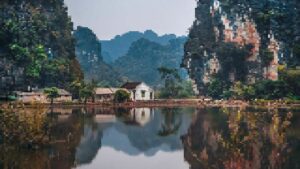
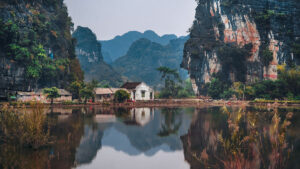
Here’s the before and after:

Blur3 (1)
Blur1

2. By Pixelating the Image

One stylized way to blur the image is by manipulating the pixels.

Step 1: Open Colorcinch. Upload your photo.

Step 2: Navigate Filters — Pixelate.

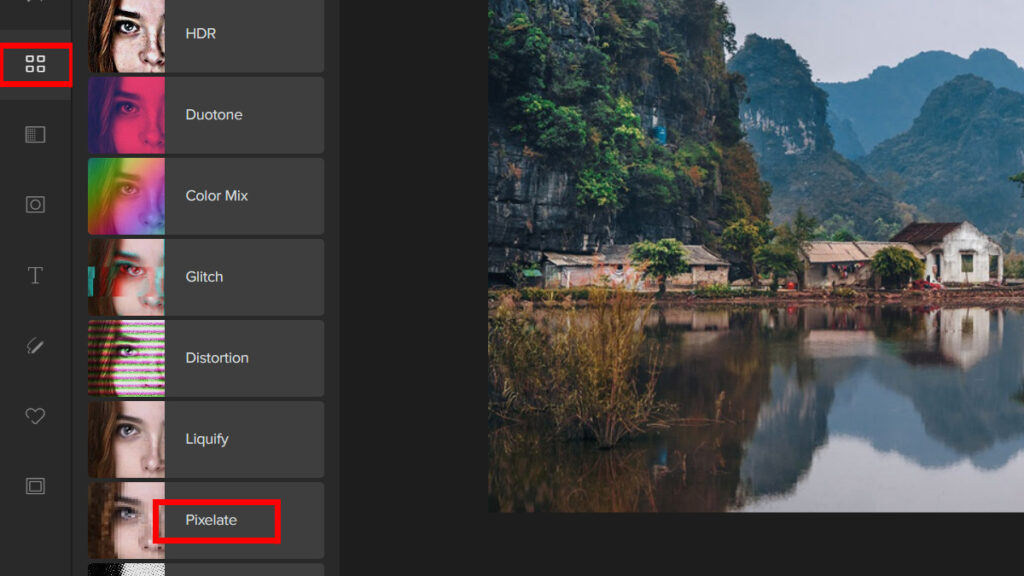
Step 3: Pick a Pixelate Filter and adjust the Slider to change the intensity of the filter.

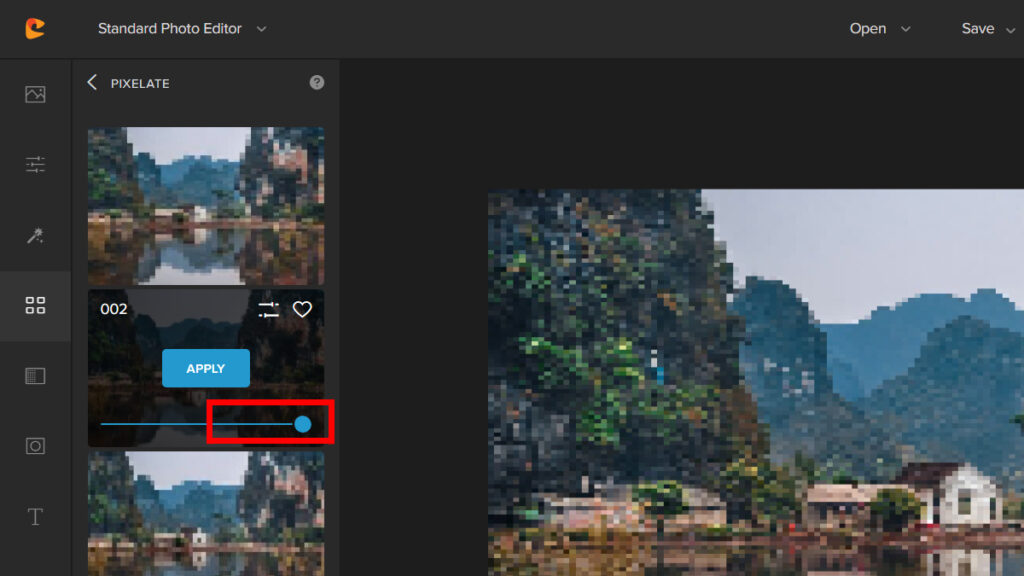
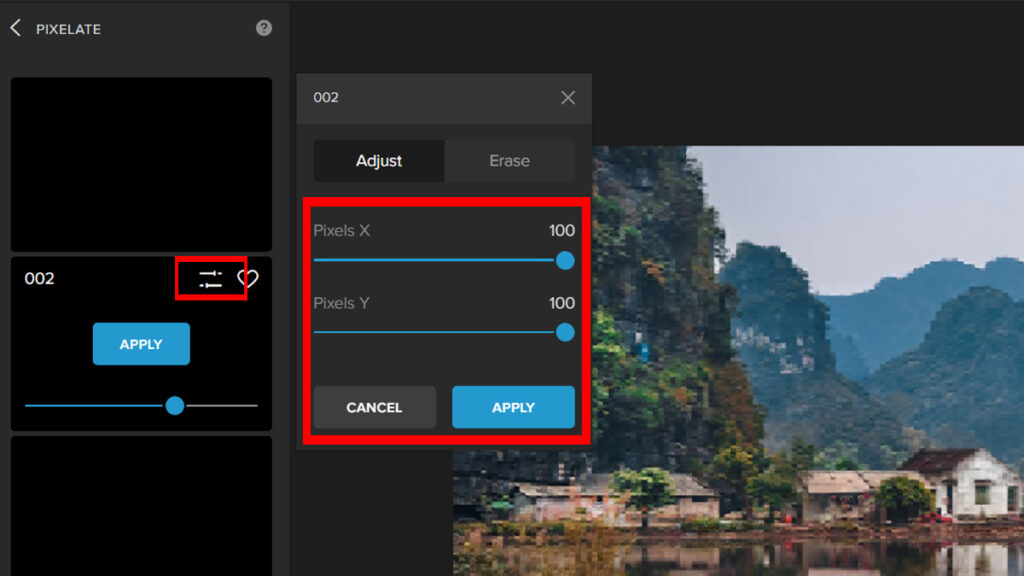
Step 4: If you wish to have more control over the filter, you may click on Settings and adjust the Sliders depending on your goal.

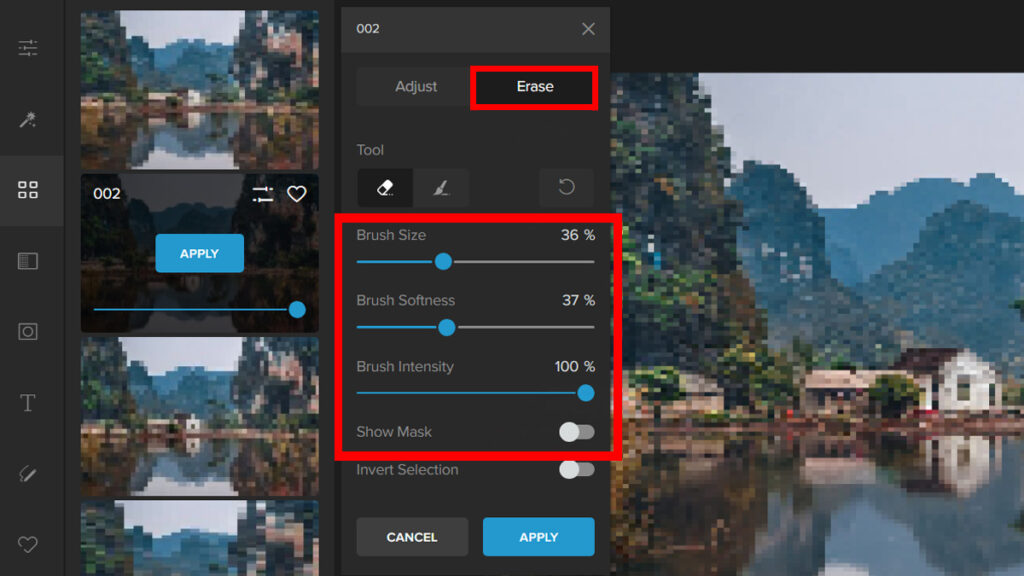
Step 5: There is also a way to bring back the areas that you want to be in focus. To do this, click on the Erase tab and adjust the Brush settings. After that, brush the area you want to be in focus.

Let’s look at the result:

Blur97
Blur6

Summary

Just a recap, we’ve learned what Blur is and its uses. We now know that it can be used to show motion, focus, and depth of field. It can be a stylized way to help better your photography skills.

Plus, we have provided you with 2 ways to achieve the blur effect using Colorcinch. We hope you enjoyed this article. If you did, feel free to leave us a comment!

background blurblurblur effectgaussian blurmotion blurradial blur
137 Posts
Editorial
  • How to Add a Vignette in Photoshop + Simpler Alternative
    Previous PostHow to Add a Vignette in Photoshop + Simpler Alternative
  • Next PostHow to Change the Background Color in Photoshop + Simpler Alternatives
    How to Add a Vignette in Photoshop + Simpler Alternative

Related Posts

How to Create a Stunning Dog Sketch from Any Photo
Blog Creative

How to Create a Stunning Dog Sketch from Any Photo

12 Best Graduation Photos: Ideas & Editing Tips
Blog Creative

12 Best Graduation Photos: Ideas & Editing Tips

Make Photos Pop with Aesthetic Yellow Text
Blog Creative

Make Photos Pop with Aesthetic Yellow Text

Why Ghibli Art Is Trending—And How You Can Try It Too
Blog Creative

Why Ghibli Art Is Trending—And How You Can Try It Too

colorcinch-dark

All Rights Reserved
© Colorcinch

Product

  • Home
  • Get started
  • Features
  • Pricing
More
  • Sitemap

Company

  • About us
  • Leadership
  • Careers
  • Affiliate program
  • Contact us

Information

  • Getting started
  • Online Cartoonizer
  • FX Cartoonizer
  • FAQ
  • Blog
  • Support

Subscribe to our newsletter:

© Colorcinch. All Rights Reserved.

Terms of Service Privacy Policy Disclaimers

colorcinch-dark
English
  • English
  • French
  • Spanish
  • Indonesian
  • Turkish
  • Arabic
  • German
  • Italian
  • Portuguese
  • Russian

Terms of Service Privacy Policy Disclaimers

  • Home
  • Get started
  • Features
  • Pricing
Copy

Forgot password