
Colorcinch offers a ton of great conversion and enhancement tools that can put the “wow” back into your pictures.
One of those tools is the photo editor. It has a set of robust but simple features to enhance the color and vibrance of an image. We’ll show you how this is done.
The Thing With Color
Color is one of the most vital elements of an image. That is because color attracts interest and stirs emotions.
However, we do not take perfect pictures all the time. Some end up dull with flat colors.
Fortunately, photos can be enhanced in Colorcinch with regard to important color attributes. These include hue, saturation, temperature, and vibrance.
Hue
Hue refers to the base color in the color spectrum. These are the primary (blue, yellow, red) and secondary colors (green, orange, violet).
There is a dominant hue in every color. For instance, for magenta the base color is violet. For ruby, it’s red and so forth.
Why should you use the Hue tool? To change the colors in photos (radical adjustments) and to correct white balance or reduce color cast (finer adjustments).
Let’s see the effect of tweaking the Hue slider.
Step 1
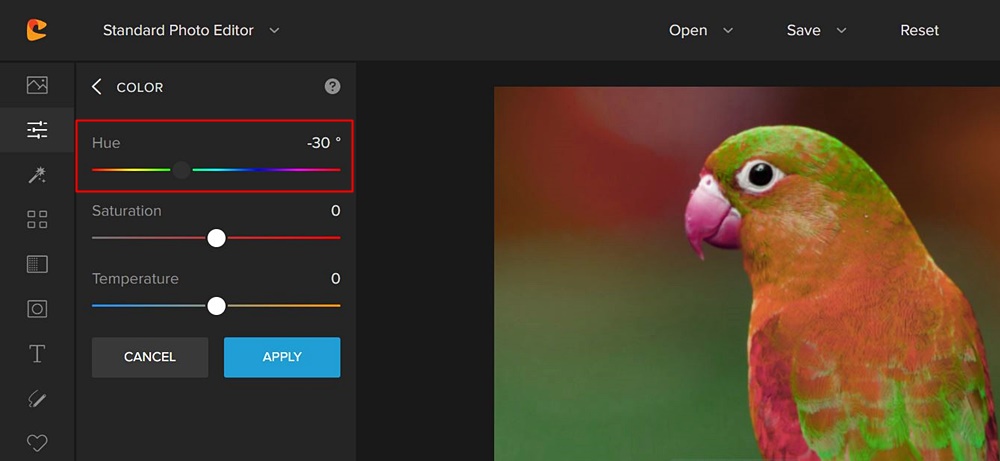
Upload image. Edit menu appears on the left panel. Under Enhance click Color.

Step 2
Sliders for Hue, Saturation, and Temperature appear. Move Hue slider -30° to the left and see the shift in colors. On the other hand, if you move the Hue slider to the right by 30° this also results in dramatic color change.
Step 3
An incremental adjustment of just -5° reduces the dominant green and reveals more reddish-brown. Base colors have become much more natural and balanced.
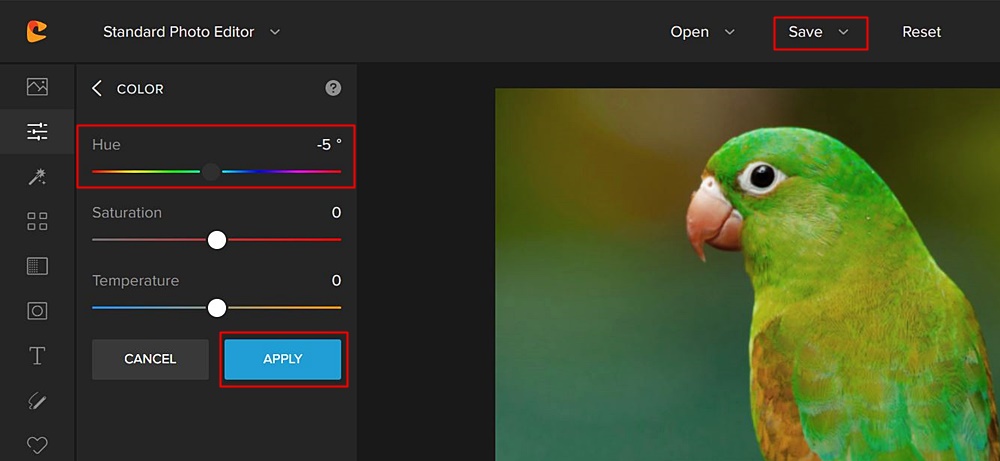
Step 4
If satisfied with the results click Apply and then Save the image (see photo in Step 3) to your computer or Colorcinch account. If you need to make other adjustments, simply go back to the Edit menu.
Saturation
Saturation deals with color intensity. When saturation is pushed up, it uniformly increases the vividness of all the colors in a picture.
How do you know if an image needs a saturation boost? If it has drab colors or looks somewhat grayish, a saturation tweak can help.
Let’s enhance an image using the saturation tool.
Step 1
Upload image. Edit menu appears on the left panel. Under Enhance click Color to get to the Hue, Saturation, and Temperature sliders.
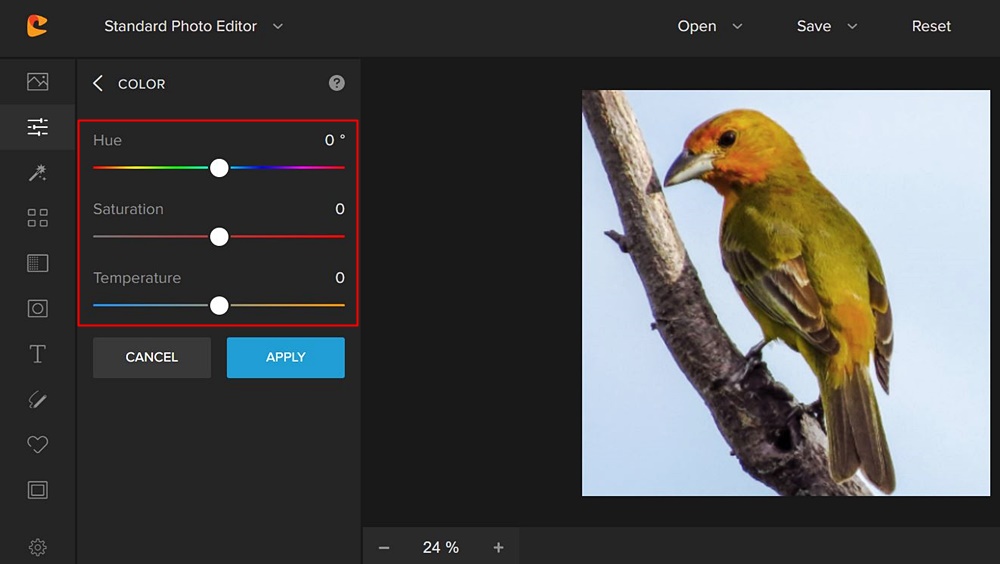
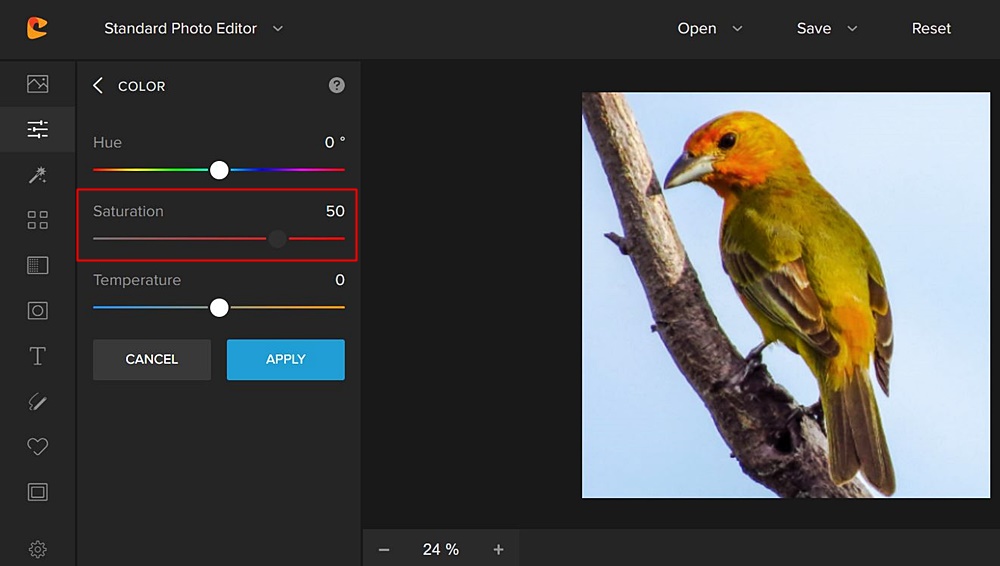
Step 2
Move the Saturation slider by 50 to the right. Notice the immediate color boost.
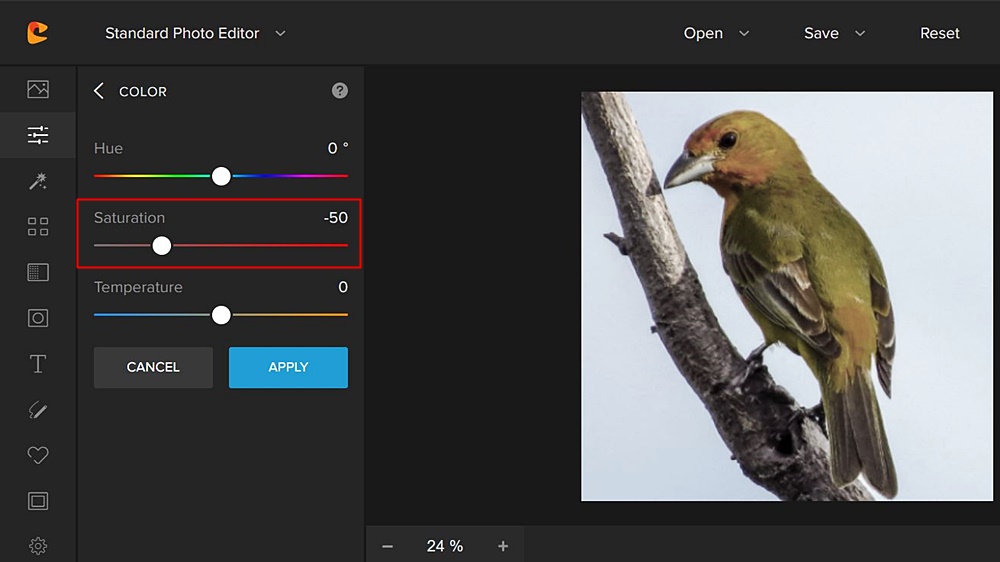
Step 3
Now see what happens when the slider is moved to the left by -50. Colors have been drastically muted. Moving the slider all the way down to -100 will remove colors altogether.
Step 4
If satisfied with the color saturation in Step 2, click Apply and Save the image.
Temperature
Temperature pertains to the color of light. This can be warm (red, yellow, orange) or cool colors (blue, green, magenta).
Color temperature is associated with white balance. Our eyes can accurately perceive white and automatically adjust even under varied light sources. The camera cannot.
Hence, the camera may produce an image that has a tint or color cast. The Temperature tool corrects white balance so that white appears as such and is not tinted.
This is how it works:
Step 1
Upload image. Edit menu > Enhance set > Color tool > Temperature slider set at 0 in the middle. Observe the bluish tint that surrounds the flamingos.

Step 2
Move the Temperature slider to the right by 30. The bluish haze disappears and the image gets just a bit lighter and warmer. This could be a more ideal color temperature since flamingos thrive in tropical regions.

Step 3
If results are to your liking click Apply and then Save image.
Vibrance
Vibrance lets you intensify muted colors while keeping saturated colors unaffected. It gives you similar results to that of Saturation – richer and more vivid images.
However, unlike Saturation, boosting Vibrance all the way up won’t give you an oversaturated effect. It works selectively by enhancing more the lower intensity colors. You can consider Vibrance as a subtler version of Saturation.
Here’s how to use this tool.
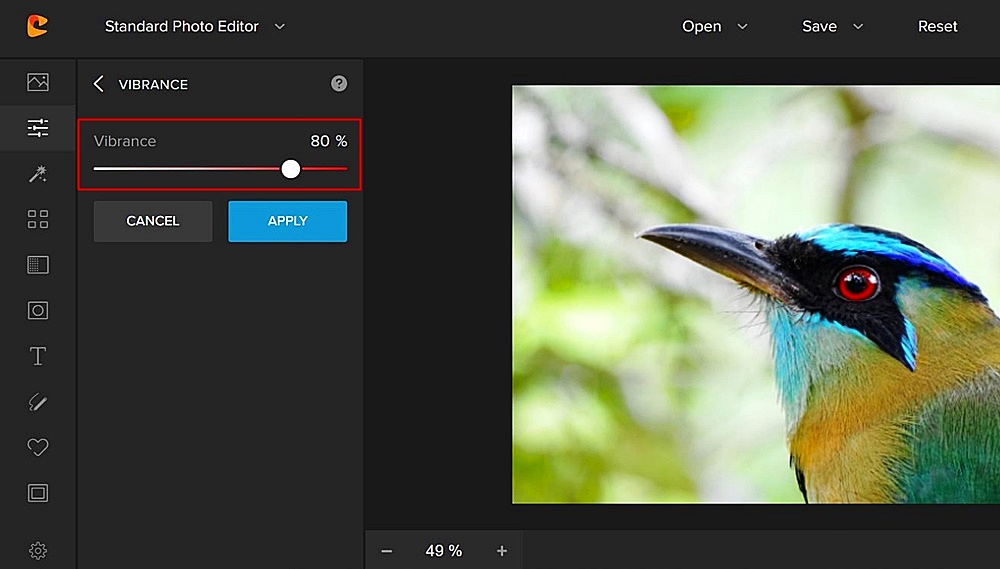
Step 1
Upload image. Edit > Enhance > Click Vibrance.

Step 2
The Vibrance slider is normally set at 30%. Crank the slider to the right up to 80% and you see a discreet but discernible improvement in colors.
Step 3
Click Apply then Save image. If you need to make more adjustments, go back to Edit.
In Summary
Play and experiment with Hue, Saturation, Temperature, and Vibrance. It’s so easy to get full, deep colors that pop out.
The photo editor makes it fun and stress-free while giving you professional-level results. But don’t just take our word for it. Go for a test drive. Try Colorcinch now. It’s free!
We hope you were enlightened by this tutorial. Watch out for more guided tours of Colorcinch features in our next post.