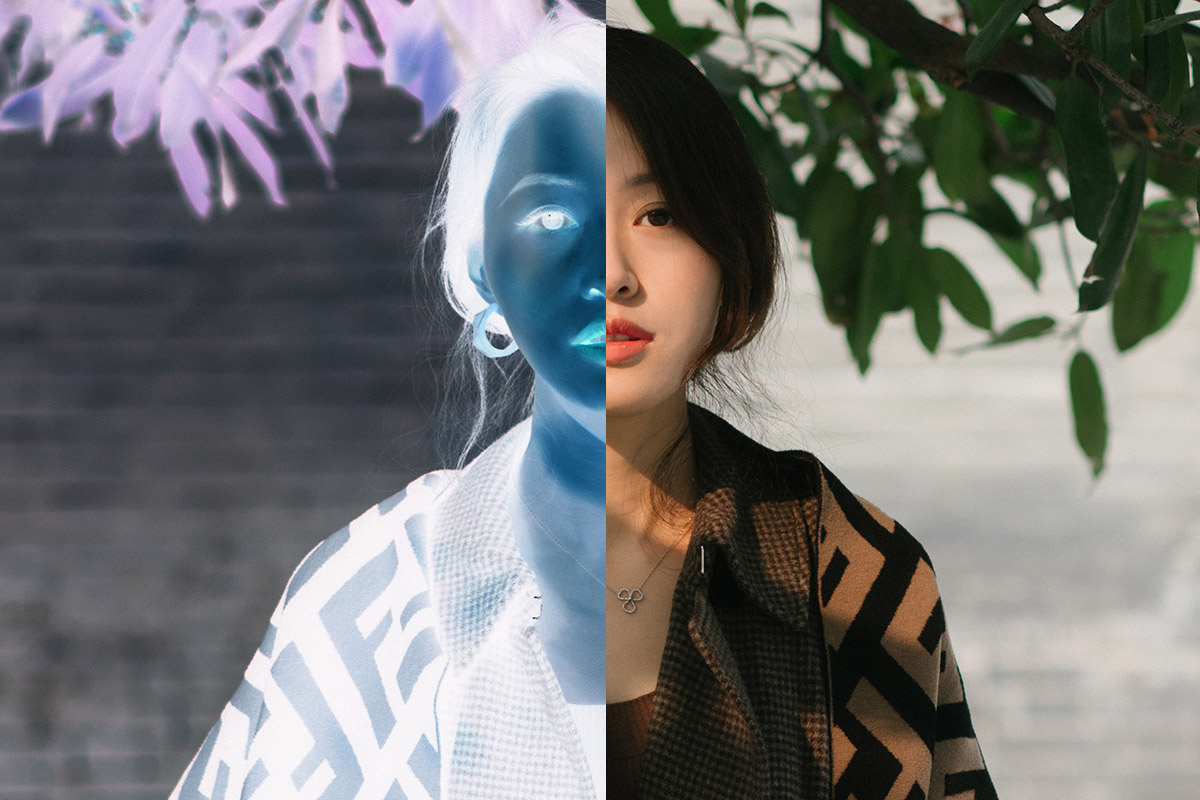
Inverting the colors of an image is a quick and easy way to change its overall look. In most image editing software, there is a simple command or tool that will allow you to invert the colors of an image with just a few clicks.
In general, inverting the colors of an image will produce a negative version of the original. Dark areas will become light, and vice versa. This can create an interesting effect, especially if you are working with black-and-white images.
In this tutorial, we will teach you how to invert the color of an image in just a few simple steps using Colorcinch.
How to Invert Color in Colorcinch
Step 1: Open Colorcinch and Upload an image.

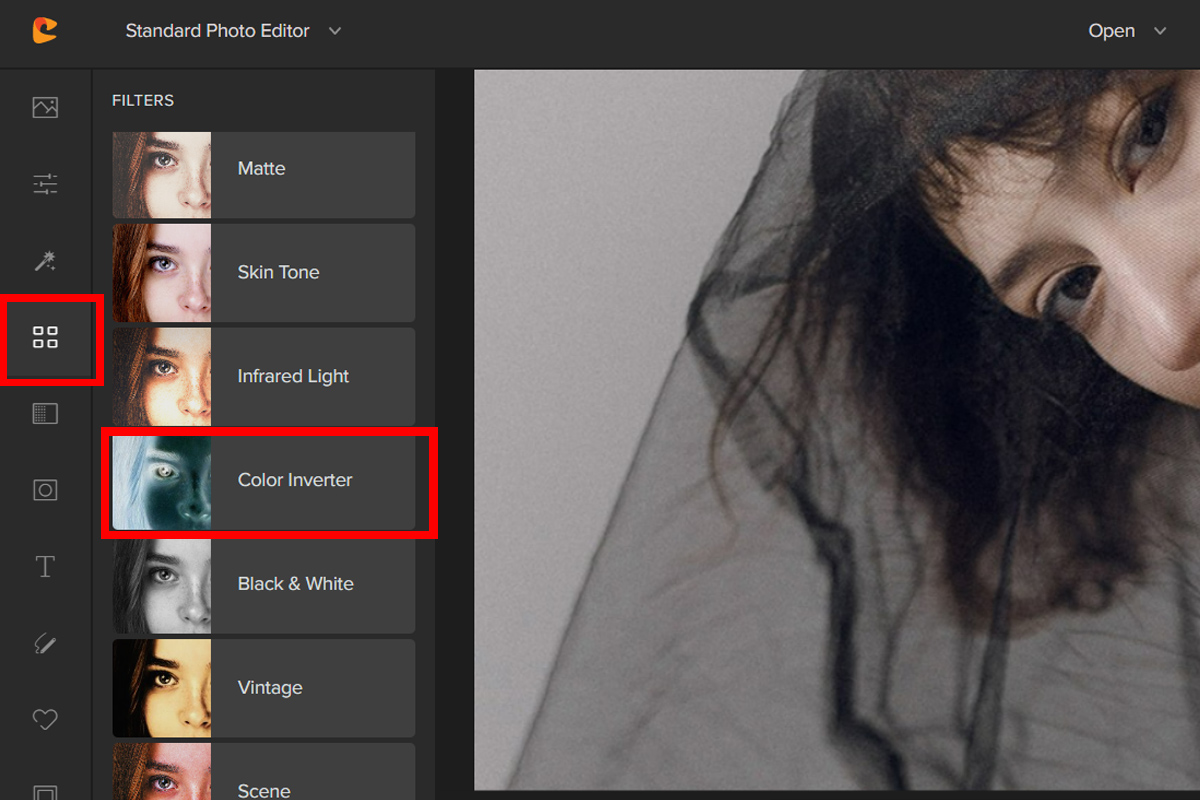
Step 2: Navigate to Filters – Color Inverter.

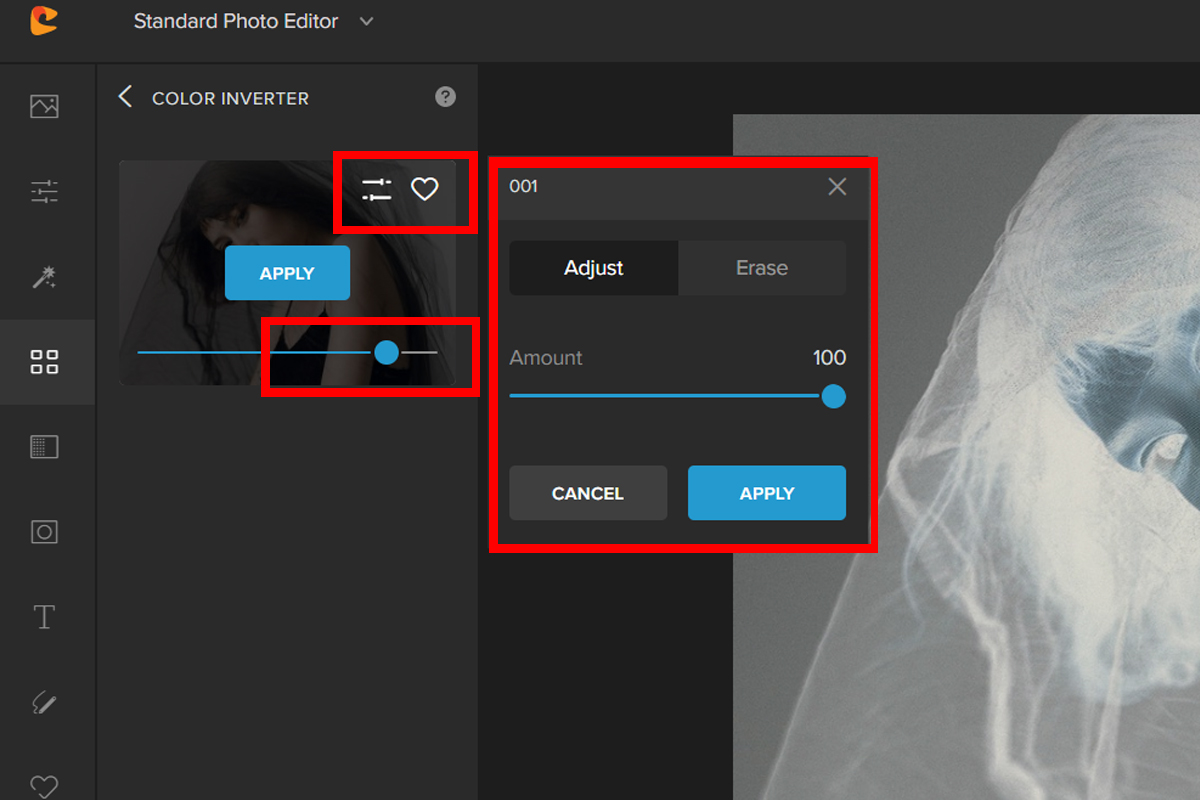
Step 3: Pick a Color Inverter filter. Adjust the filter by the Slider or by clicking on the Settings button.

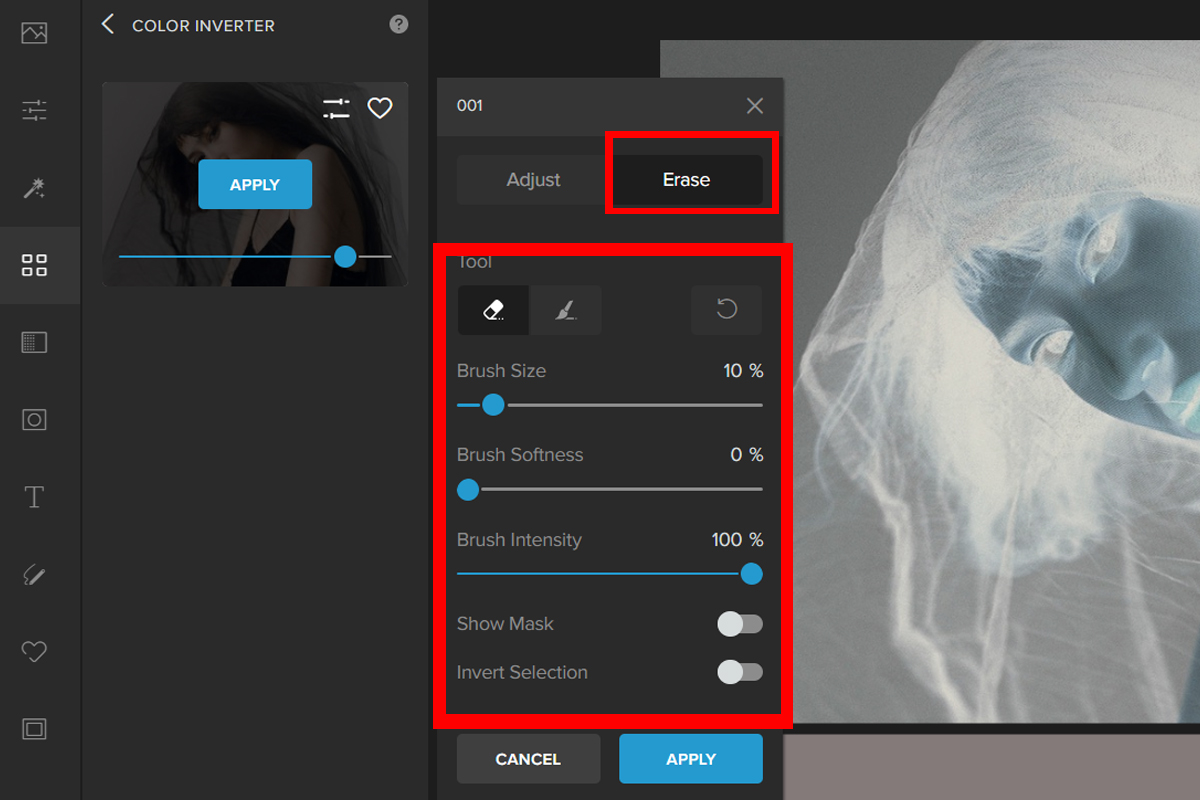
Step 4: You can also remove the effect from places where you don’t want it. Click the Erase tab. Change the eraser brush settings and then paint over an area to remove the effect.

Here are the before and after:


Conclusion
In general, Inverting the colors of an image is a quick and easy way to change its overall look. By using Colorcinch’s Color Inverter makes it way easier to achieve an inverted look.
We hope that you find this article helpful and we can’t wait to see your outputs.


