
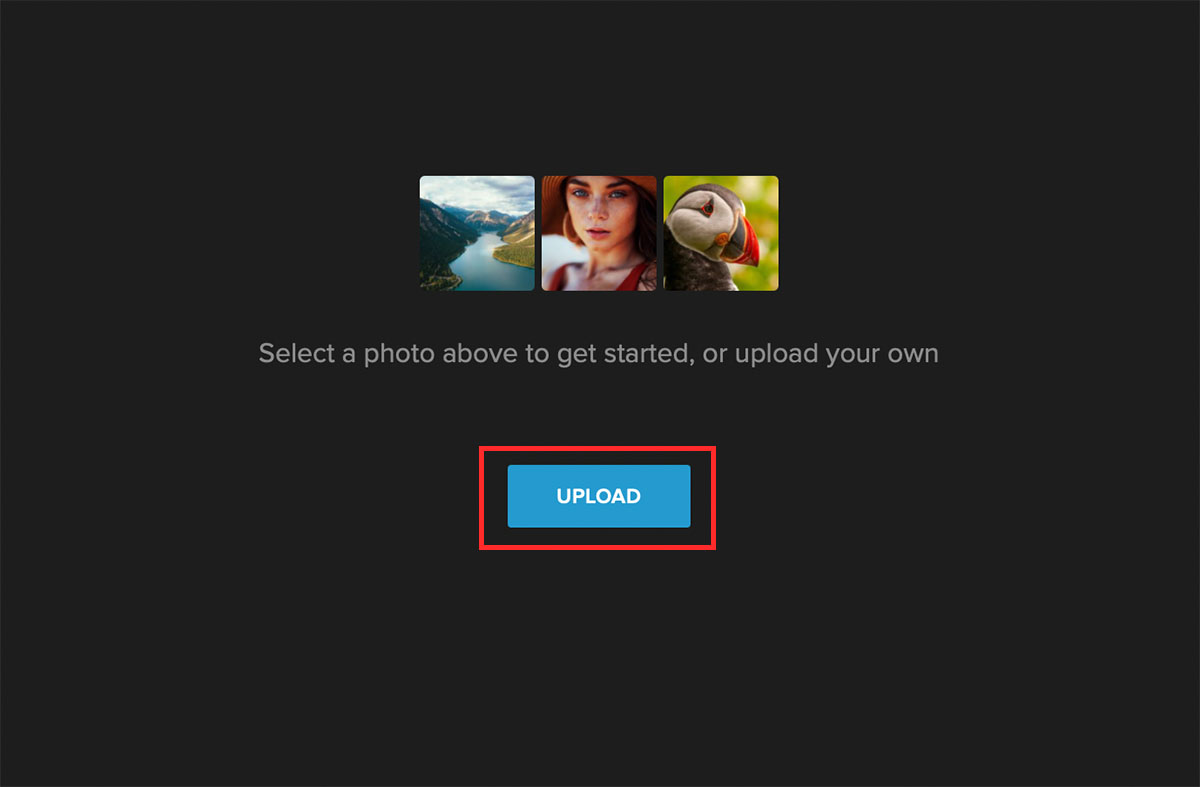
Looking for ways to add a different background to your photo? Well, you’ve come to the right place. Whether you want to completely remove the background of your image or get it replaced, Colorcinch has your back. And it has never been easier than this.
Removing the background of an image and adding a new one can come in handy in various circumstances. For instance:
- To add a white background to product photos
- Make a portrait photo appear more exciting
- To place someone in a place where they’ve never been
In today’s article, we’ll see how we can do this using Colorcinch.
Add Background to a Photo: Step by Step Guide
1. Remove the Existing Background of Your Image
Before you can add a new background to a photo, it’s important that you get rid of the existing background first. This makes the entire process so much easier.
Thanks to the AI-powered background remover feature in Colorcinch, you can remove the background from any image with just a single click. Simply follow these easy steps.
Step 1: Upload your image to Colorcinch.
Step 2: Navigate to Edit – Remove Background. You’ll be taken to the Remove Background menu.
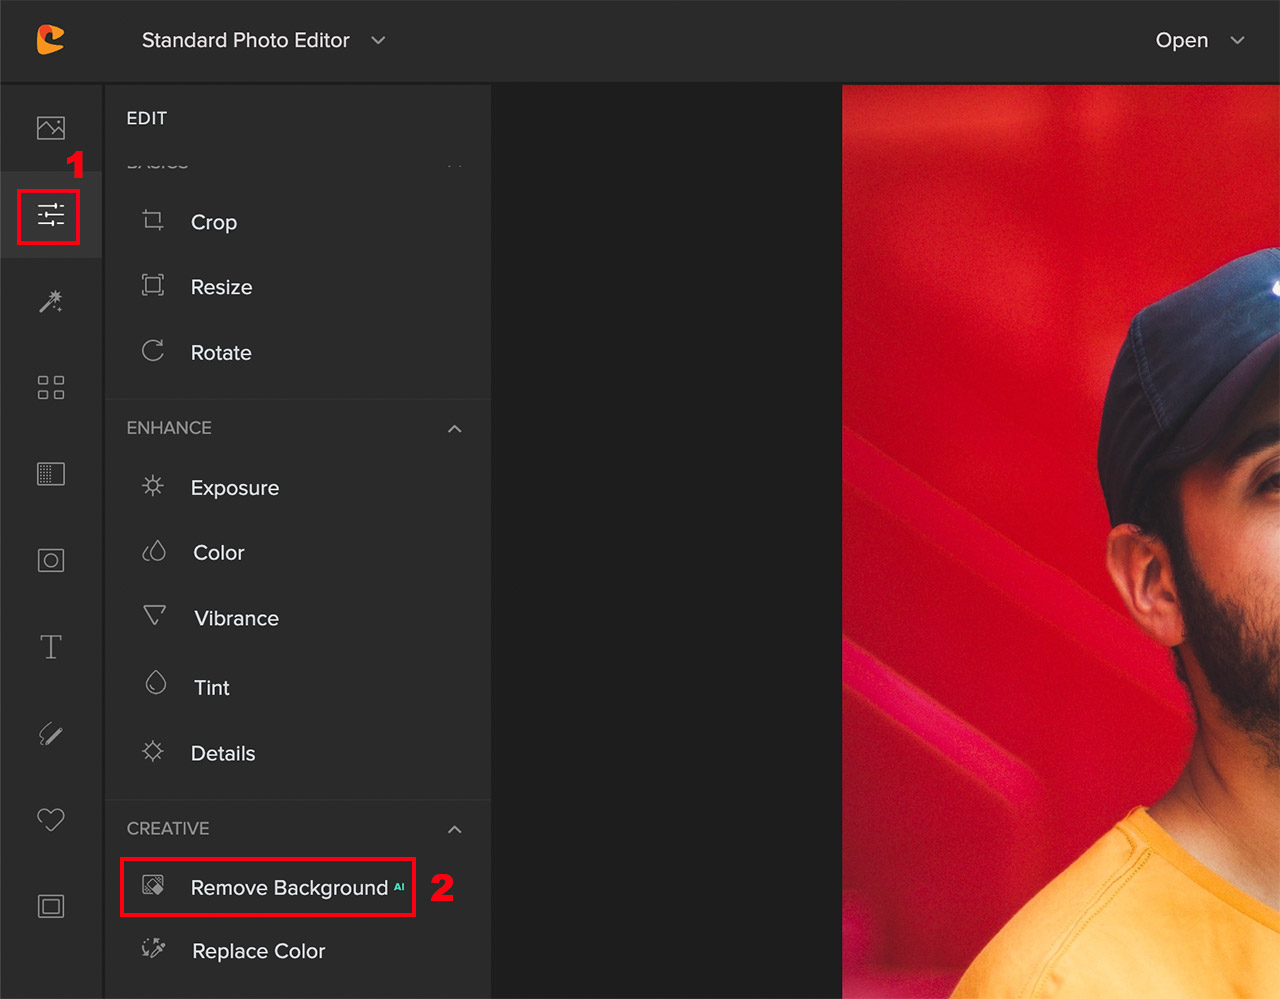
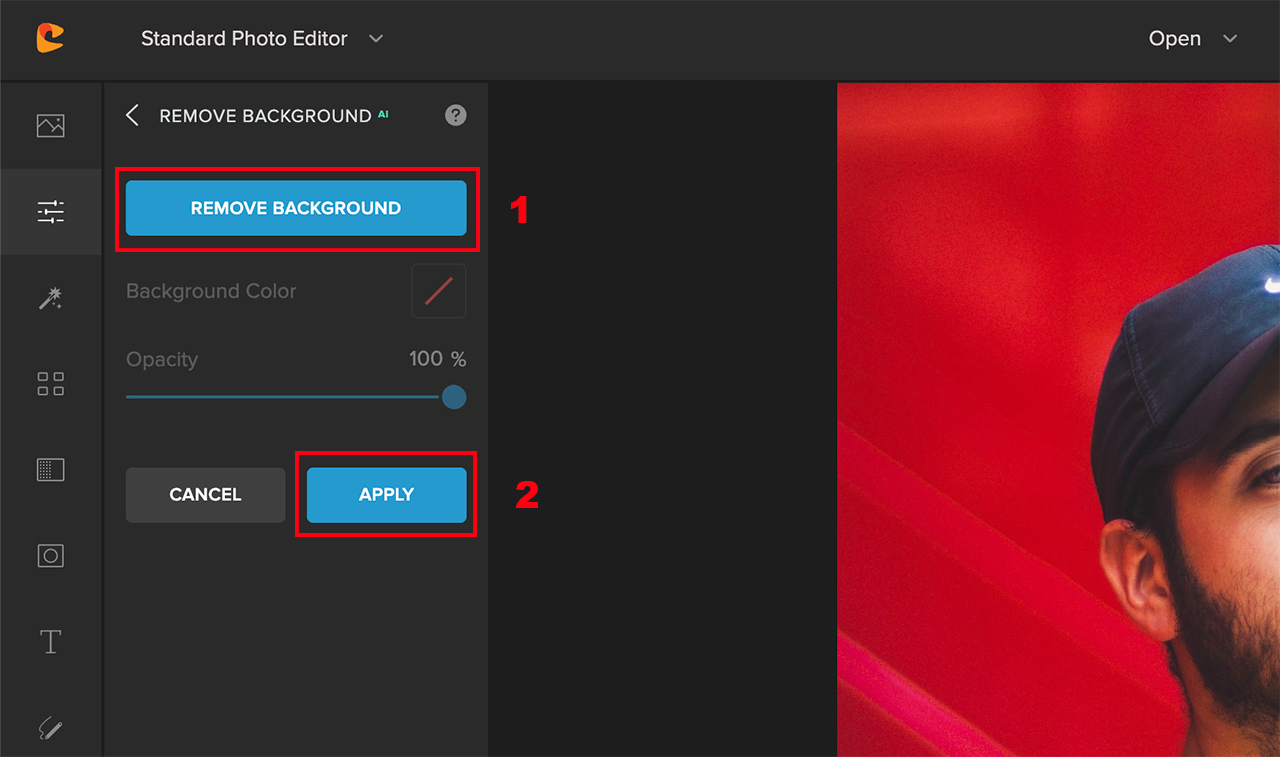
Step 3: Click on the Remove Background button. Our AI-powered algorithm will now analyze the image and automatically remove the background from the image leaving just the subject. Once the background is removed, click on Apply.
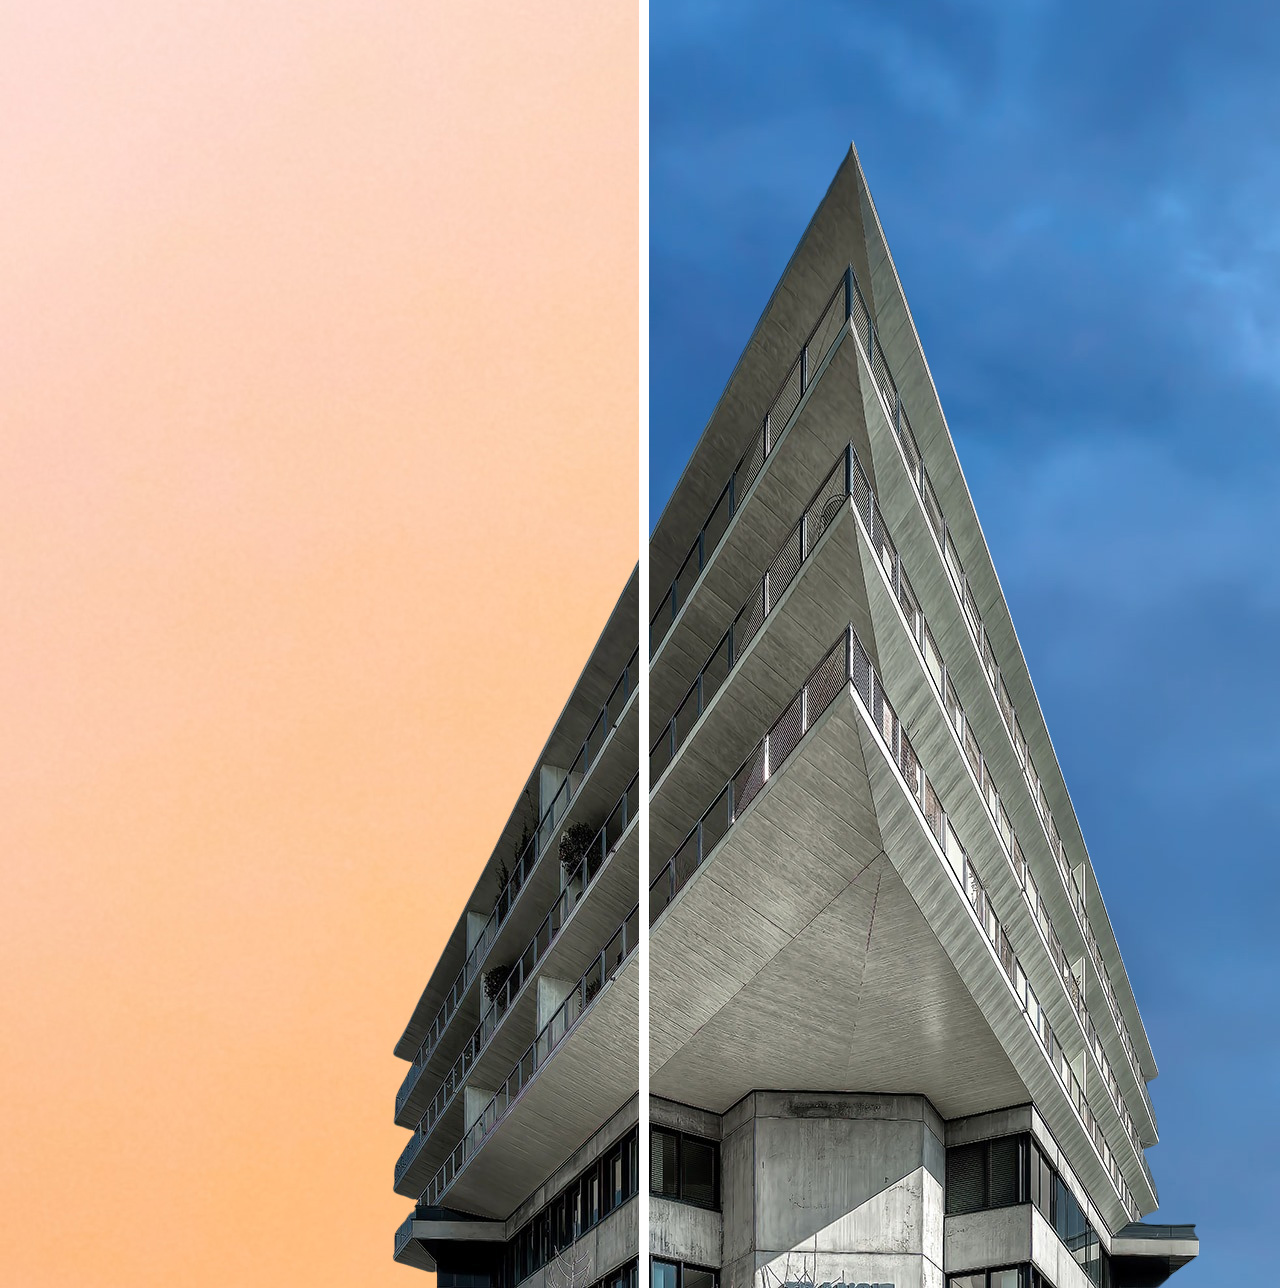
As you can see below, the AI-based background remover does an excellent job of getting rid of the background, and that too with the click of a single button.


2. Add a Solid Color Background to Your Image
In the previous section of this article, you saw how easy it is to remove the background from your image. Now, if your intention is to add a solid color background to the image, you can do so while still using the Remove Background tool.
Step 1: After you’ve removed the background, click on the color picker tool beside the Background Color option. You can then choose the color of your liking to add as a new background for the image.
For instance, if you’re looking to add a plain white background for the purpose of listing it on e-commerce websites, you can choose white as your color of choice.
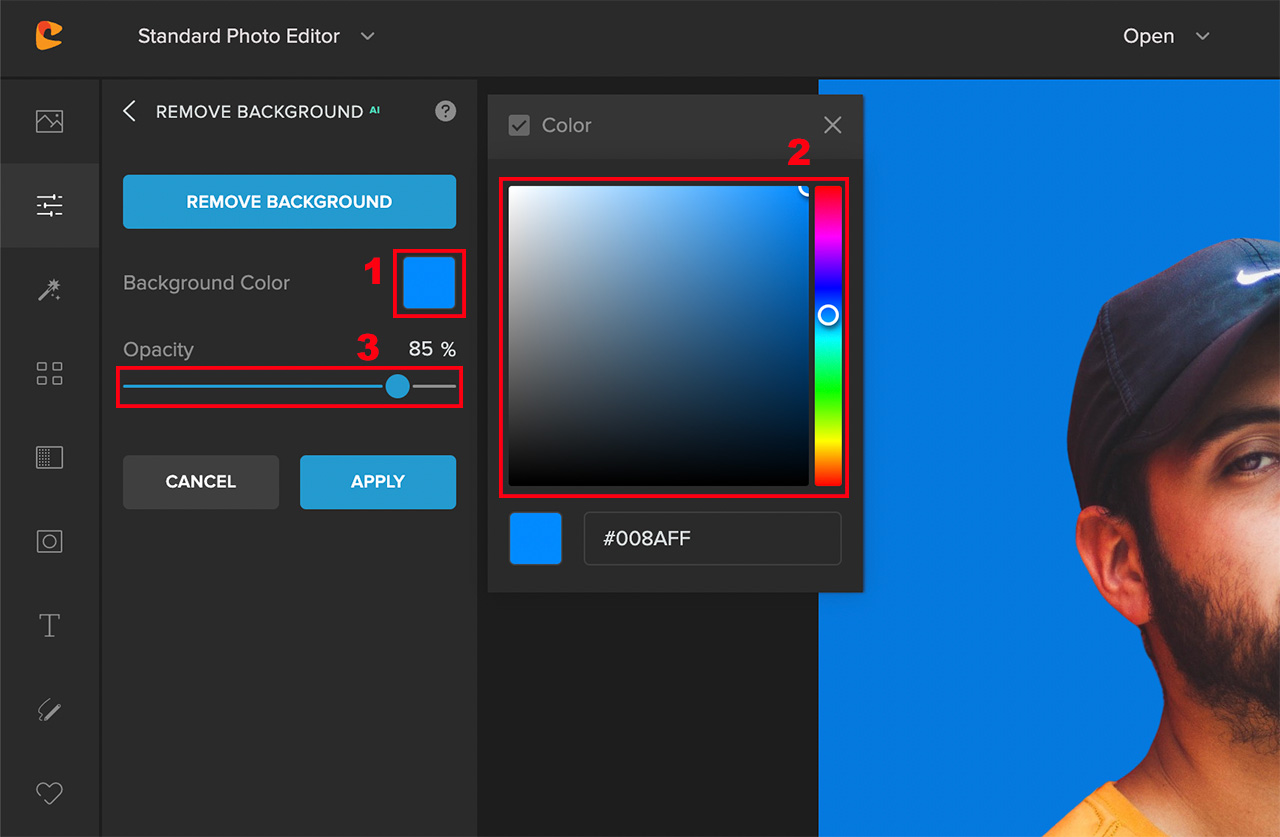
Step 2: Adjust the opacity of the new background color by using the Opacity Slider. This step is entirely optional.
Step 3: Click on Apply to commit your changes.
Here’s how the image will appear once you add a solid color background to your image.

3. Add a Different Image as a Background for Your Photo
If you’re looking to totally change the background of the image and not just add a solid colored background, you can do that too using Colorcinch.
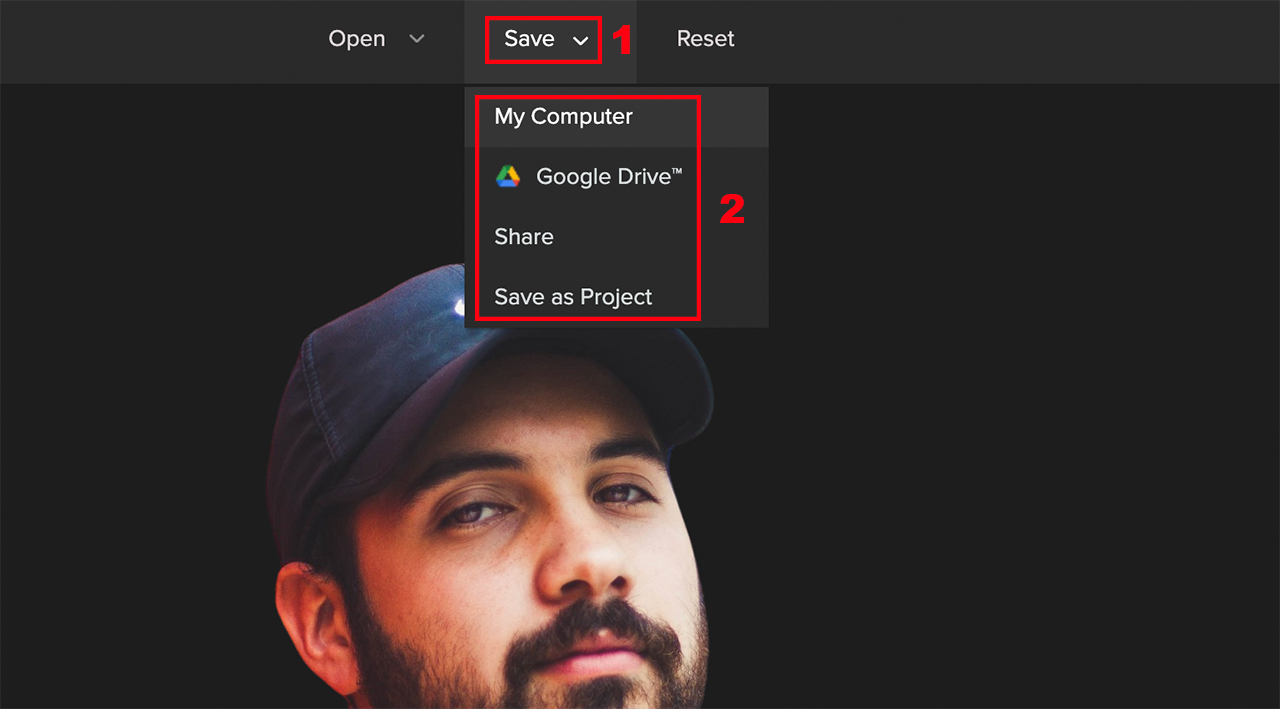
To do that, first, you’ll need to remove the background from your original image by following the steps that we discussed in the first section of this article. Then, download it to your computer as a PNG file by navigating to Save – My Computer.
You can even save it to your Google Drive by linking it to Colorcinch or save it within Colorinch by choosing Save as Project.
Now that you’ve saved the file, follow these simple steps to add a new background to the photo.
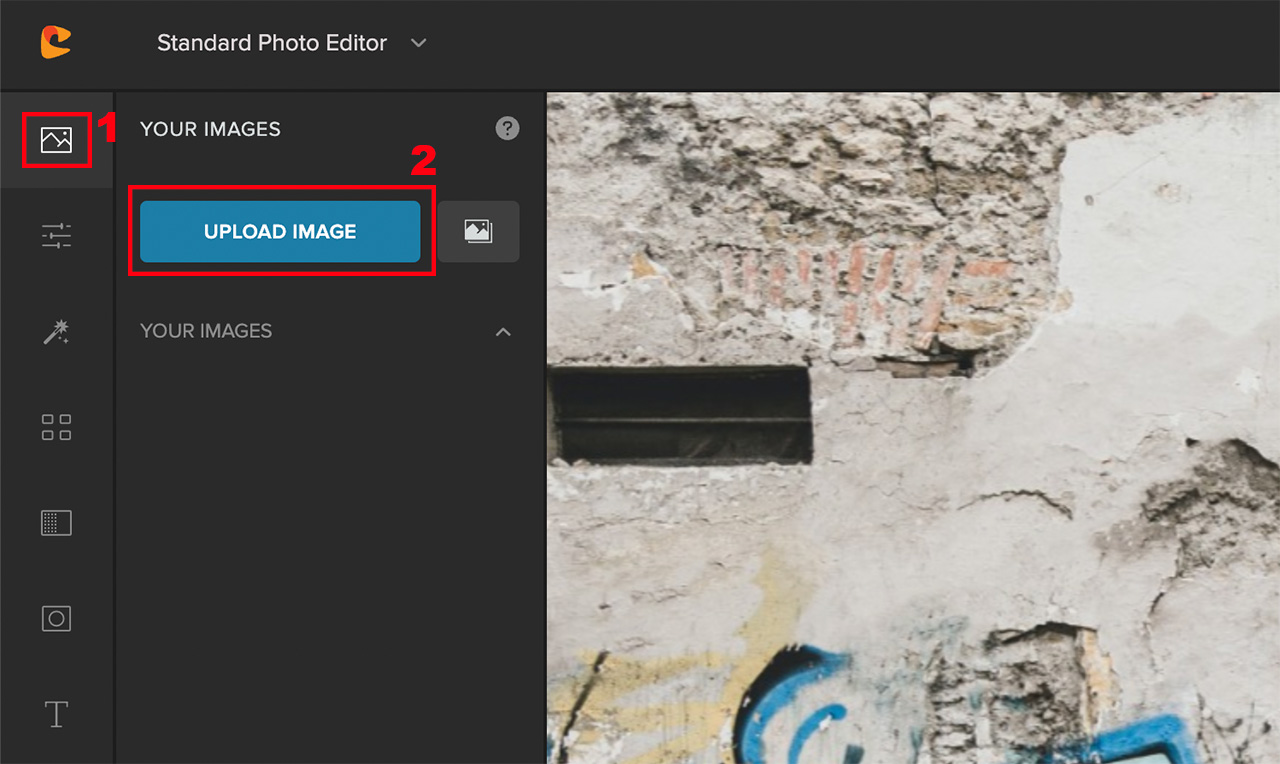
Step 1: Upload the background image to Colorcinch.
Step 2: Next, you’ll need to upload your image with the transparent background that you’d saved earlier. To do that, navigate to Image Manager and click on Upload Image.
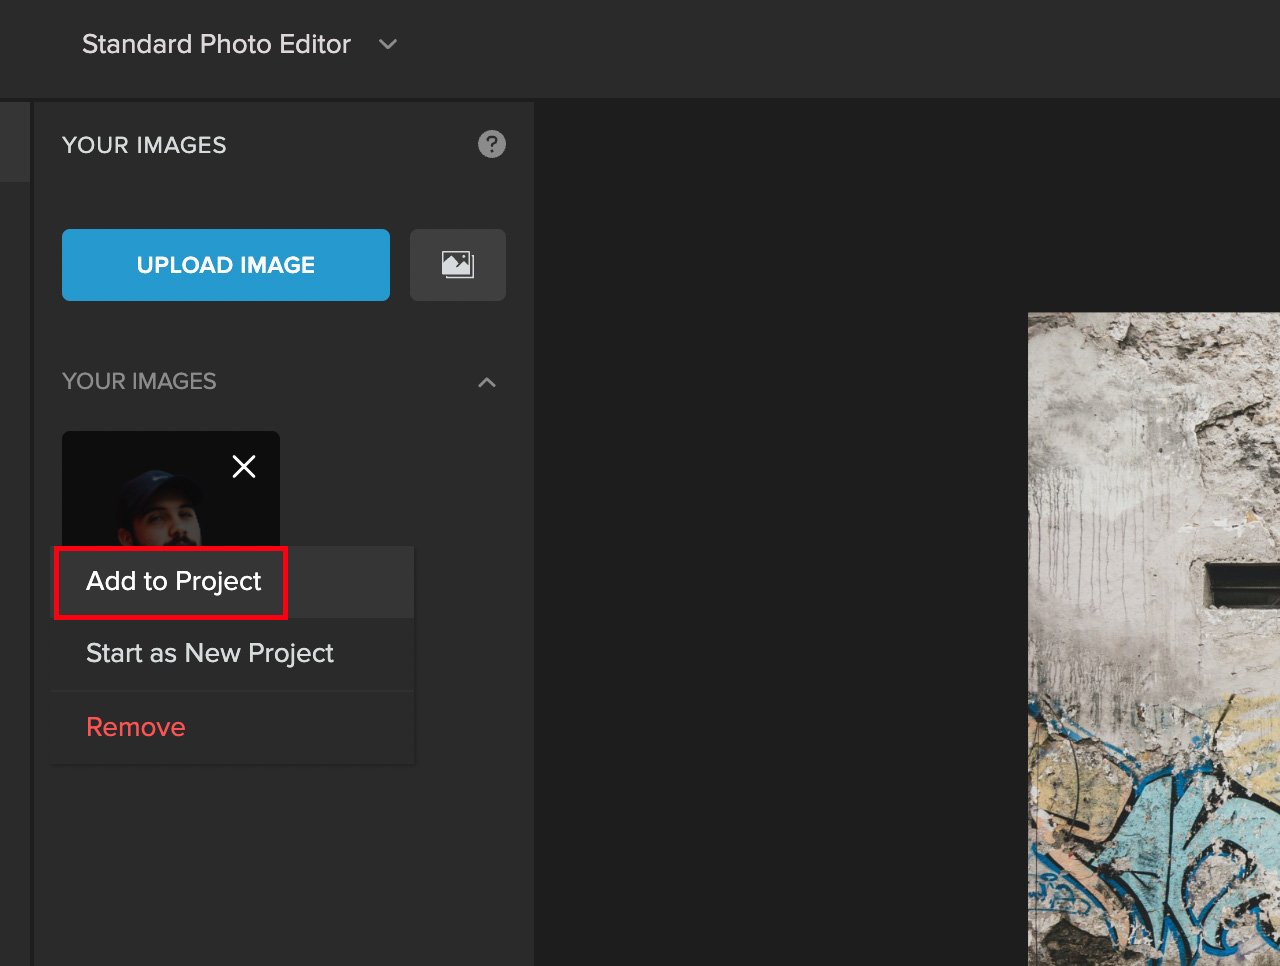
Step 3: Once your image is uploaded, it will appear in the Your Images section. You can either drag the image to the workspace or click on it and then select Add to Project.
Step 4: Once your image is placed in the workspace, you can resize the image by using the control points that appear when you select it. Also, if you need to move your subject around you can easily do so by dragging it around.
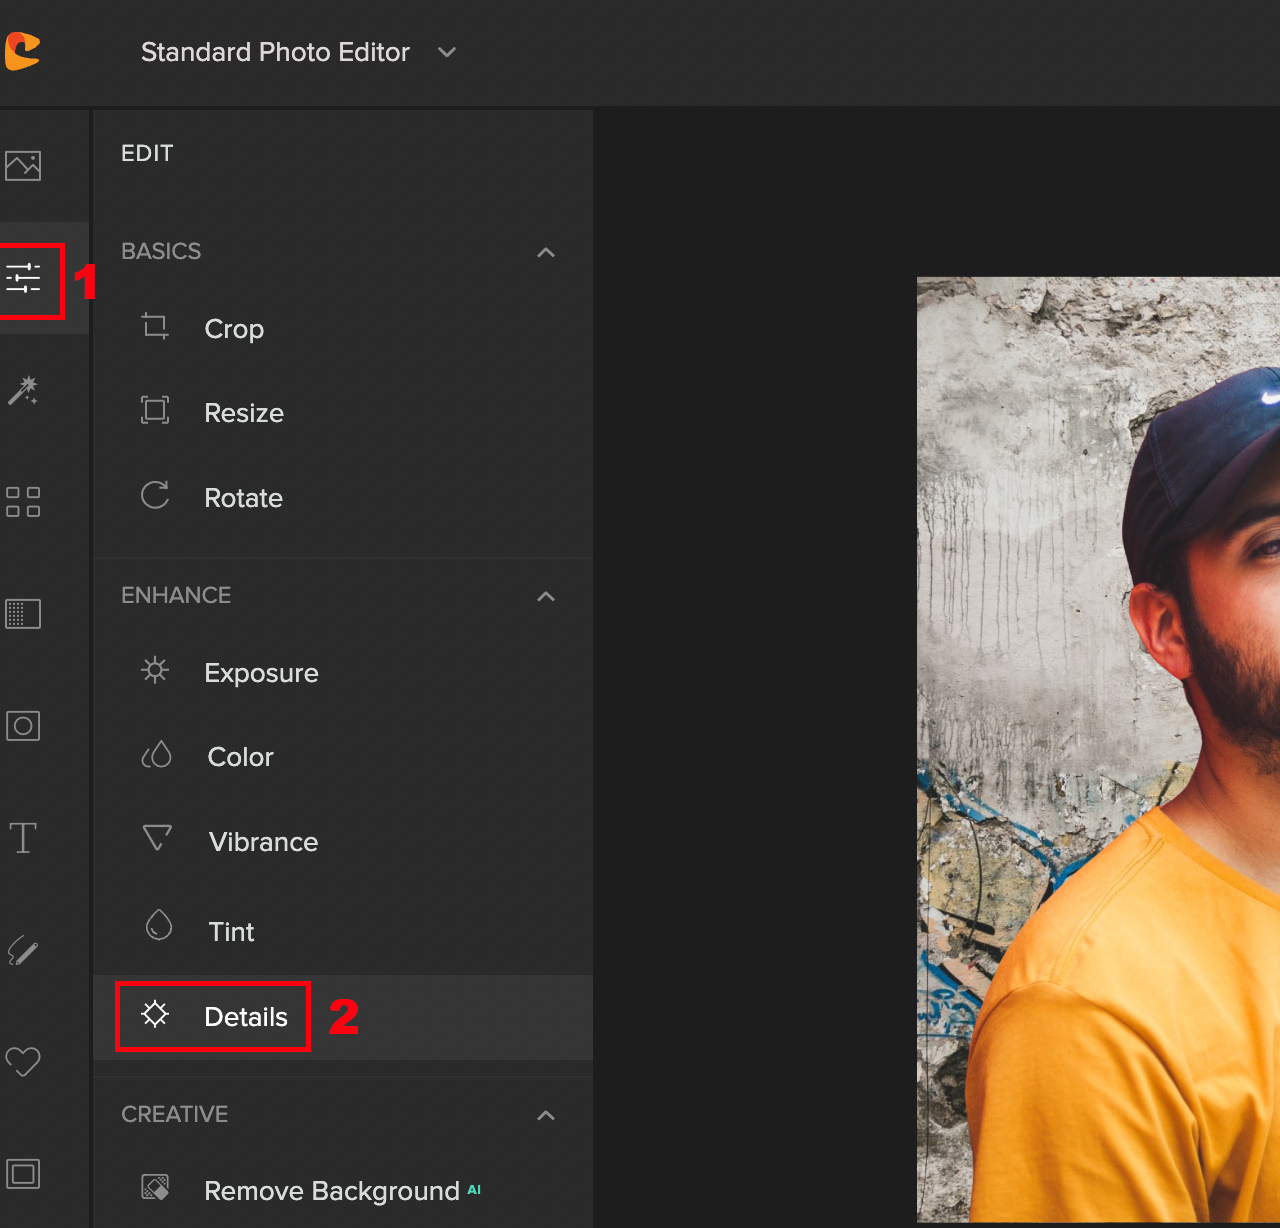
Step 5: Make the composite appear more realistic by slightly blurring the background to give a sense of a shallow depth of field. You can do so by navigating to Edit – Details and slightly increasing the Blur value using the slider.
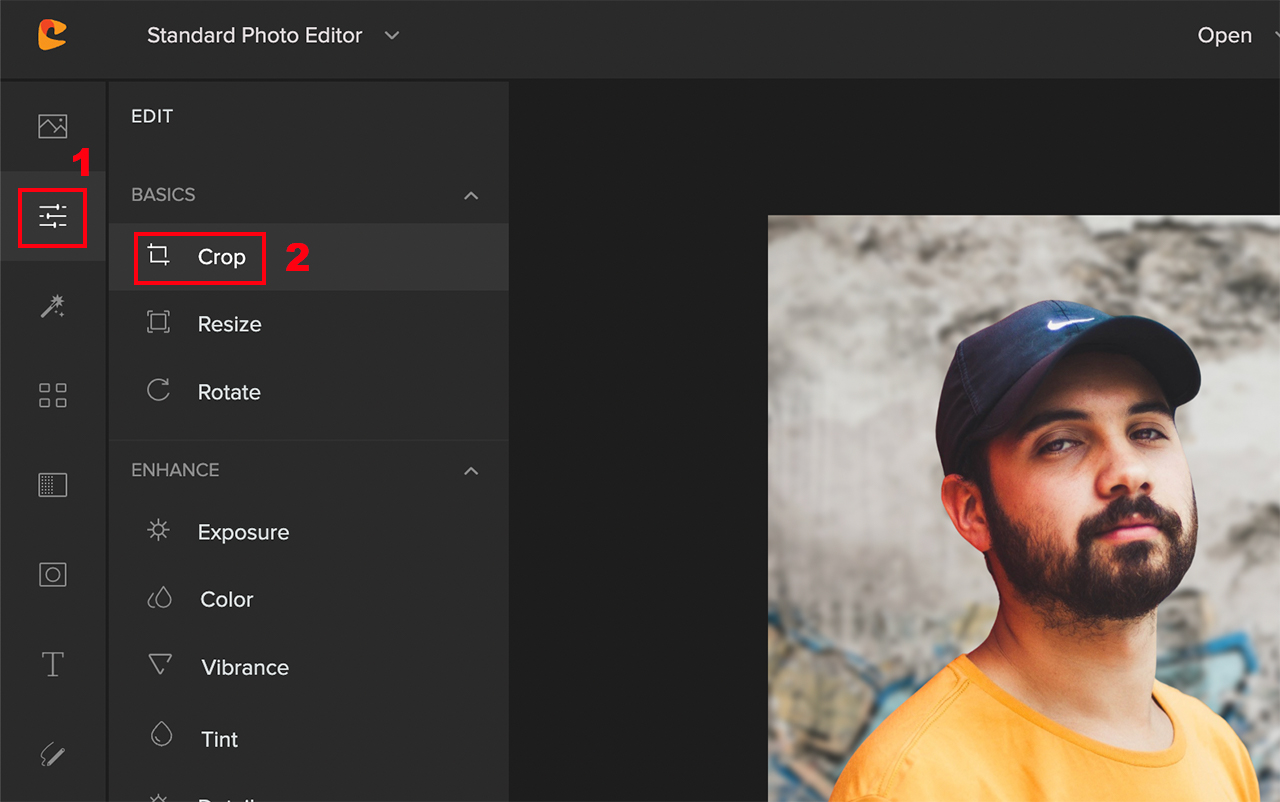
Step 6: Crop the image to give it a final look. You can do so by navigating to Edit – Crop and working either with the Freeform aspect ratio or choosing a preset aspect ratio from the dropdown menu.
Here’s a before and after comparison between the original photo and the same photo after adding a new background.


To Sum It Up
Knowing how to add background to a photo or even manipulate it is a fun skill to have. Moreover, it is something that you must know if you’re into social media marketing, product photography, or if you own an e-commerce based business.
With the powerful AI-powered features available in Colorcinch, it has never been easier to add or alter the background in any photo. You can easily get your job done with a single click of a button. There’s no need to tamper with any sort of selection or masking tools either.