
In this discussion, we’ll learn about portrait lighting. The key to any good portrait photography is a good understanding of lighting, portrait lighting techniques, and how different lighting ratios can impact the mood of your photos.
Sure, we can enhance the photos in post-processing, but it’s important to understand that post-processing is not an excuse for poorly lit or badly composed photos.
Introduction to Portrait Photography Lighting
Portrait lighting is all about lighting your subject in a tasteful way so that it brings out the best in that person in the form of an image. The camera simply captures the image, but the lighting does the trick.
Lighting is the key to any photography. It sets the mood of a photo. The way you position your lights, the angle from which you fire them, the lighting ratios you use, and the kind of light shaping tools you employ all contribute to how a photo will finally appear.
Posing also contributes to the final photo. But in this discussion, we’ll limit ourselves to the lighting bit. We’ll discuss poses for portrait photography some other time.
How Many Lights Are Required for Portrait Photography?
A single light is a bare minimum for portrait photography. With two you have a lot of room to experiment.
As we’ll learn in a moment, even a single light can be very versatile. A single light allows you to set up your shot in several different ways.
There are many different kinds of portrait lighting kits out there. We’ll discuss them some other time.
Different Types of Lighting Arrangements
Beginner photographers often ask,
“what is the best lighting for portrait photography?”
There is no one way to answer this. It all depends on what you want to achieve. If you want a high key result, you need to use a particular lighting setup along with multiple lights.
If you need a darker, more sinister-looking result, you need to light your subject in a specific way and use a fewer number of lights (usually one). So, it all depends on what your expectations are.
Next, we’ll discuss some of the more commonly used single-light portrait lighting setups. Then we’ll move on to the double light setups.
Single Light Arrangements
There are a bunch of single light setups you can use for your portrait works. These are all tried, and tested lighting arrangements used millions of times over by photographers worldwide.
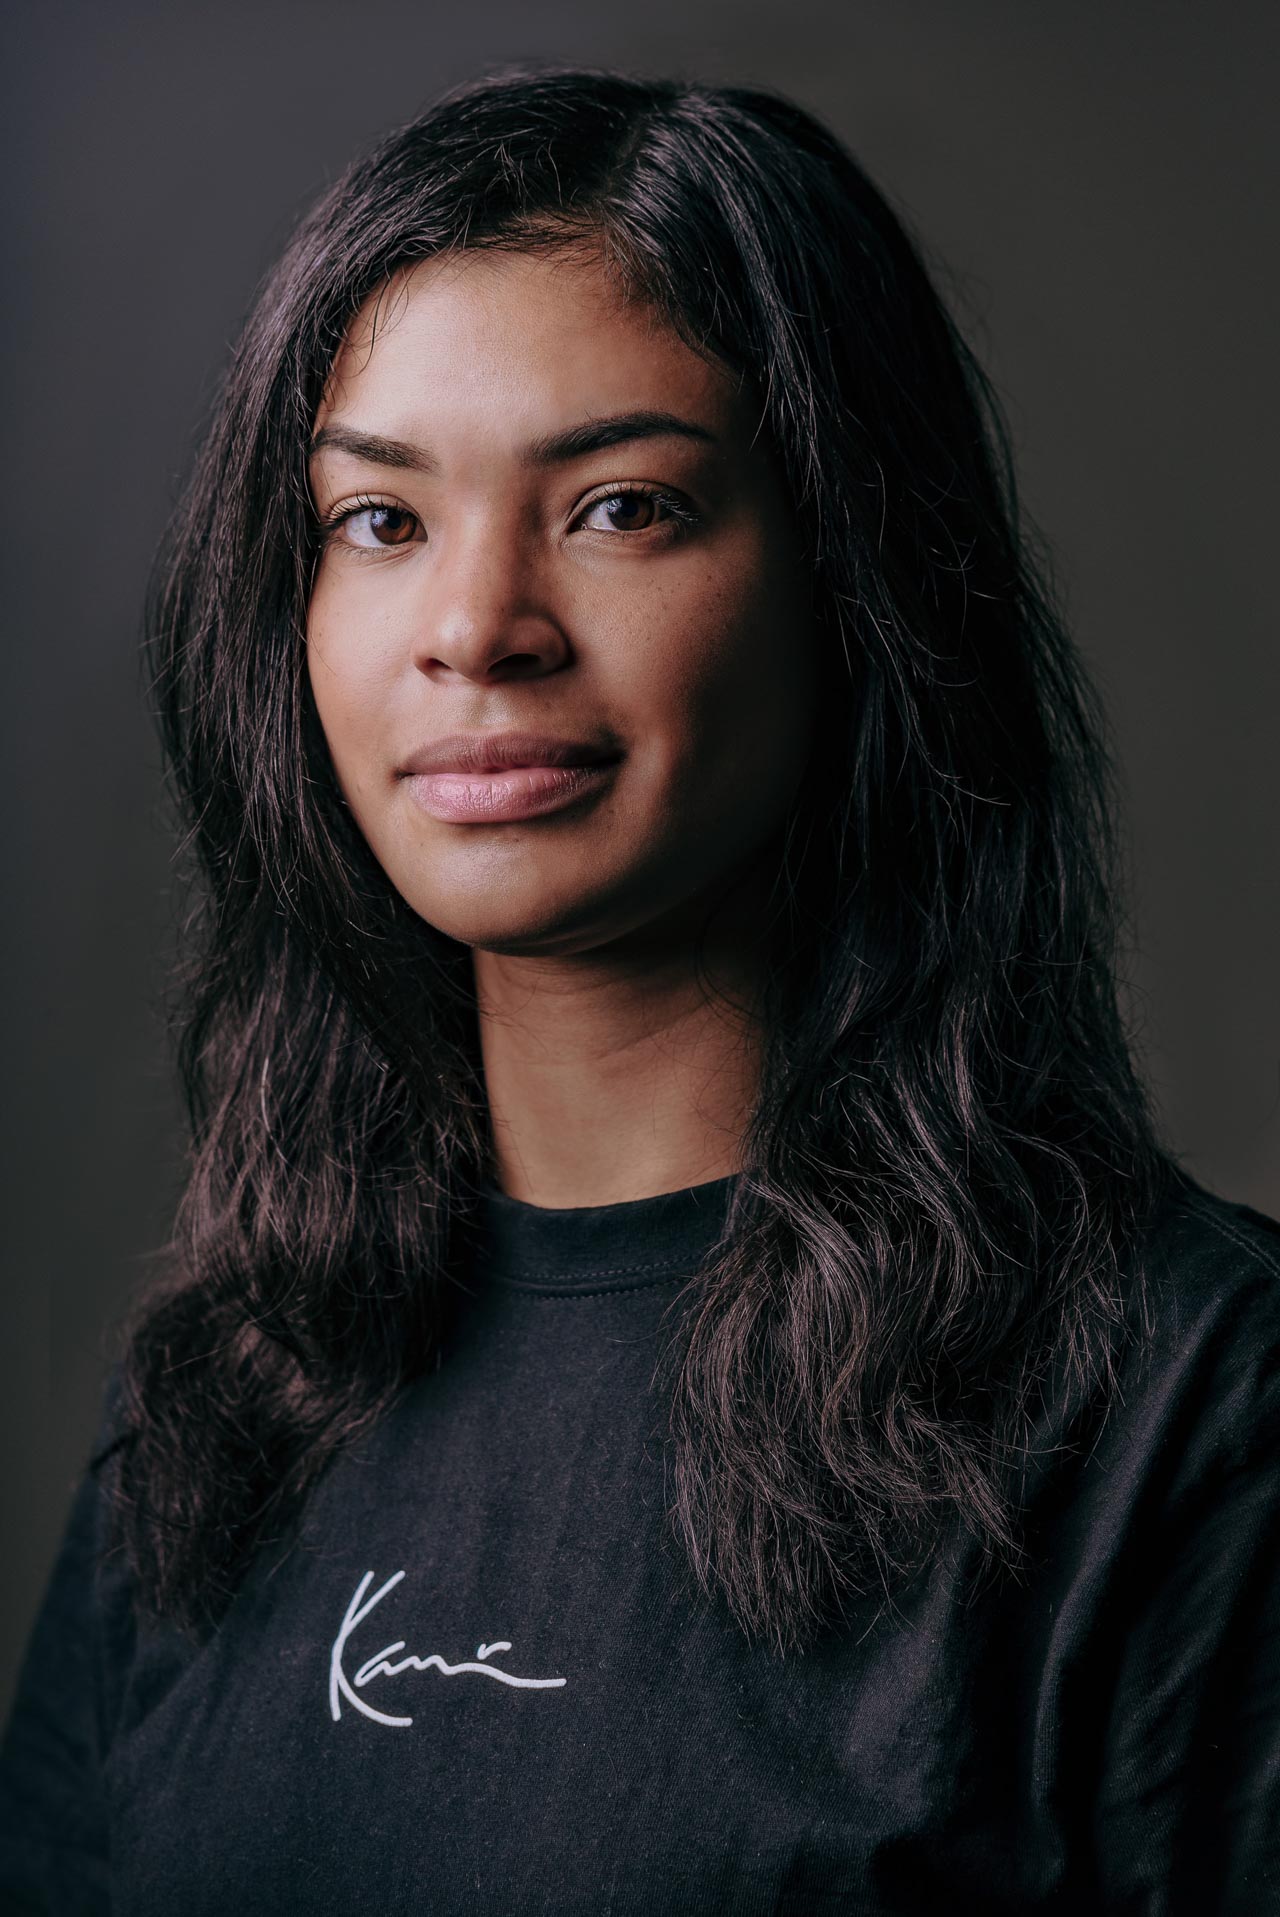
1. Butterfly Lighting
Arguably, the second most popular lighting setup (loop lighting being the first), Butterfly lighting, can be easily identified by the presence of a small butterfly-shaped shadow under the nose of the subject being photographed.
To achieve this result, you need to place the light source directly above the subject’s head at a slightly tilted angle.
Butterfly lighting works the best when you can fill in the shadows under the chin with a reflector or a whiteboard.
How to Achieve:
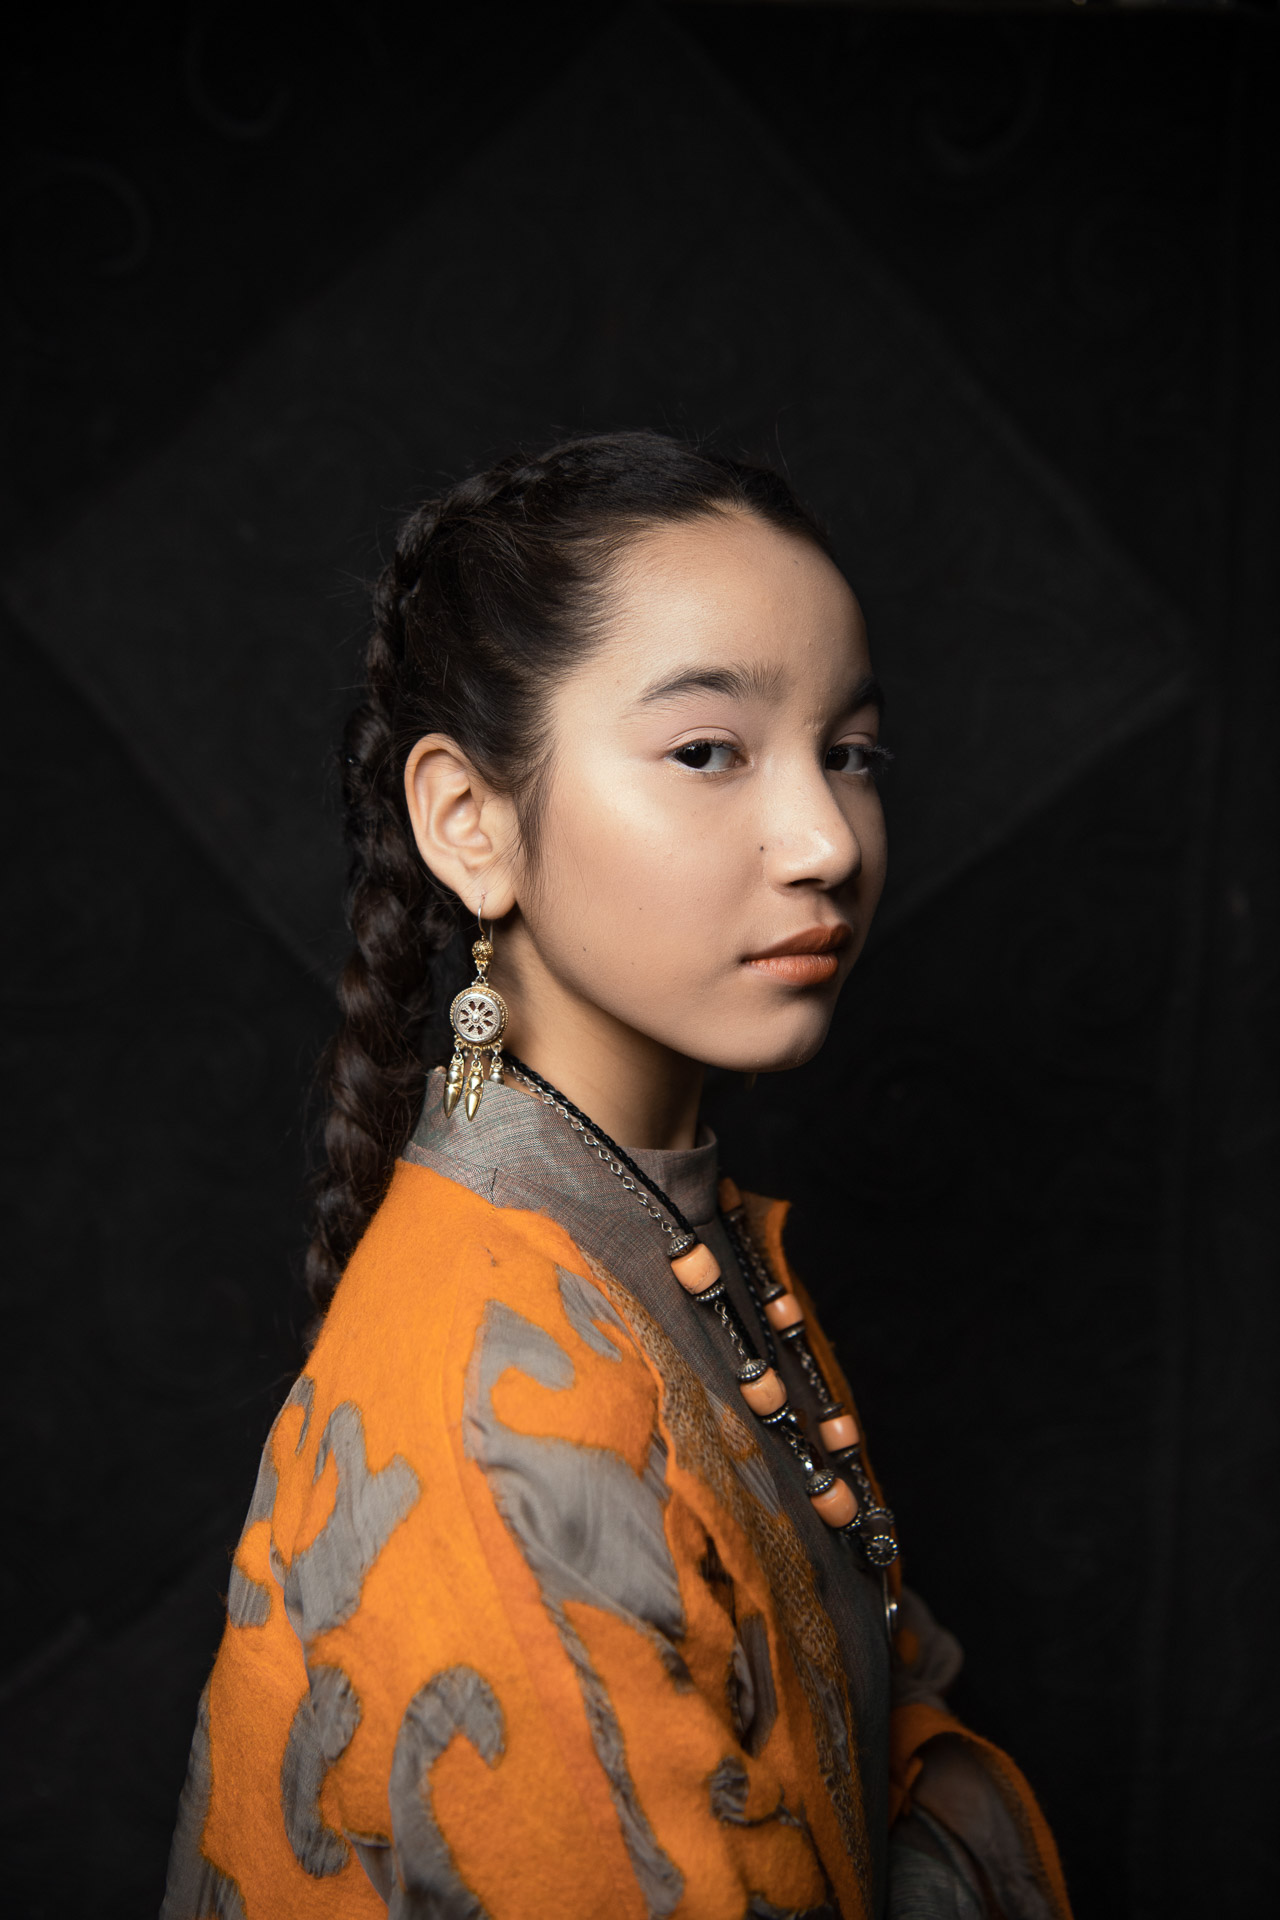
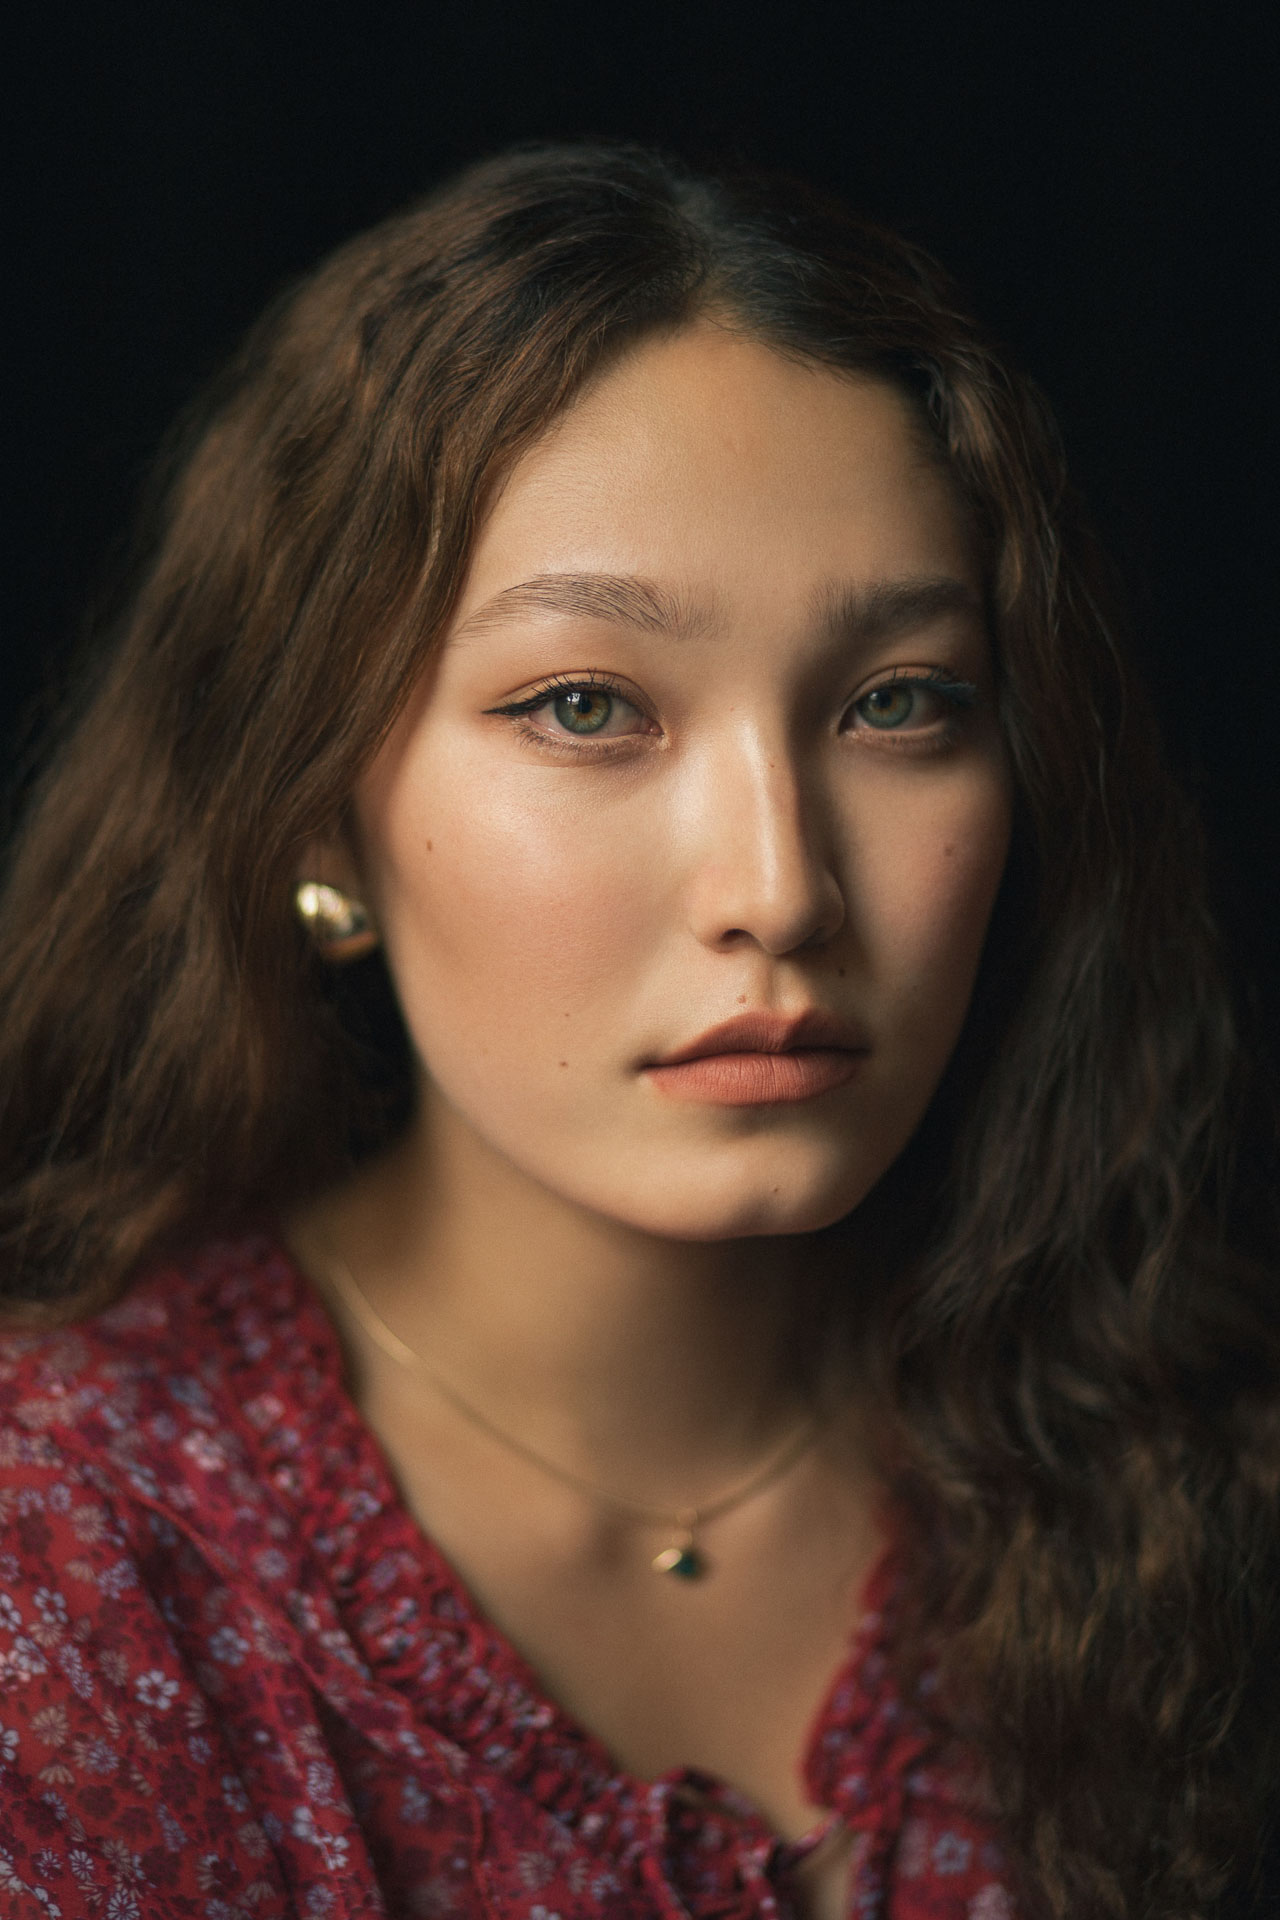
2. Loop Lighting
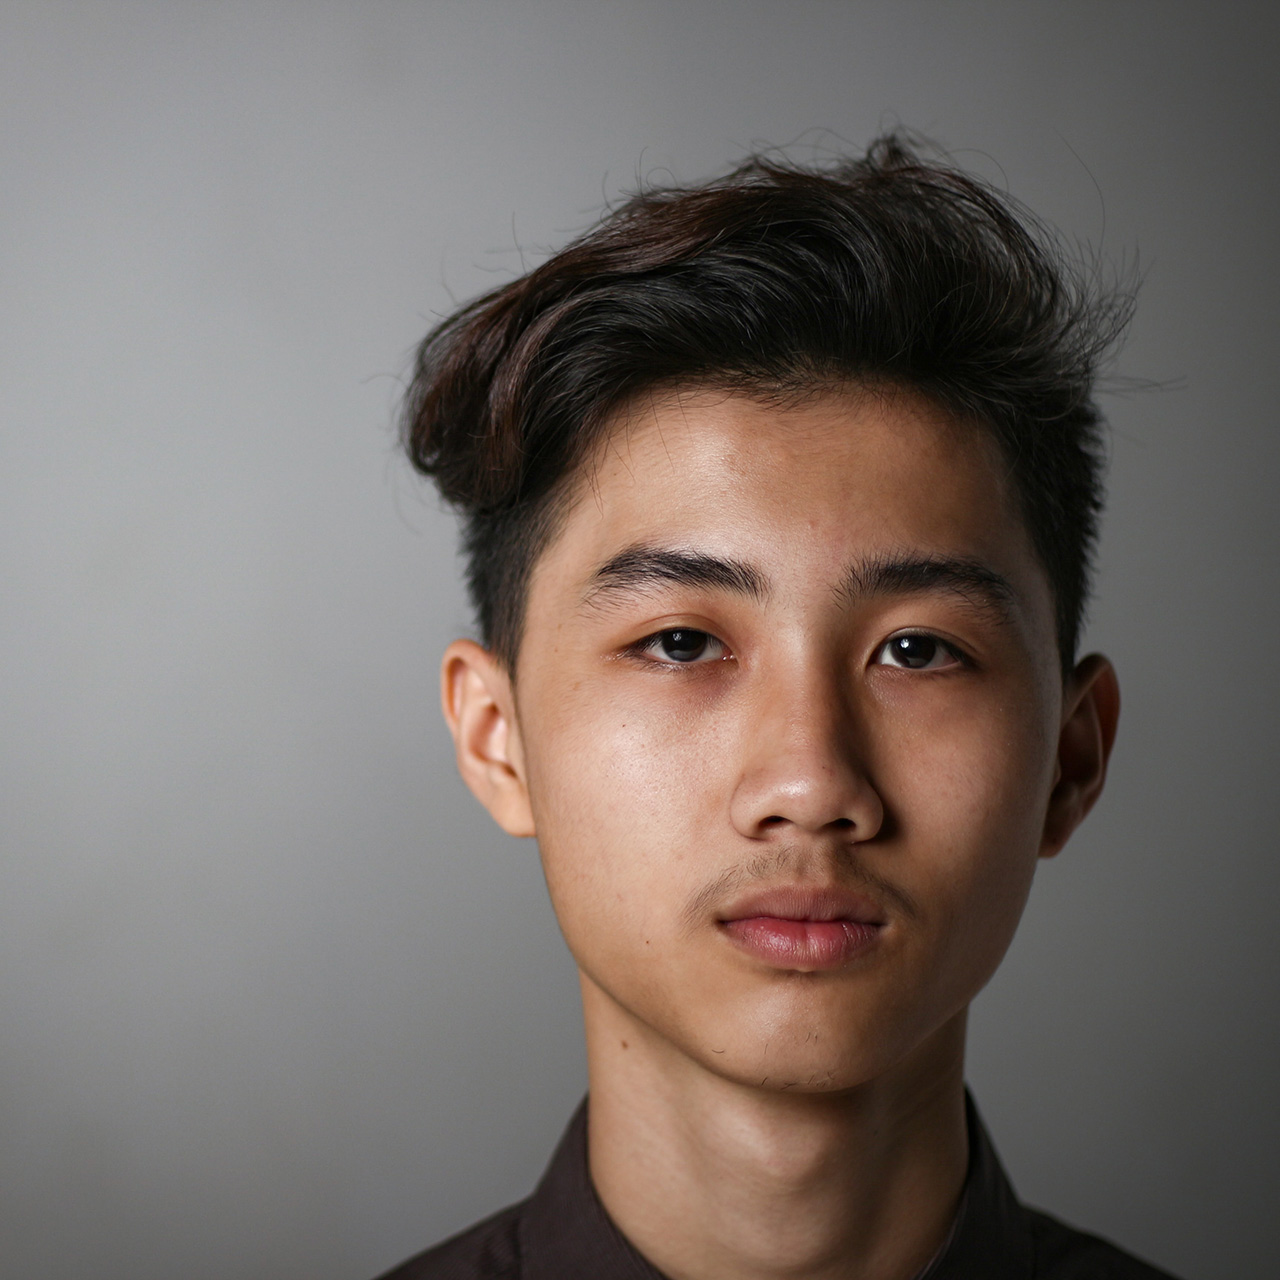
One of the most famous portrait lighting techniques, the name Loop lighting comes from the tiny shadow that appears on the side of the nose (depending on the angle of the light) of the subject.
Loop lighting is a very easy-to-use lighting setup. All you need is to position your light to either the camera right or left and at a slight angle above the subject’s head.
How to Achieve:
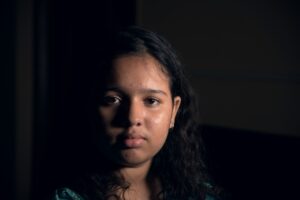
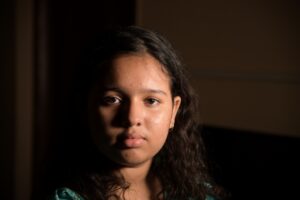
Many of the single light setups discussed here can be tweaked to give a portrait a slightly moody feel. In the case of this demonstrative image, the subject’s background was slightly more exposed. Tweaking the Exposure sliders after uploading it to Colorcinch results in a fine-tuned image.
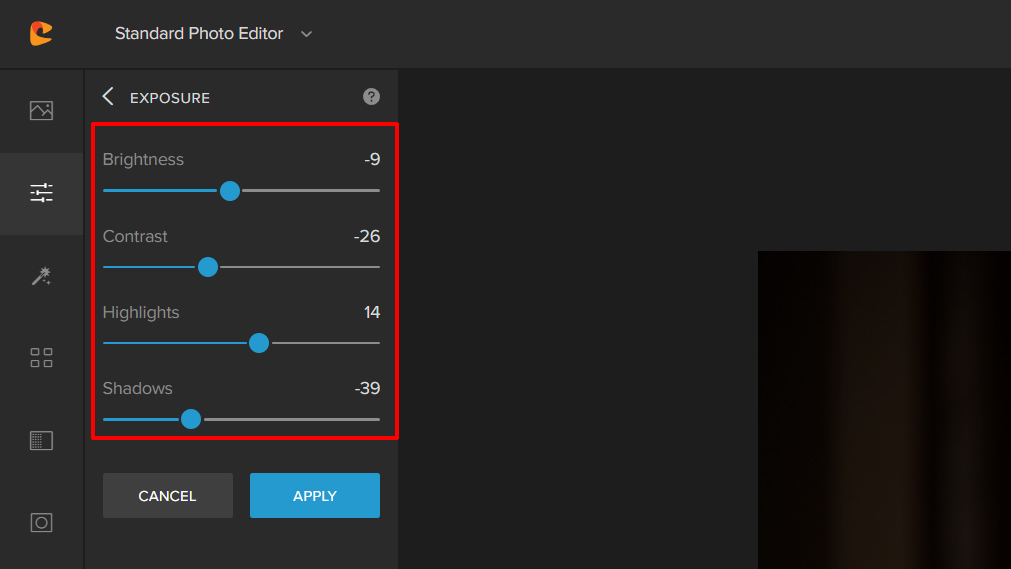
Here’s a quick before and after look.
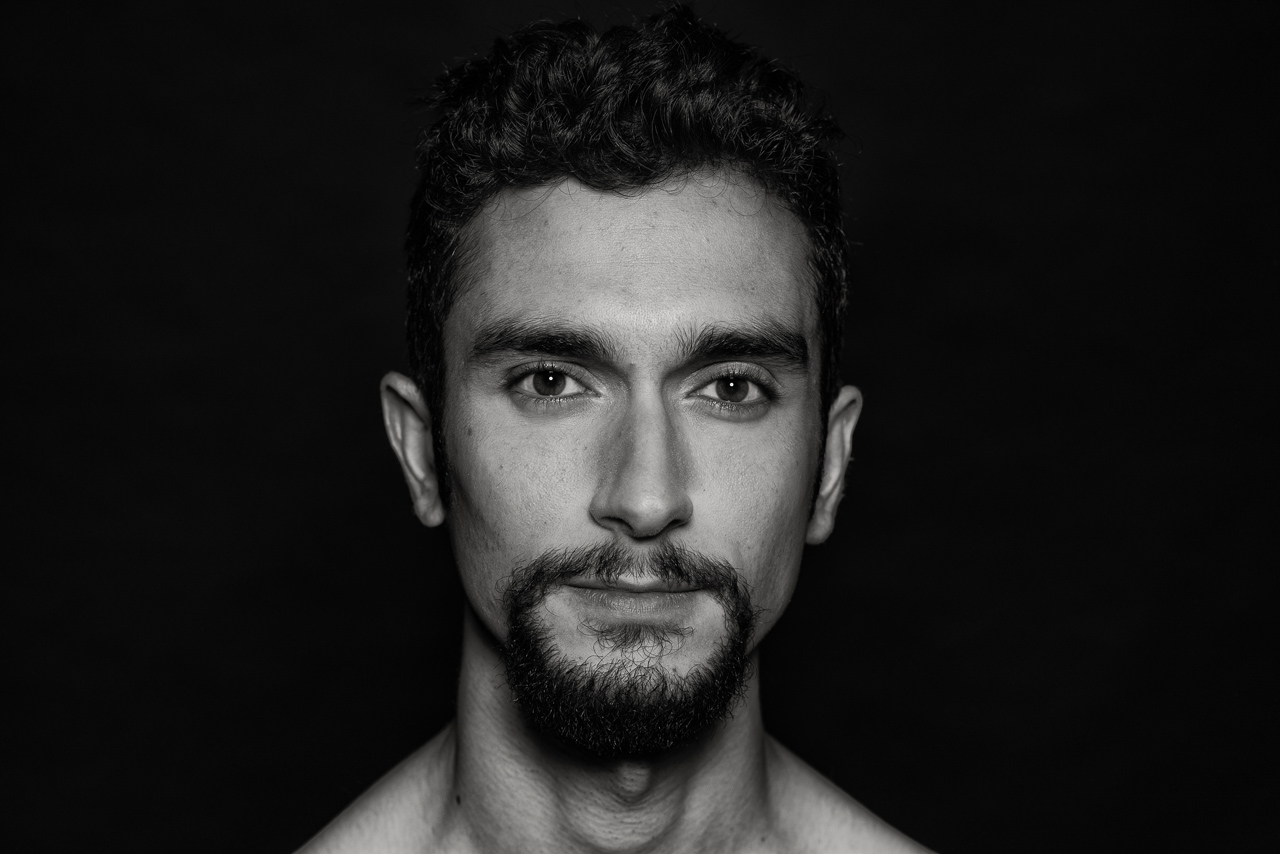
3. Rembrandt Lighting
This portrait lighting setup was made famous by the 17th-century Dutch painter Rembrandt. Many of his portraits have this lighting technique demonstrated. It’s easy to tweak the loop lighting setup and create a Rembrandt lighting setup.
Notice that in Loop lighting, the nose’s shadow does not touch the shadow on the subject’s cheek, but in Rembrandt lighting, it does. Also, notice the small triangle of light on the right cheek of the subject.
How to Achieve:
4. Broad Lighting
To define Broad lighting in simple terms, it’s a lighting arrangement where the side of the subject’s face that’s lit is also the side facing the camera.
How to Achieve:
5. Short Lighting
Short lighting is the reverse of Broad lighting. Here, the lit side isn’t the side facing the camera.
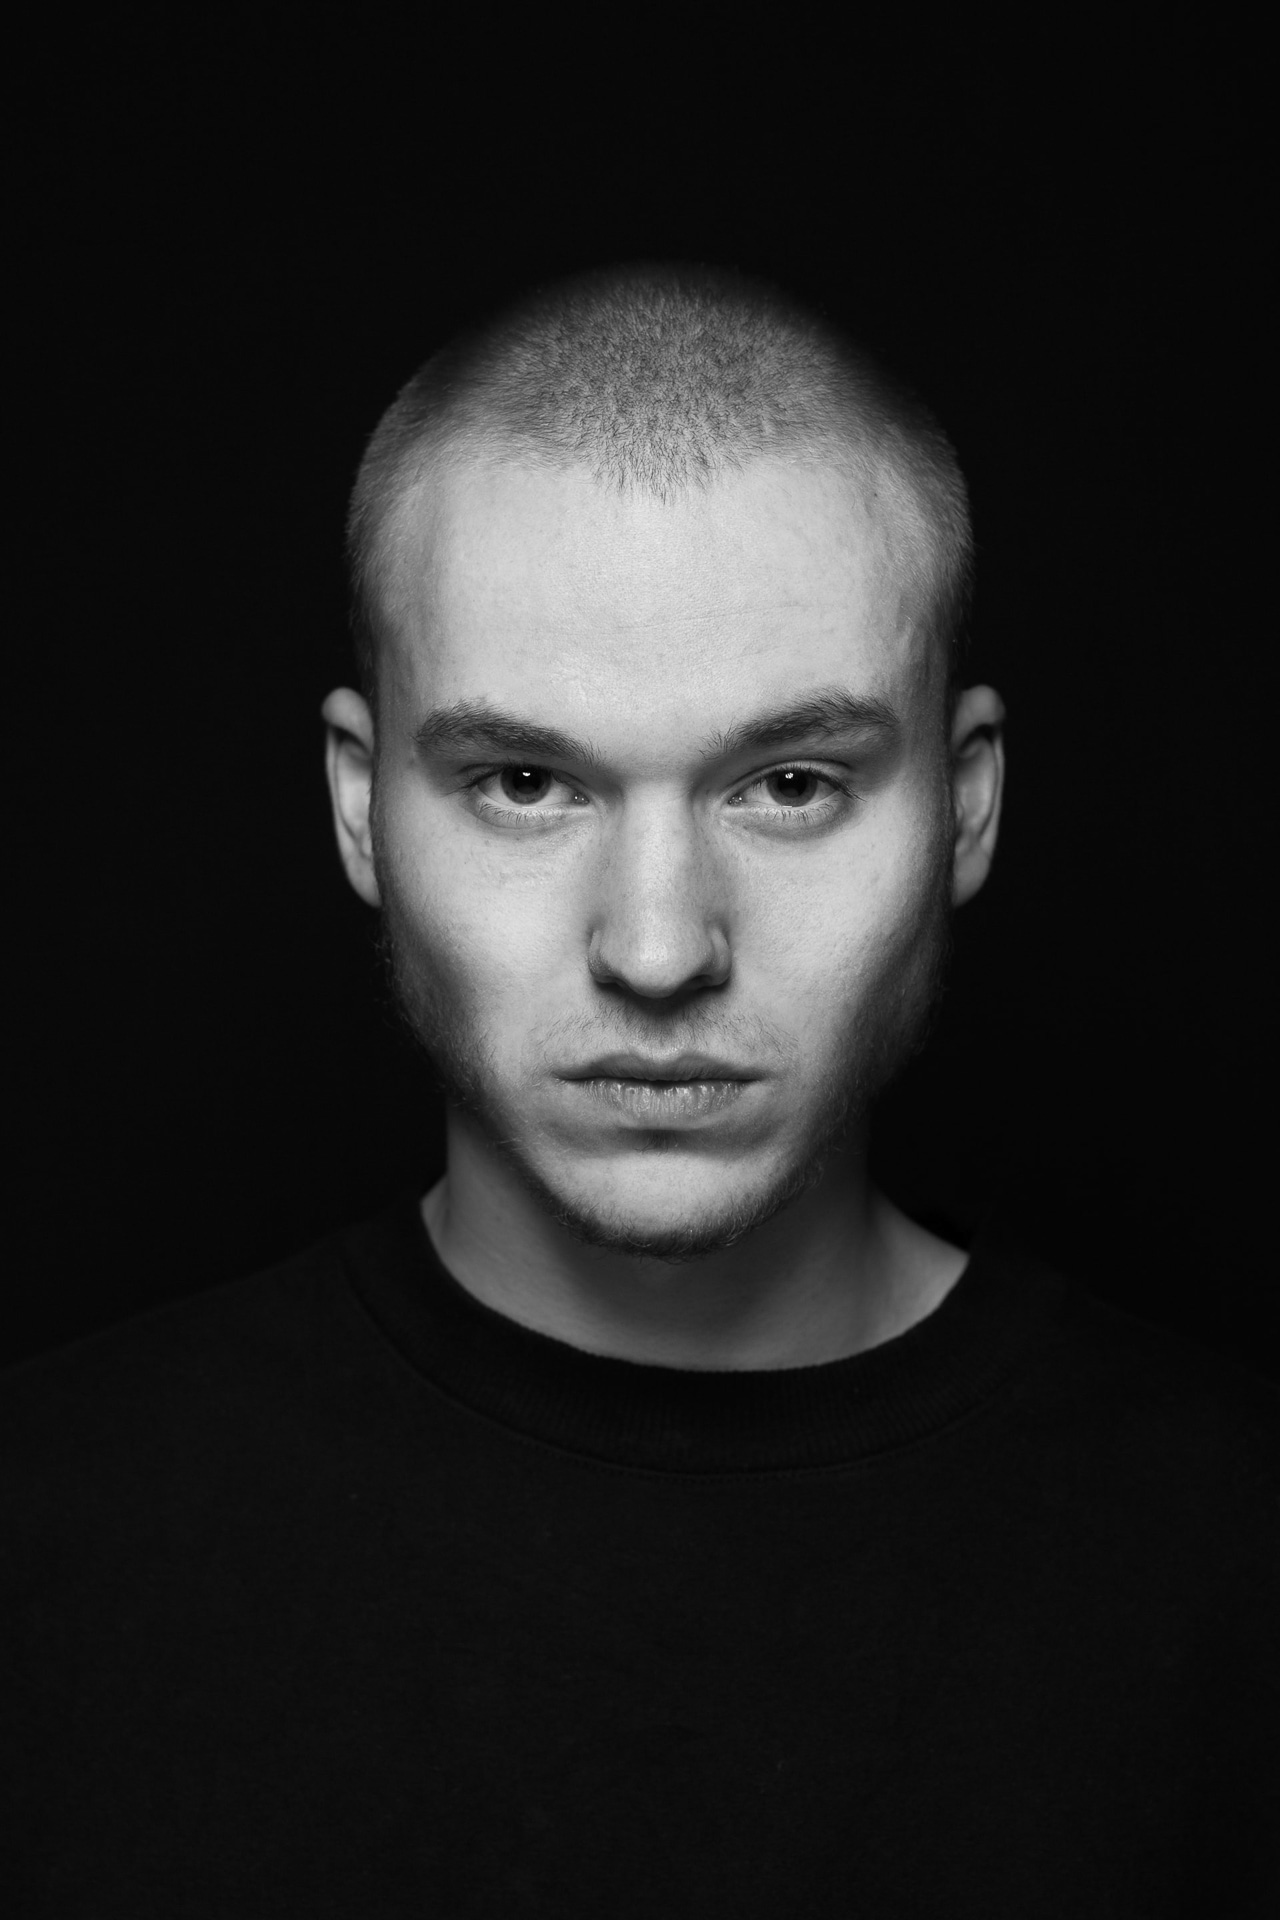
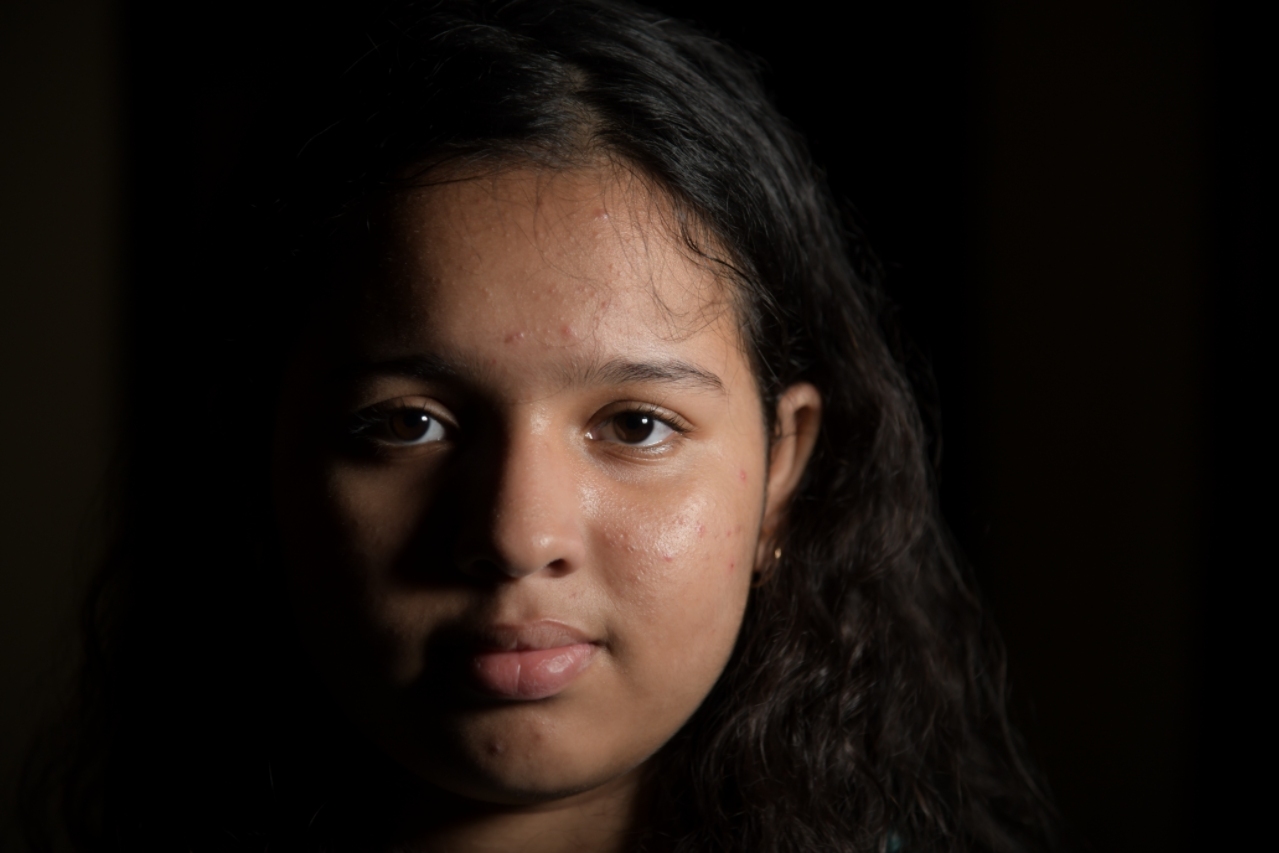
6. Split Lighting
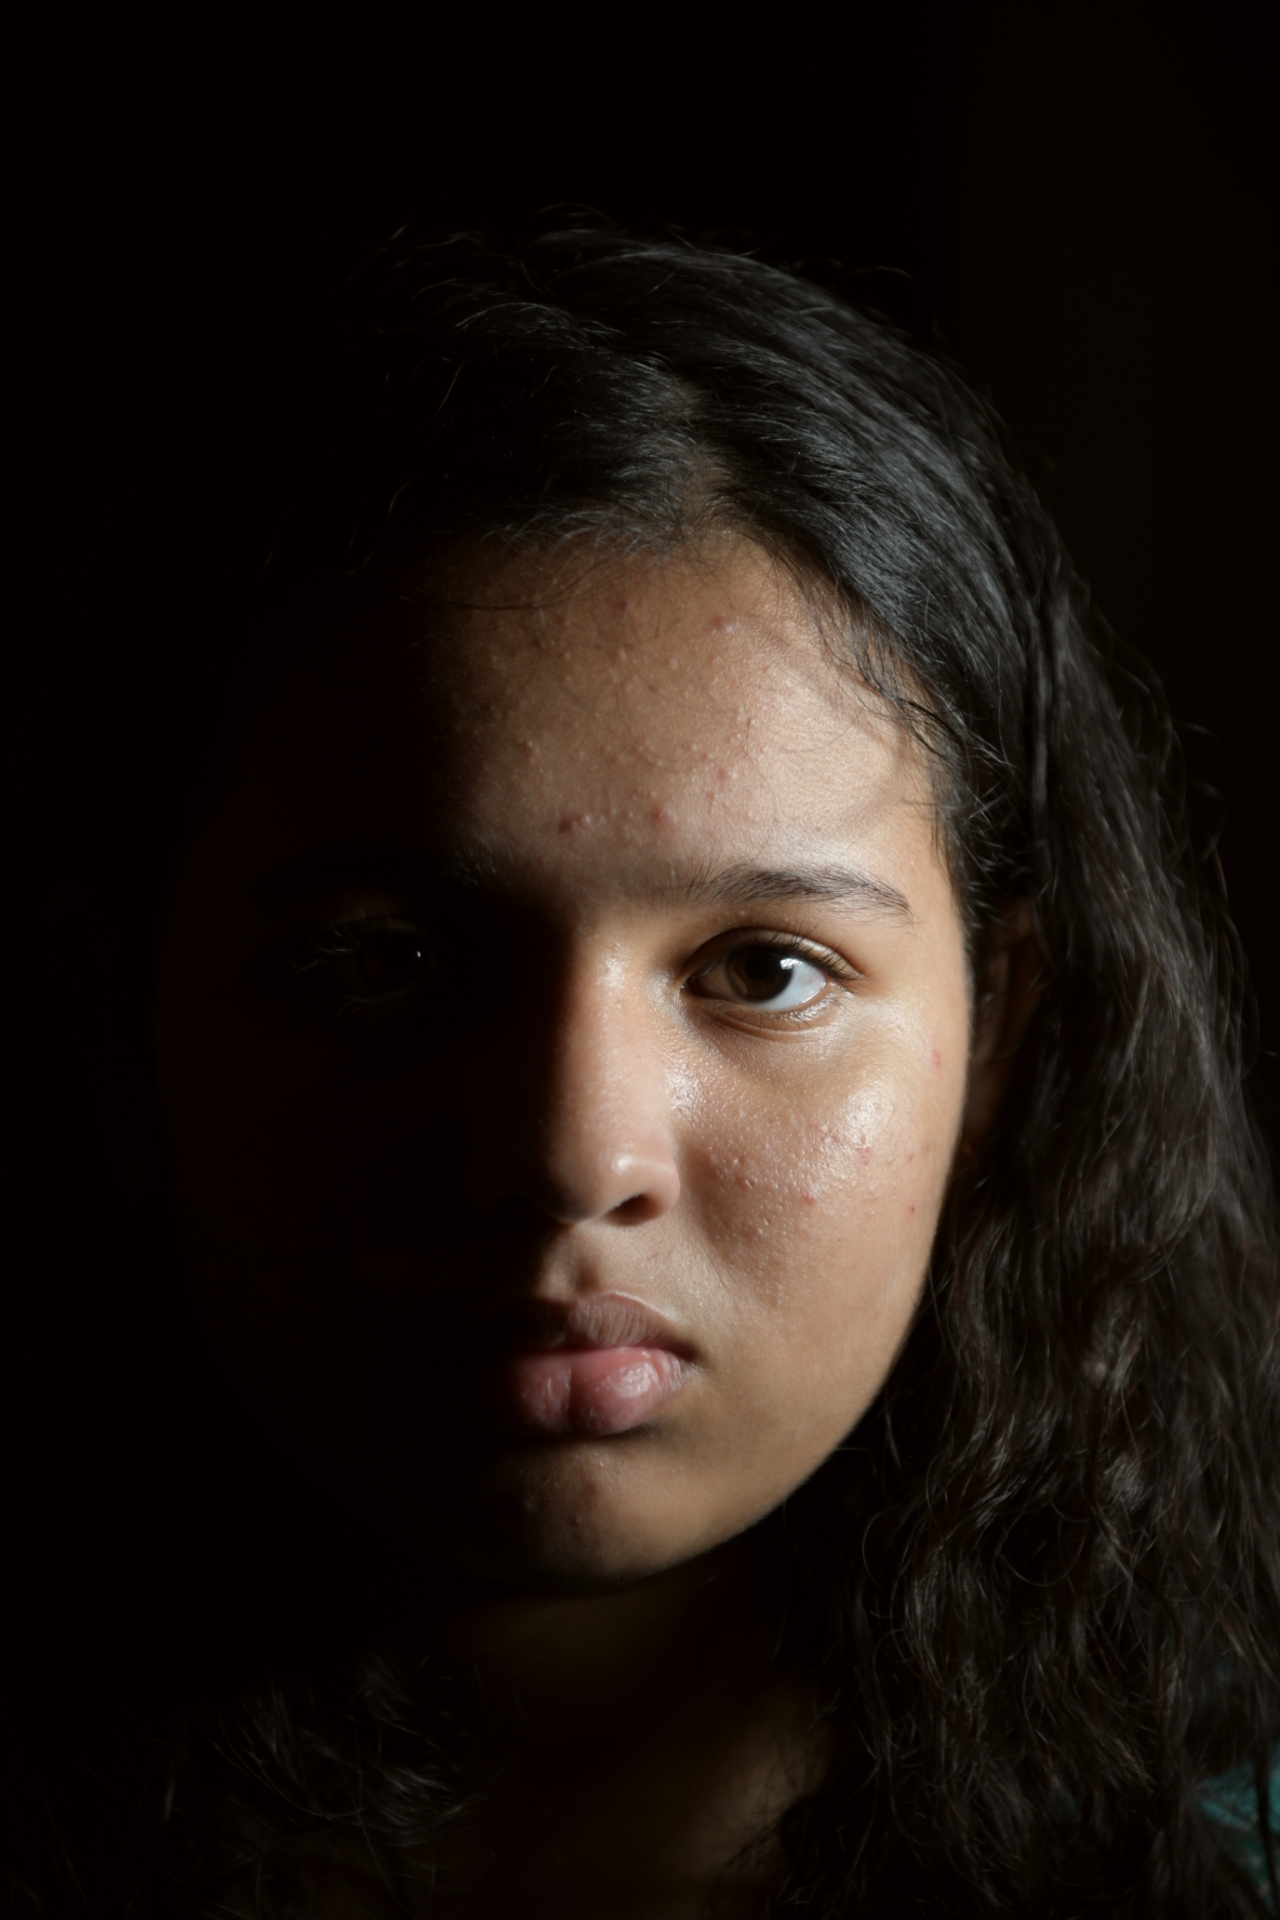
Split lighting is a technique where the face is split into two halves, with one half receiving significantly more light than the other.
The key light is placed at an angle of about 180 degrees to where the subject is. Directly either to the right or the left of the subject.
It’s advisable to catch a small highlight in the corner of the subject’s eyes just to infuse that sense of life and make the portrait image more appealing.
This is an example of Hard lighting. Hard lighting is a popular technique to create moody lighting setups for portraits.
How to Achieve:
Double Light Arrangements
Here are a couple of very common double light setups in portrait photography:
1. Rim Lighting
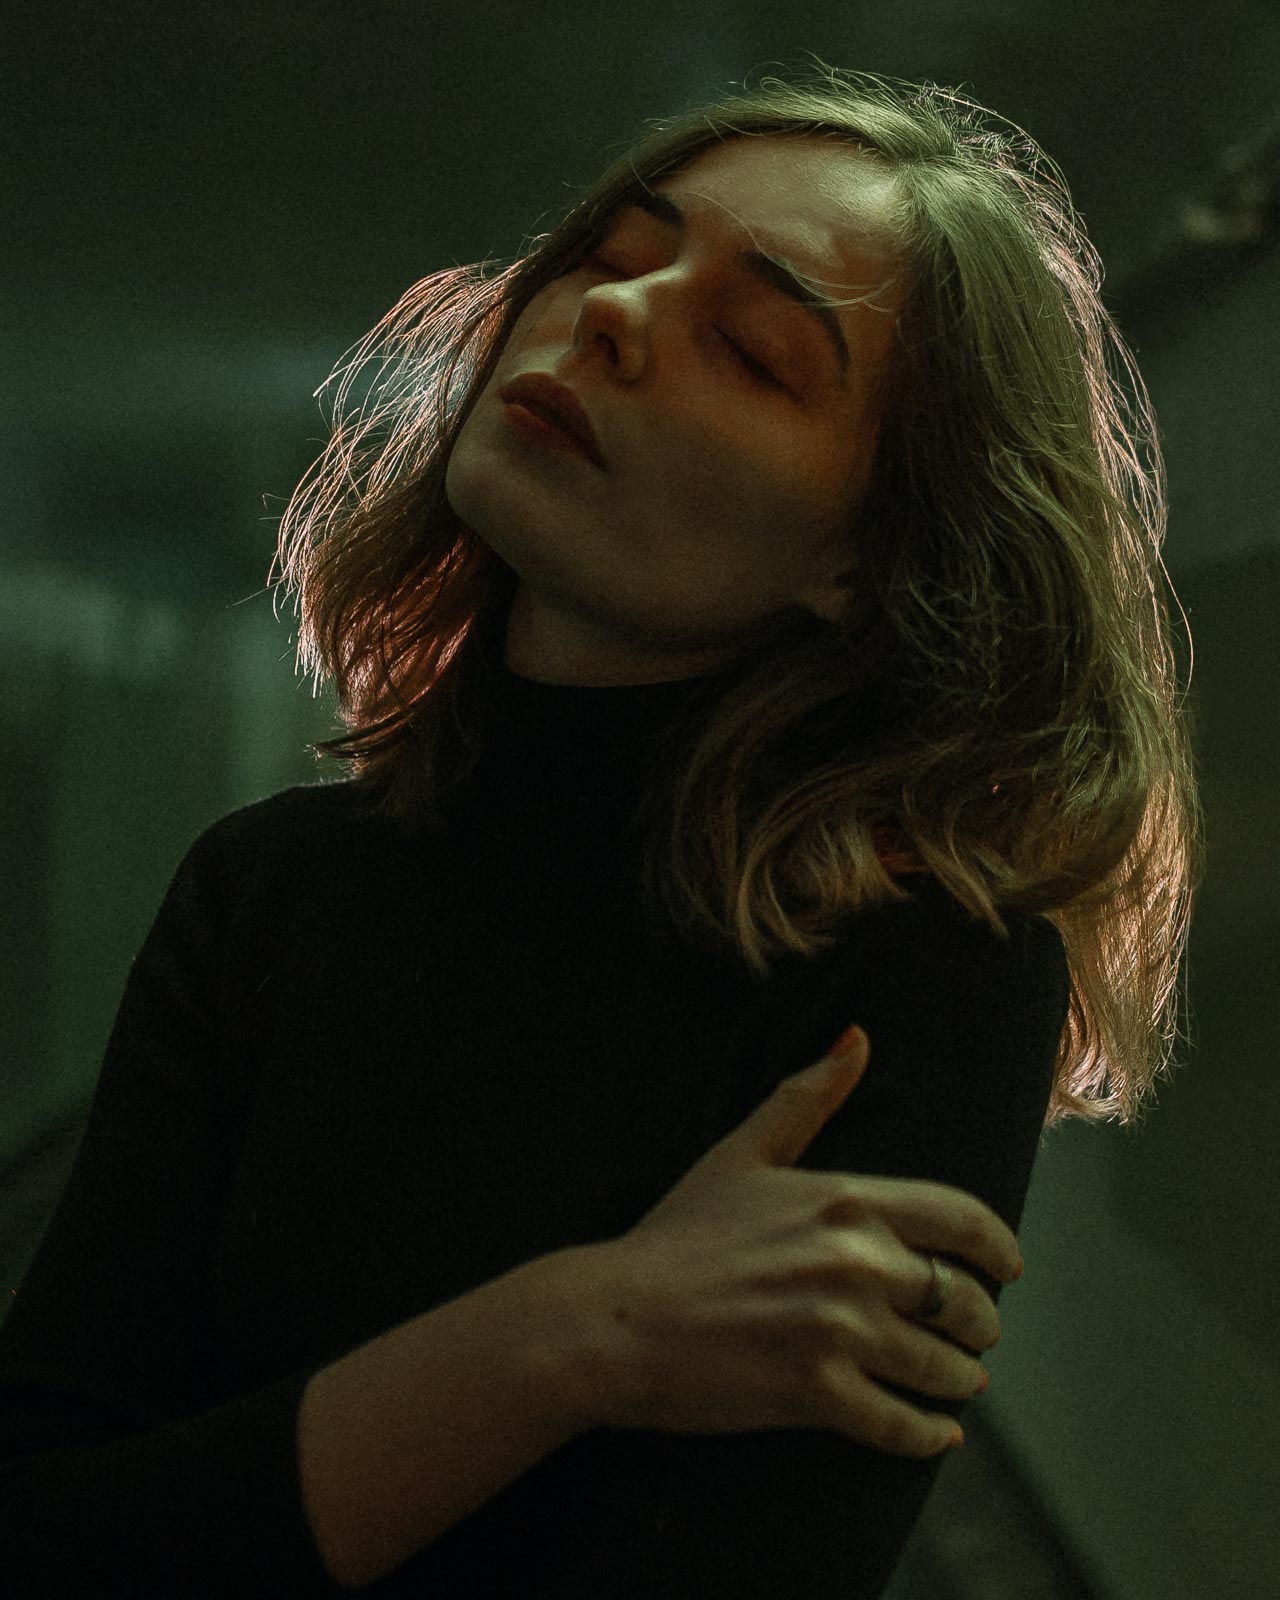
This is the first of the two two-light setups that we’ll learn. One light is fired from directly behind the subject’s head in this lighting setup.
If there are no other lights in the scene, this will produce a thin strip of light around the subject’s head. Thus, the name Rim lighting.
The job of this light is to isolate the subject from the background, thereby defining the person being photographed.
The second light is fired from the front, and it illuminates the subject’s face completing the look.
How to Achieve:
2. Fill Lighting
The phrase Fill Light comes from the need to fill in shadows in most portrait photography. As demonstrated above, one light can be used in diverse ways. But that said, there is a limit to what you can do with a single light. At times you will be reaching for a second light. E.g., when you’re trying to create a high key lighting effect, you will need a second light.
With the second light, you have more breathing space to arrange them and create that perfect lighting effect.
During post-processing, you could adjust if you goofed up the lighting ratios during the shoot.
E.g., you can boost the Exposure sliders, mainly the Shadow slider, to ensure that the result appears more ‘ideal’.
How to Achieve:
An Introduction to Lighting Ratios

It’s important to understand Lighting Ratios because they define a portrait photo’s mood, look, and feel. Lighting ratios can change the look and feel of any image where artificial lighting is involved but it has special significance in portrait photography.
Briefly, the lighting ratio compares the key light and the fill light. If the ratio is higher, the key light is brighter than the fill light, which results in a contrasty portrait image.
If, on the other hand, the lighting ratio is smaller, it suggests that the portrait image is lit uniformly, and there is a lack of shadows. Consequently, the image will appear less contrasty.
There are quite a few situations where a lower light ratio will be helpful – high key photography comes to our mind straight away.
What Lighting Ratio Is Traditionally Used for Portrait Photography?
A 2:1 lighting ratio is a good starting point for portrait photography. It suggests one light churning out half of the amount of light than the other one.
Some photographers would prefer a lighting ratio of 4:1, which suggests that one light is churning four times the amount of light that the other light is doing.
In another discussion, we’ll talk about lighting ratios and setting up lights for an indoor/studio portrait photography session.
Concluding Thoughts
Portrait lighting is a vast subject that requires years of practice to perfect and fine-tune. It’s one of the more tricky areas in photography. We hope that you will find these portrait lighting techniques and tips helpful to get started. As you continue to experiment, you will be able to fine-tune your skills to take better portrait photos.