

Have you ever wanted to make a photo appear to have been cut out of a page? Or maybe you want to add some effects to your image that no one has ever seen before.
Well, the good news is that there are numerous ways to do this without having any prior knowledge of editing programs like Photoshop.
In this article, we’ll go over exactly how easy it can be for anyone to create an image mask using an online editor.

What is Image Masking?
Image masking is a way to hide parts of an image. This can be done by either removing the color or by making the pixels transparent.
It’s different than cropping, blending modes, blurring, and opacity because it actually masks out areas in your image so they aren’t visible anymore.
Image masking is a popular tool for photographers, designers, and artists alike. It can be used to remove unwanted objects from an image or to protect certain areas of an image while editing.
Types of Image Masking
Masking is a way to isolate a portion of an image and there are different types of it:
1. Clipping mask
This is the most common type of mask and is used for effects like clipping an image into another, hiding parts of an image, or combining several images together.
2. Layer mask
Layer masks are one type of adjustment layer that allows you to change the appearance of the layer below them by hiding or revealing parts of it.
3. Vector mask
A vector mask is another type of adjustment layer that lets you add transparency to any shape or path, so it will be partially visible when composited over other images.
4 Image Masking Methods Using Colorcinch
What if I tell you that you don’t need Photoshop to do image masking? That there is a web application that you can easily use.
Colorcinch provides you with different methods of using masks. In this section, we will be showing an overview of the tools Colorcinch has for masking images.
Mask Presets
Step 1: Start by opening Colorcinch. Upload an image.

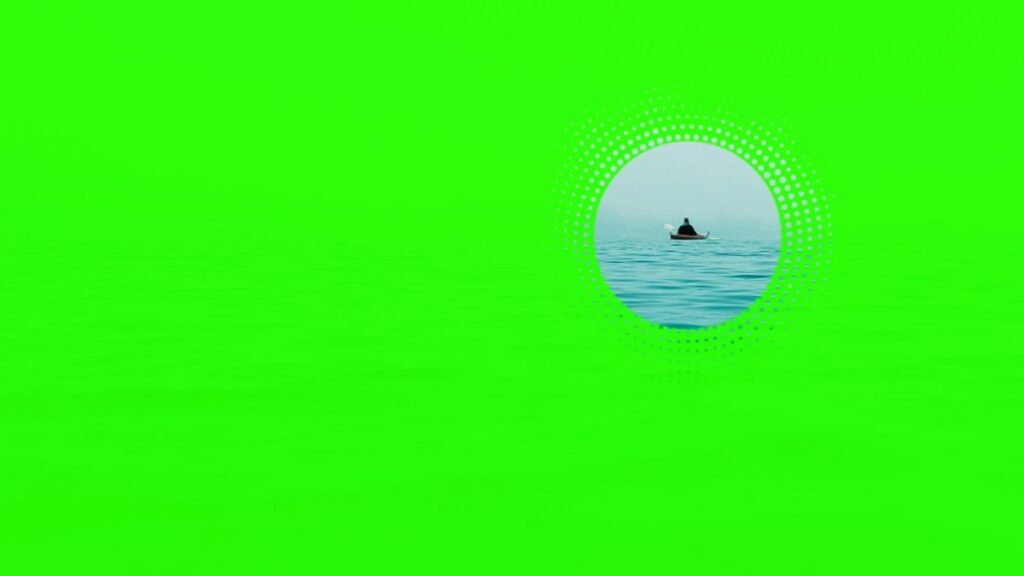
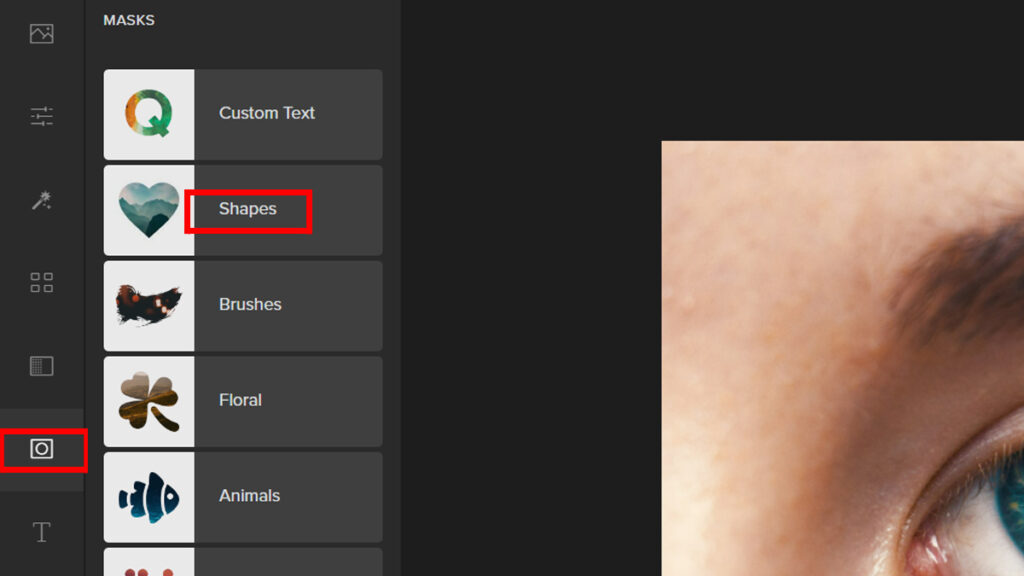
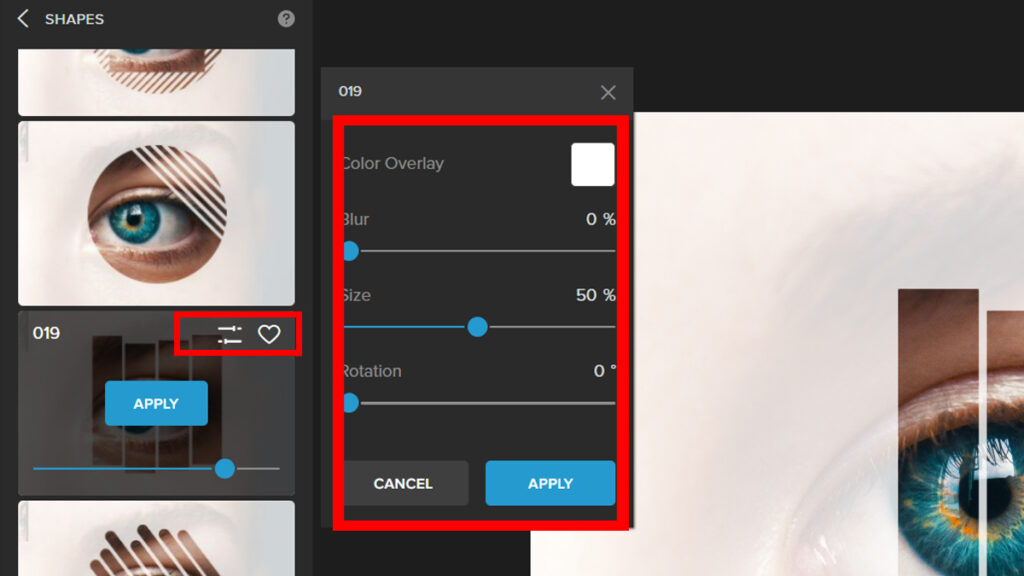
Step 2: Navigate to Mask and click on Shapes.
Step 3: Choose a Shape mask and adjust the Slider to change the opacity.
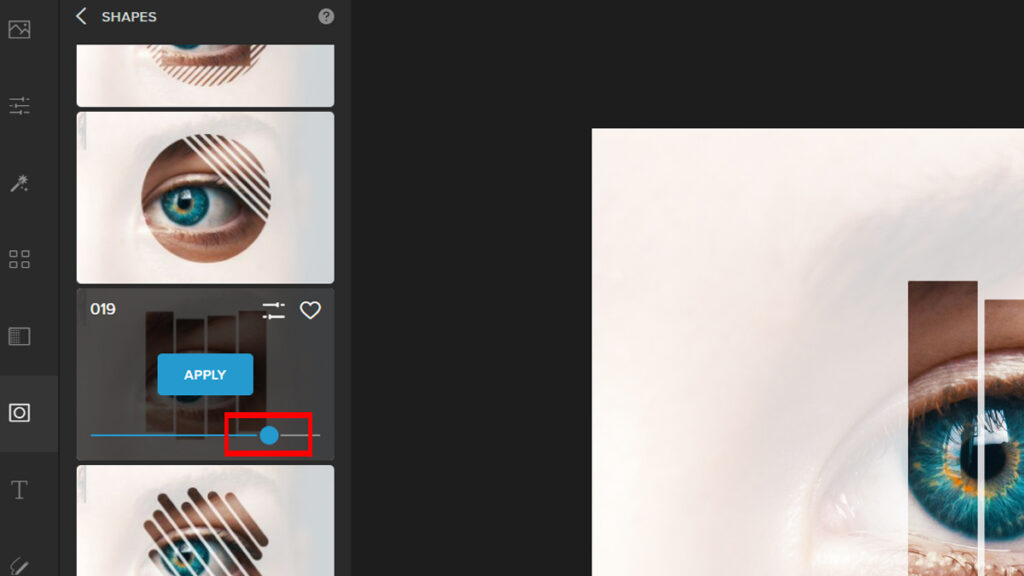
Step 4: There is an advanced option that you can adjust if you wish to have more control over the chosen Shape. Just click on Settings and experiment with the Sliders.
Let’s take a look at the end result:


Custom Text
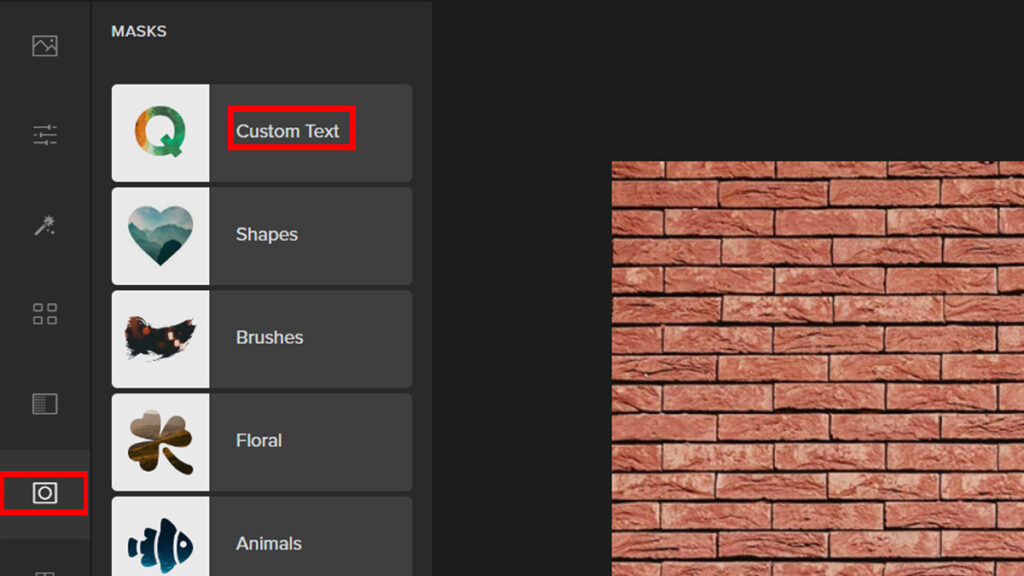
Step 1: Open Colorcinch and Upload an image.
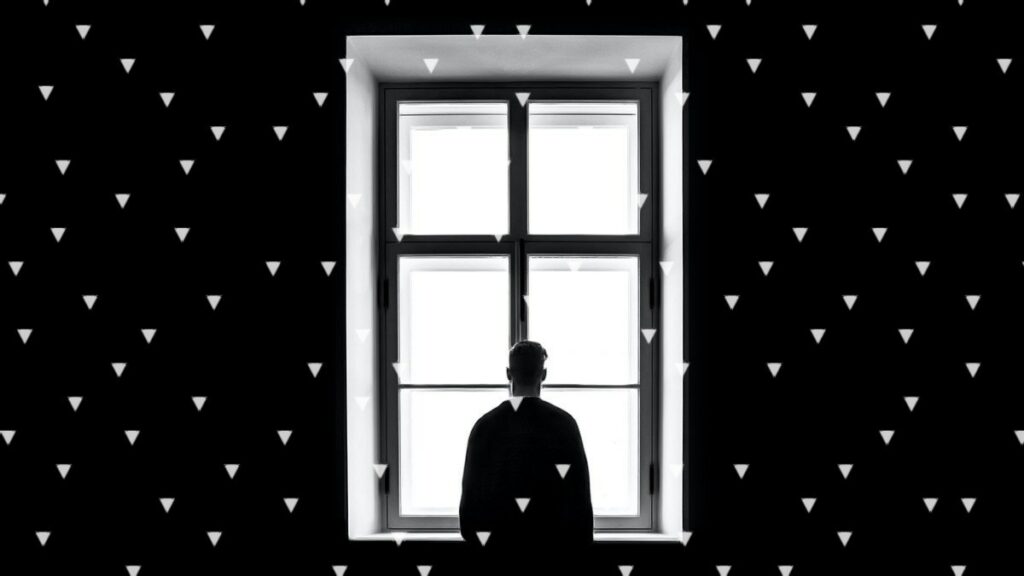
Step 2: Navigate to Mask– Custom Text.
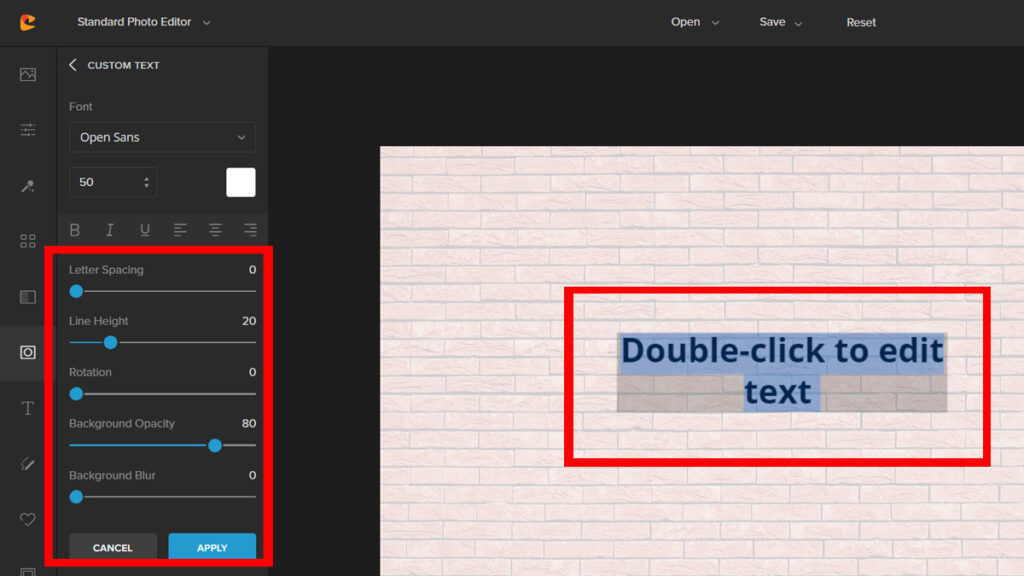
Step 3: Type in a text to serve as your overlapping layer. Adjust the Font Size, Letter Spacing, and Background Opacity to your liking.
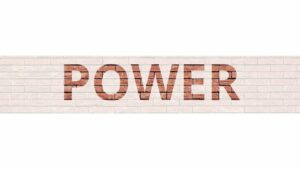
Here is the final output:
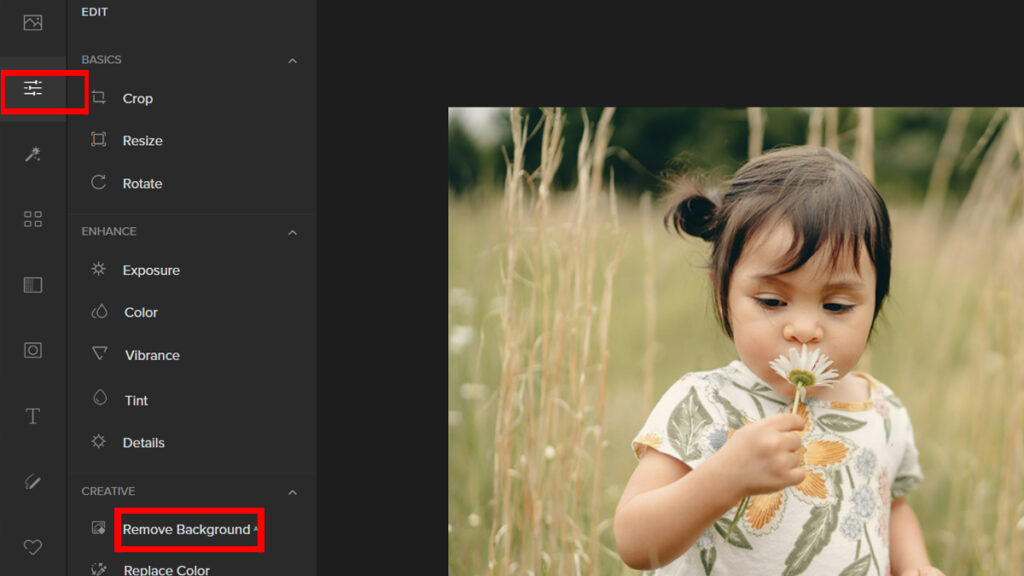
Background Remover
Masking is not just for design purposes. You can also use a mask if you want to separate the subject from the background.
Step 1: Just like the previous method, start by uploading your image in Colorcinch.
Step 2: Navigate to Edit and select Remove Background AI.
Step 3: Click on Remove Backround. The AI will automatically do its job removing the background. Once it’s done, you have the option to change the Background Color.
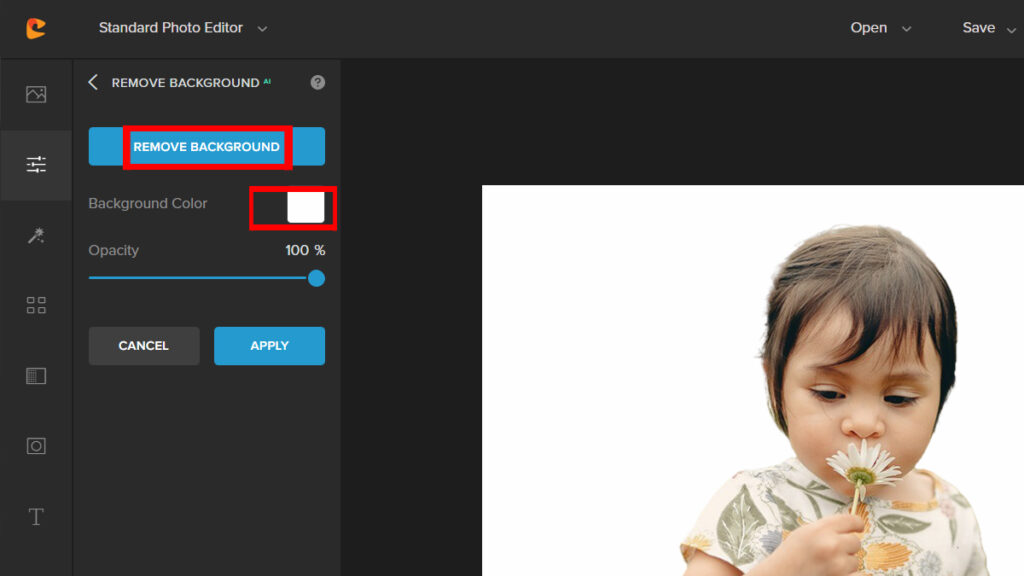
With just one click you are able to remove the background. You can also easly change the background color using this method.
Here is the result:


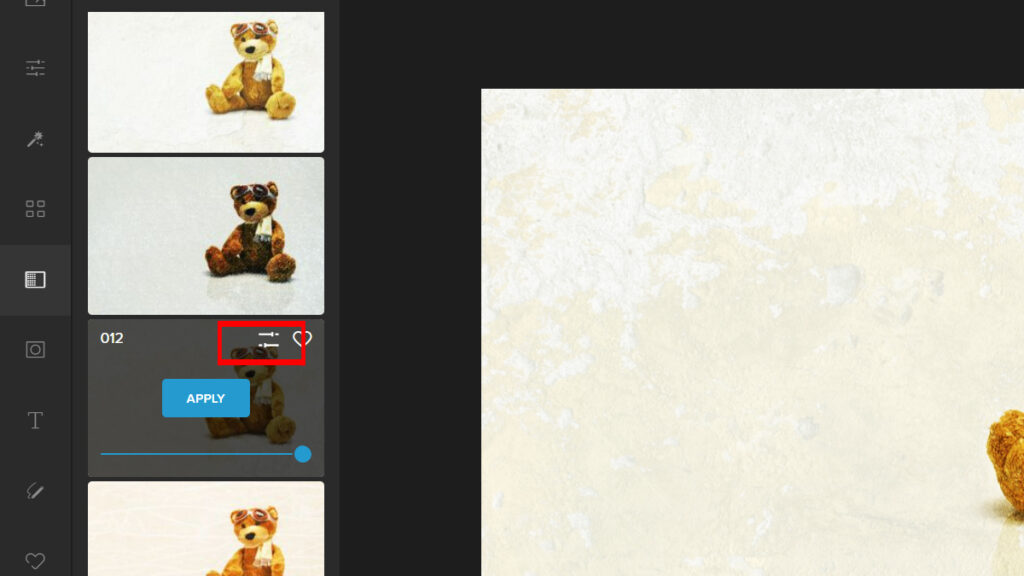
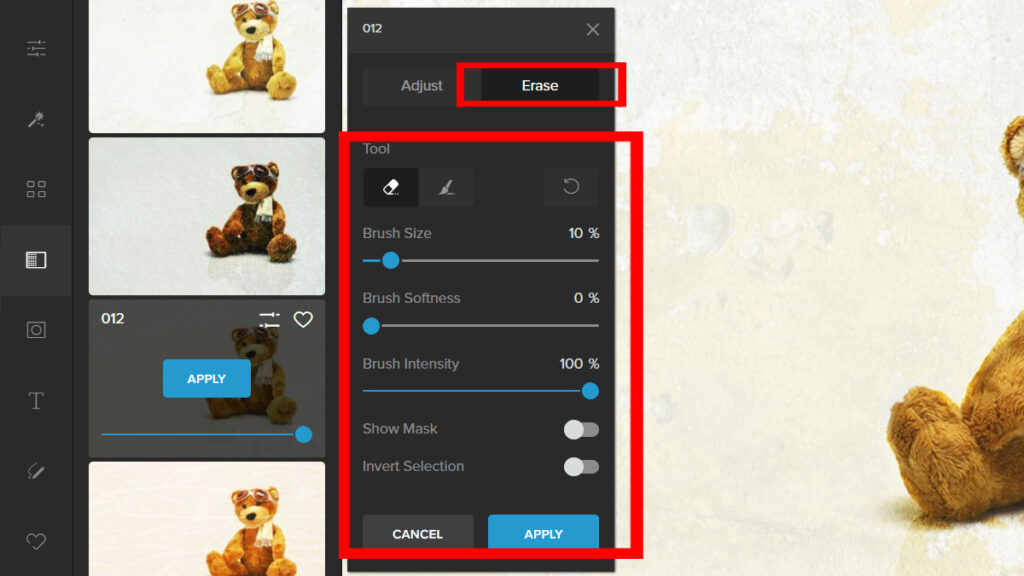
Erase Mode
Another method that acts like an image masking is the Erase Mode. This allows you to delete parts of your image that you wish to be excluded from the filter effect.
Step 1: Upload your image on Colorcinch.
Step 2: Go to Overlays and choose Textures.
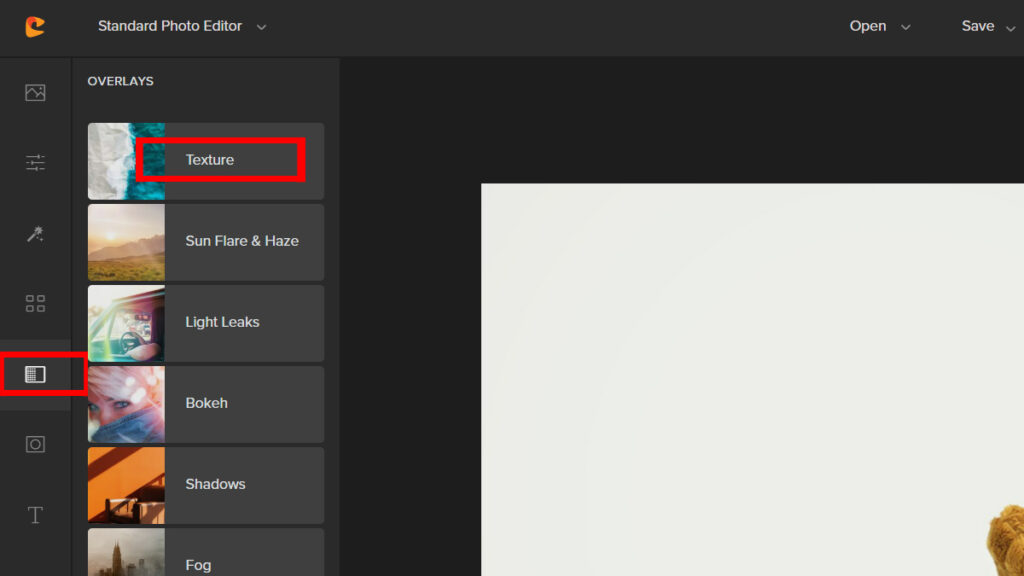
Step 3: Pick a Texture and click on the Settings Button.
Step 4: On the Settings Panel select the Erase Tab. Adjust the Sliders to change the brush settings. Once done, you may now erase the areas that should not have the filter’s effect using the brush.
And there you have it. Let’s look at the final output:


Conclusion
To wrap up, we learned that there are different methods how to use image masking. You just have to know the right one for you.
Image masking is not only simple to do but also accessible to everyone via Colocinch. If you find this article helpful, please do like and share!