
Light leaks are one of the most used and popular effects in photography. It can be used to give a vintage feel to your photos or as an interesting way to make them look different from other photos in your feed.
In this article, we’ll go over how you can use them on your own images!
Add Light leaks to your Photos Using Colorcinch
Step 1: Open Colorcinch. Upload an image.

Step2: Click Overlay on the left side of the panel and it will open a tab of overlay filters. Navigate through it and feel free to use any filter you like. For this example, we will be using Light Leaks.
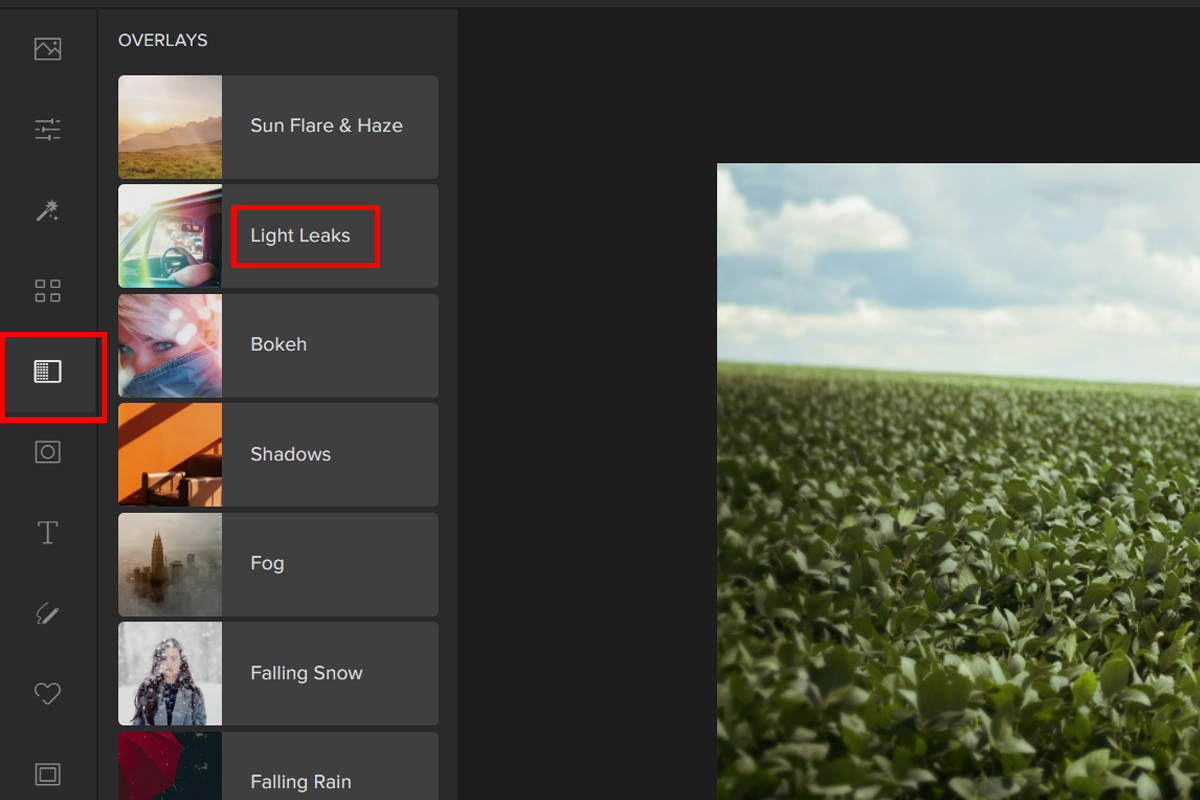
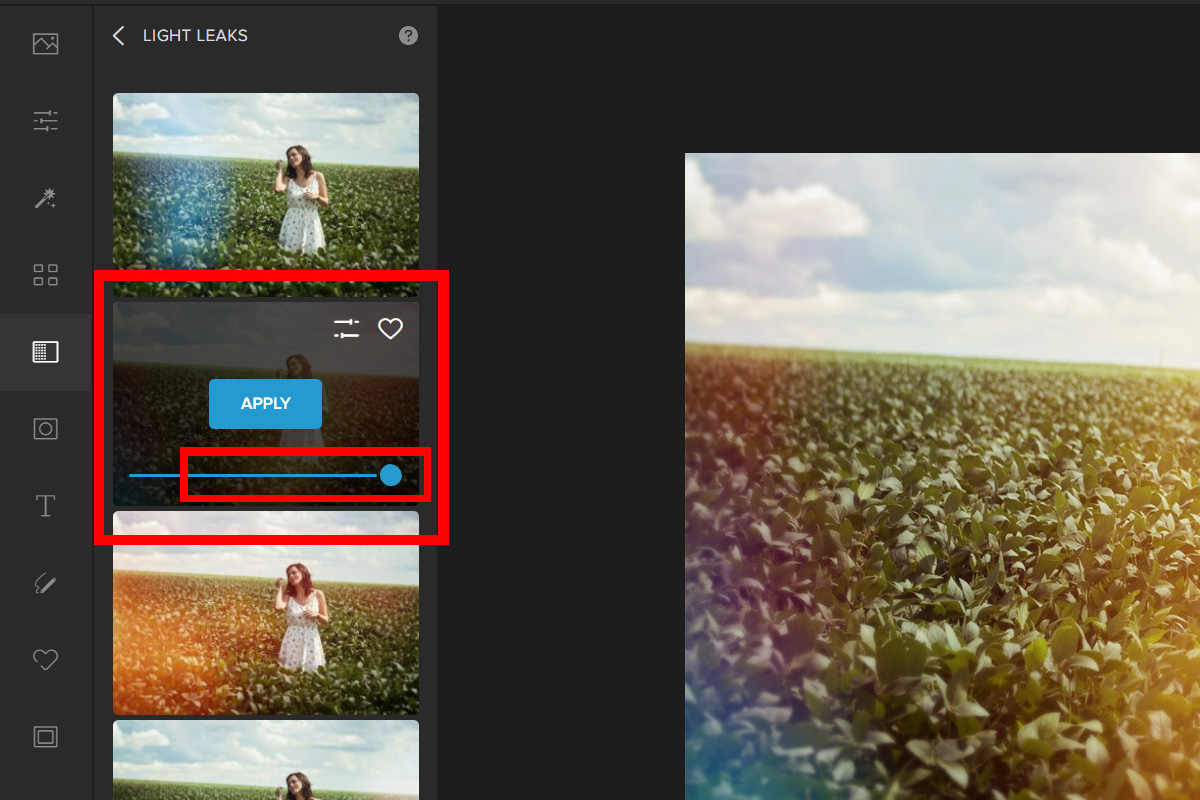
Step 3: Choose a Light Leaks filter and adjust the slider to change the Opacity.
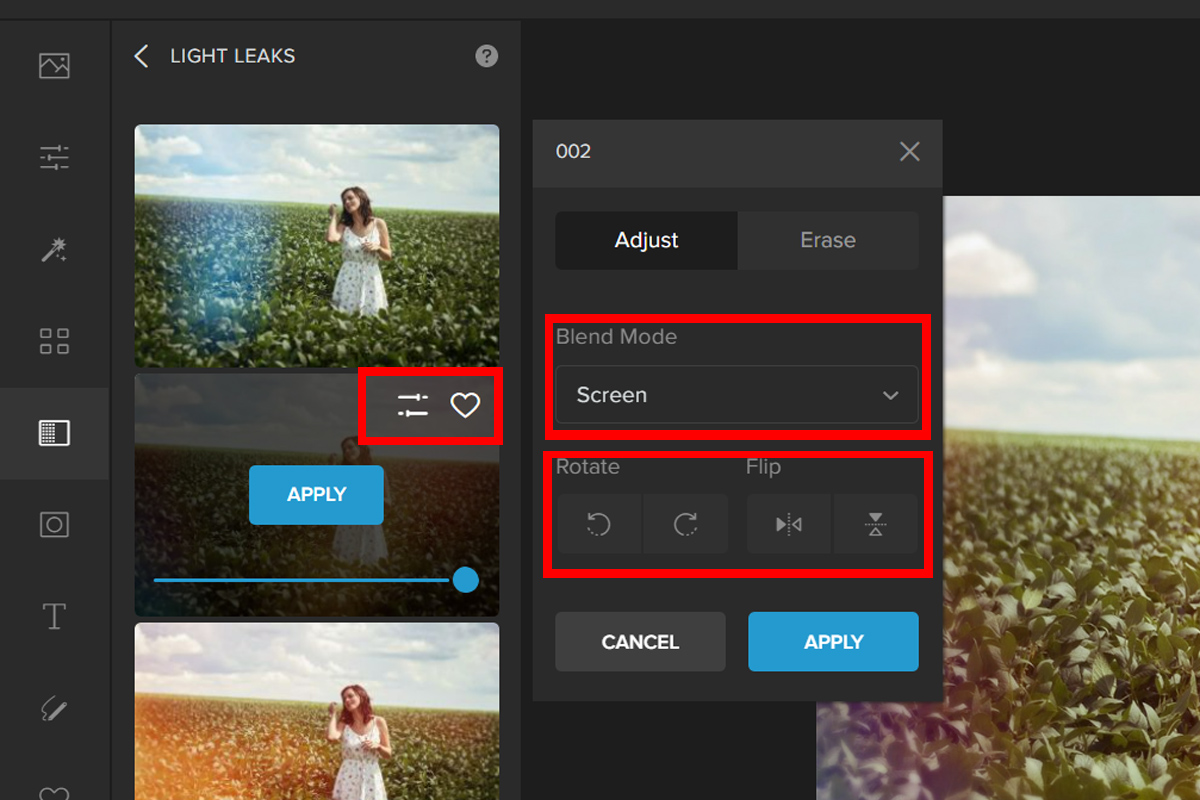
Step 4: There is an advanced option that you can play around with if you wish to have more control over the chosen overlay filter. Just click on Settings and experiment with the Sliders, Flip, Rotate and change the Blend Modes.
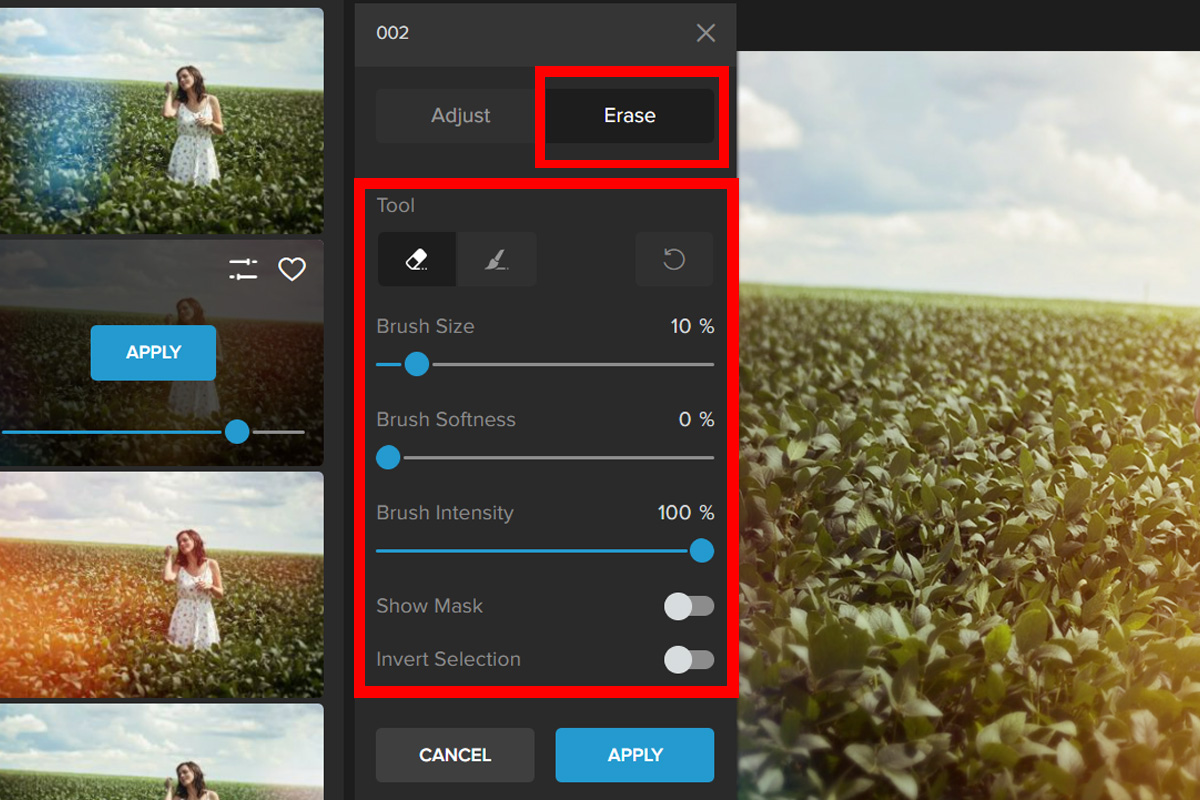
Step 5: You also have the option to erase the light leaks in the areas you don’t want them to be in. To do this, click on the Erase tab. Change the settings for the Brush, and then paint over an area to erase the light leaks.
 .
.
Here’s the before and after:


Conclusion
In conclusion, using light leaks is a great way to add more creativity to your photos. It’s also a great way to show off the world around you and your experiences as a photographer.
I hope you’ve found this article useful and that it has inspired you to try it out in your photos. It is also a great way to add some extra character and mood to your images, so don’t be afraid of using them! As long as they don’t overpower the subject or distract from what’s important in the photo.


