
Have you ever taken a few photos – whether with your phone or a camera – only to later discover that they came out way too dark?
If yes, then this article is for you! The good news is that you can quickly brighten photos using an online image editor.
In this article we’re going to take a look at how to use Colorcinch (or a similar online web-based photo editor) and break down 3 quick and easy ways to do just that!
Let’s begin!
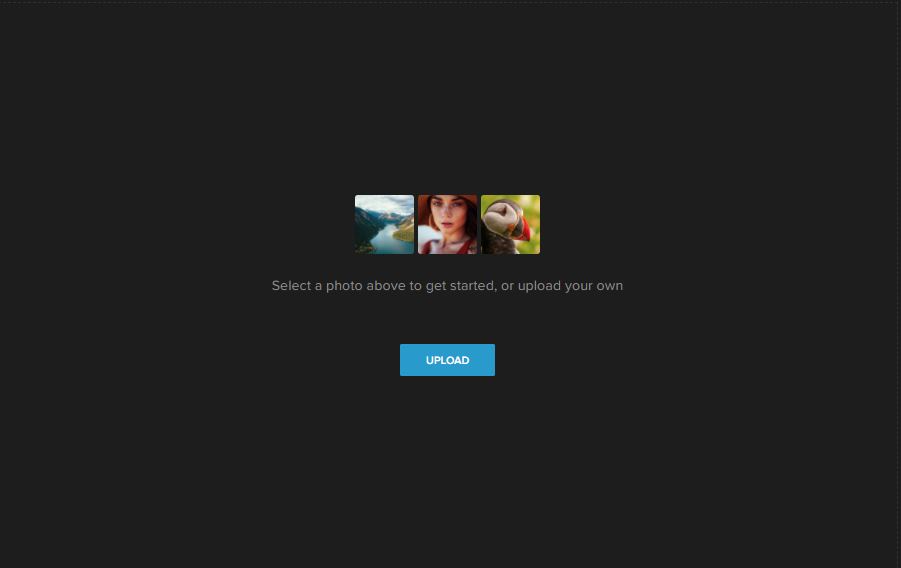
The first thing you need to do is upload one of your underexposed images in Colorcinch, or a similar online photo editor.
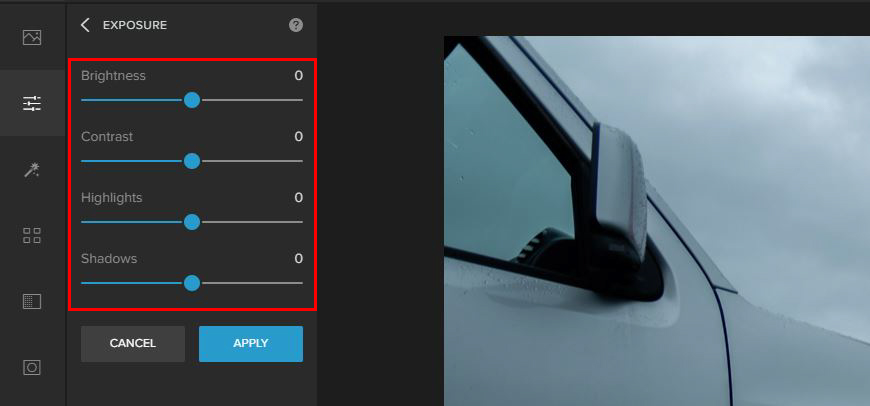
Next click the Edit tab in the left-hand column, followed by Exposure.

Once that has been selected you will see a list of slider options to choose from, such as: Brightness, Highlights, and Shadows. Additionally, there is a Contrast slider, which I will explain below.
1. How to Use the Brightness Slider:
The Brightness slider can be a great first option when dealing with slightly darker images that don’t require too much correcting.
Increasing the brightness in an image will target the tones evenly rather than having a heavy priority on the brightest areas.
For example:
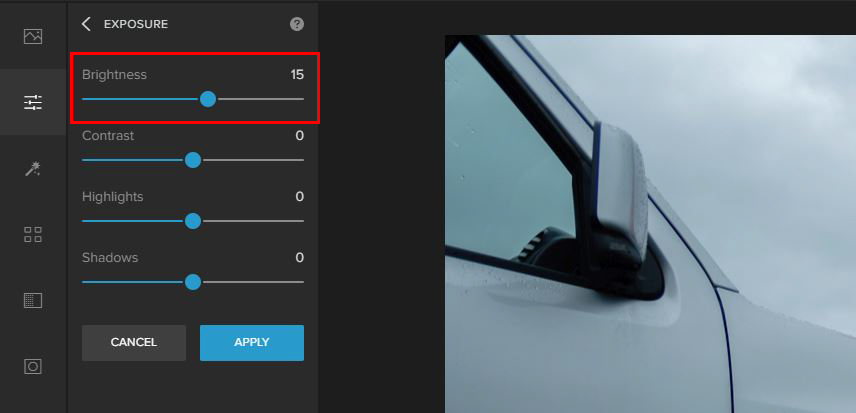
By simply sliding the Brightness slider to + 15, I start to increase the overall brightness of the image. The rule of thumb here is: Slide to the right to brighten your photo and slide to the left to darken it!
To easily correct this you can slightly raise the Contrast slider up a few notches. In this example I added + 10 contrast to counter the added brightness.
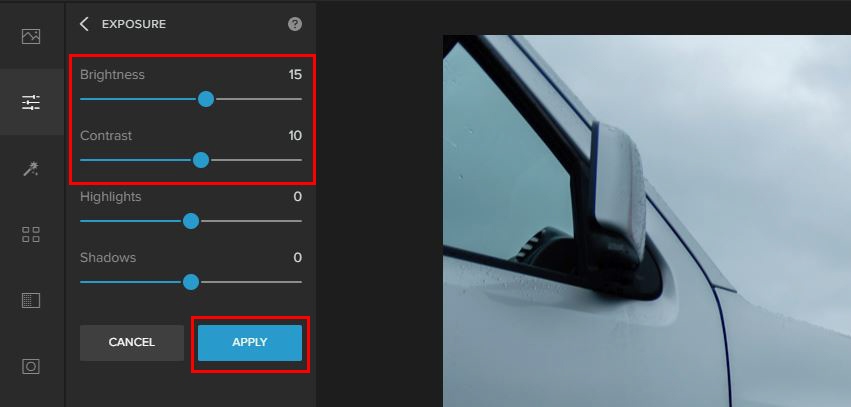
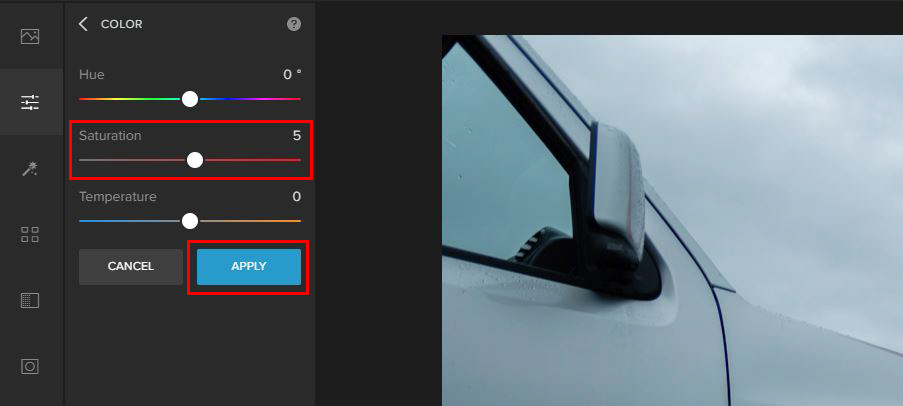
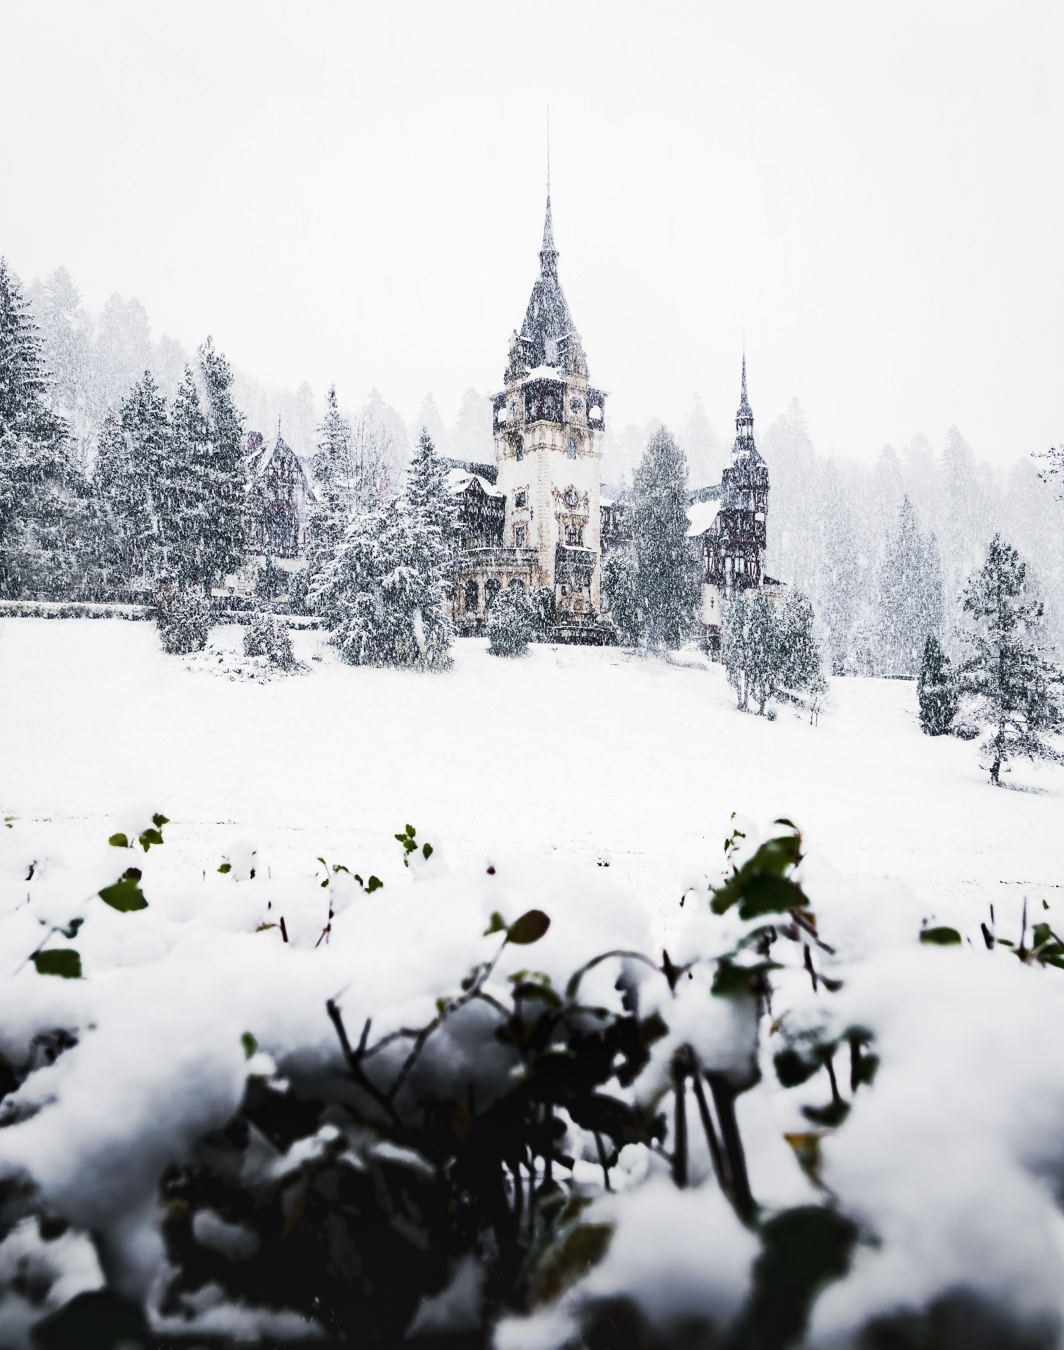
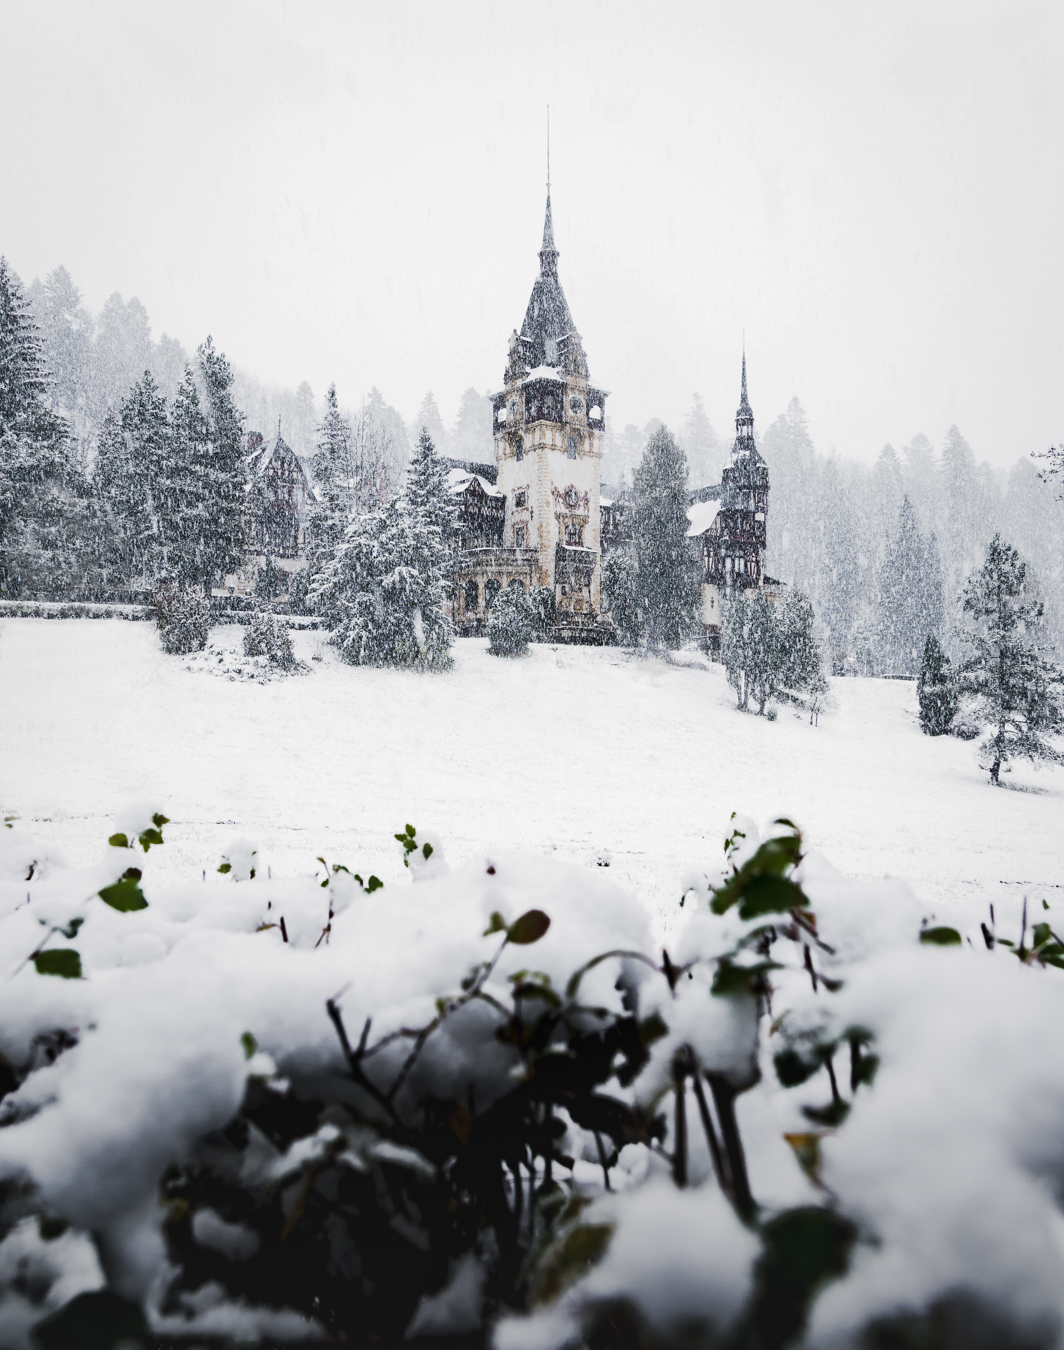
Another thing that I like to do is to add just a bit more saturation back into the image. After making your adjustments to the Brightness and Contrast sliders, click the Apply button to save those changes. Next select the Color tab and slightly adjust the Saturation slider to add a bit more saturation (color) back. Typically, I won’t push the saturation too high and in this case + 5 works for me. Make sure to click on the Apply button before saving your new image! And the final result! The Highlights slider will have more of a priority on the brighter areas of the image – known as the highlights – rather than the overall brightness of the image. A good example of this would be in an image with a lot of white areas. In this image the snow is looking pretty gray and is lacking brightness in the highlight areas. By using the Highlights slider, I can target these highlight areas more so, which in turn will make the snow look whiter, rather than gray. In addition, this will add some nice punch to the image!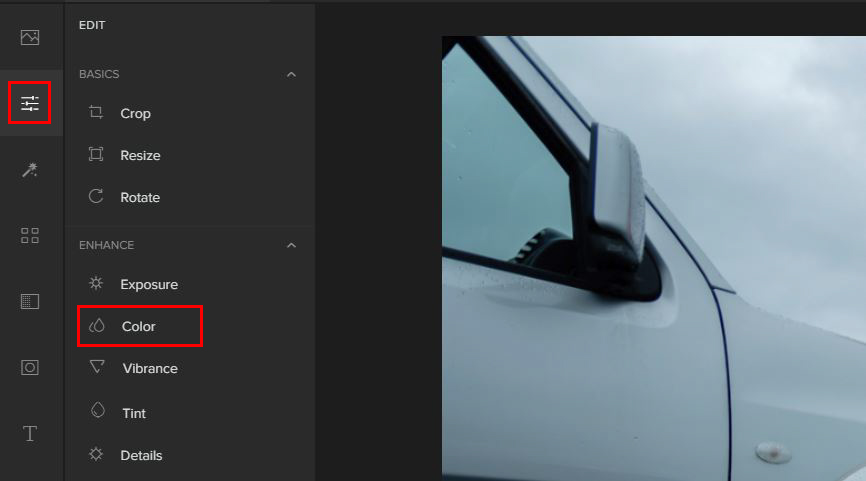

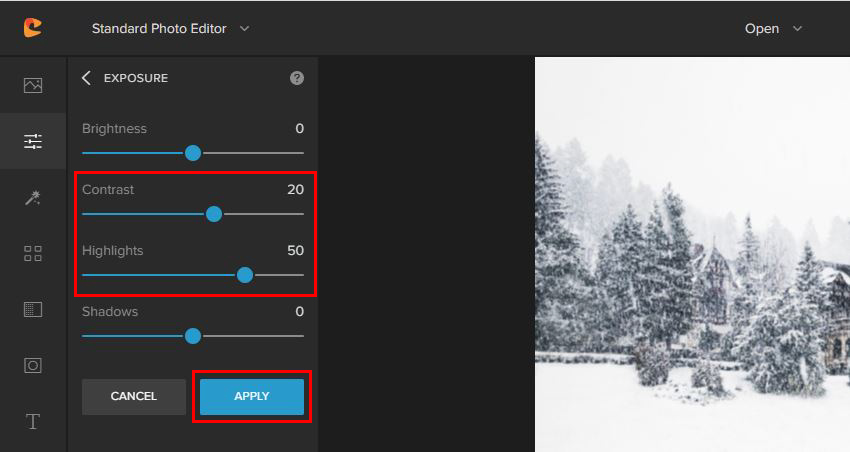
2. How to Use the Highlights Slider:
To achieve this I simply raised the Highlights slider to + 50 and then increased the Contrast slider to + 20.
In the brightness section above, I mentioned needing to maintain a balance and the same concept applies here. We need to counterbalance our increase to the highlights so that we don’t lose too much contrast in the overall image.
If we only increased the Highlights slider the image would tend to look more flat rather than defined.
Once you’re happy with your changes click the Apply button. The final step would be to save your image.
3. How to Use the Shadows Slider:
Using the Shadows slider can be a great way to fix underexposed images, as this will brighten up any darker areas within your image. The reason that some images tend to come out darker is because some scenes have too great of a contrast between the brightest areas and darkest areas.
Examples of this include:
- Shooting into the sun
- Any time we have a backlit subject (sun behind the subject)
- During the afternoon hours when the sun is at its highest and harshest
Unfortunately, modern day technology can’t always capture the full dynamic range in these types of situations.
To make up for this limitation, cameras will try and expose for that brightest areas, in order to protect them. By doing so, the darker areas of the photo will come out darker.
Thankfully, due to editing software, we can easily recover the shadow areas and bring back detail and brightness.
Let’s have a look at an example of this.
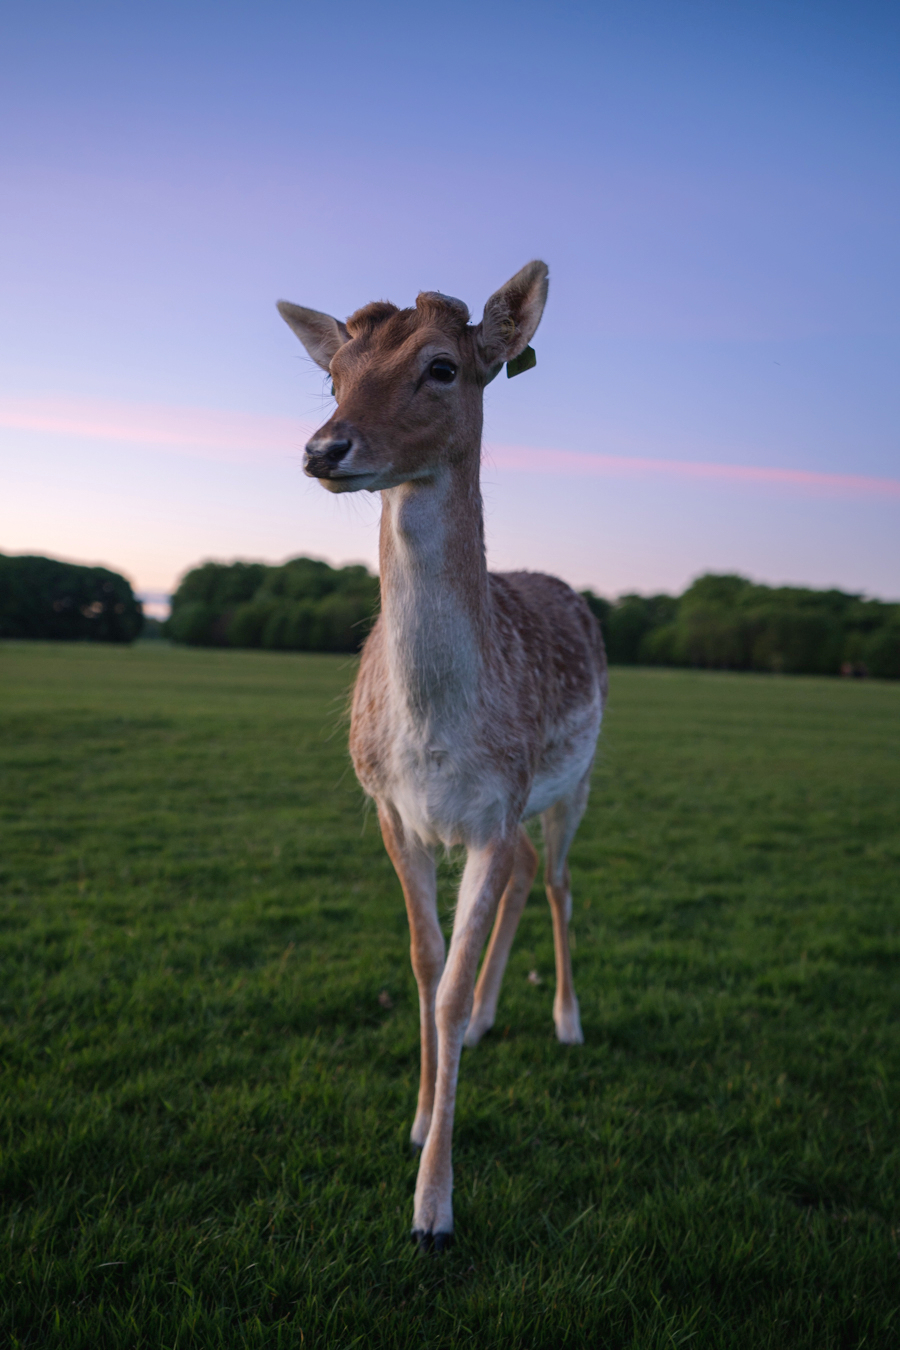
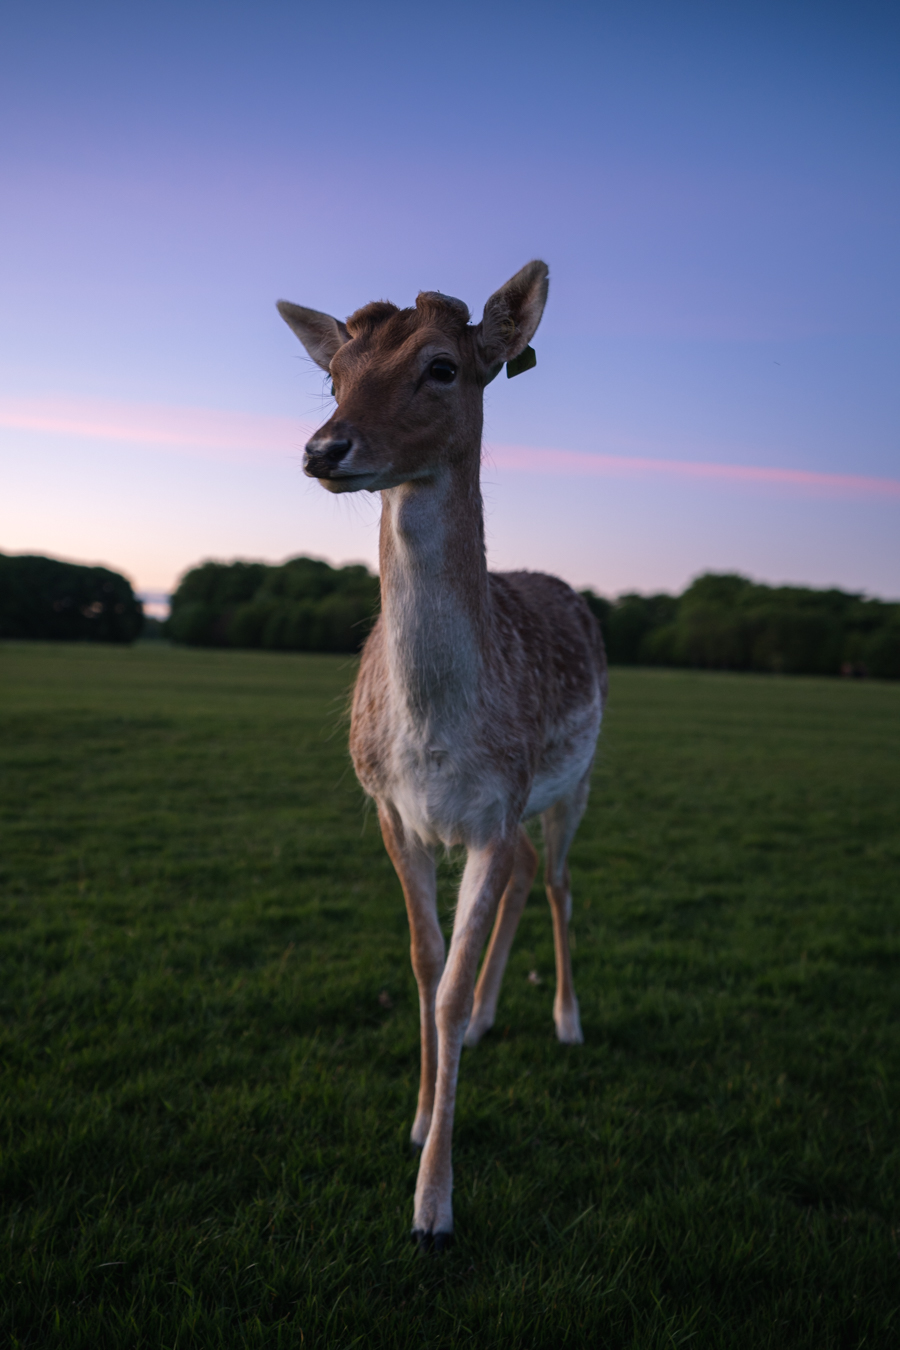
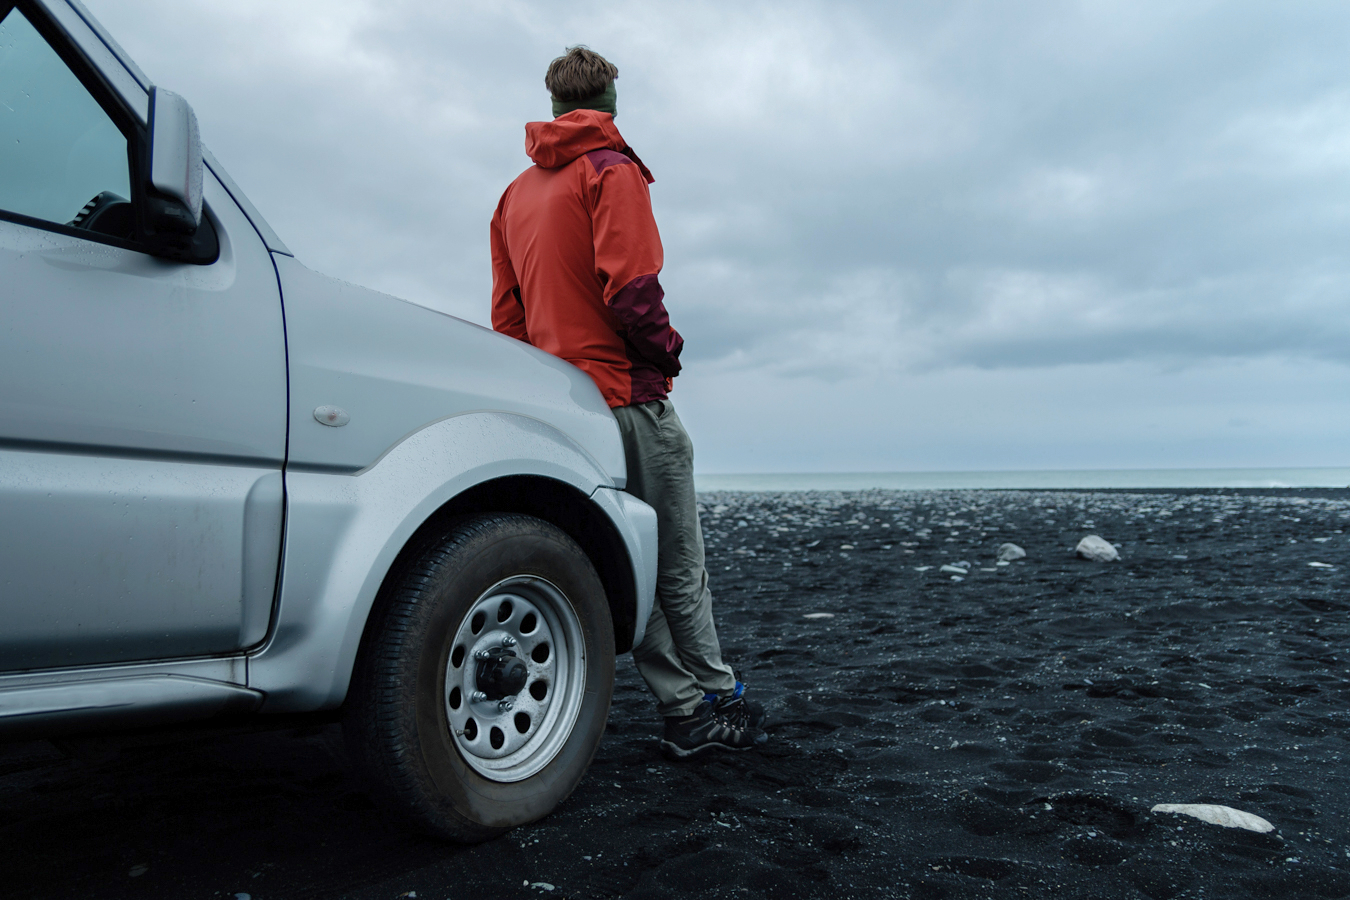
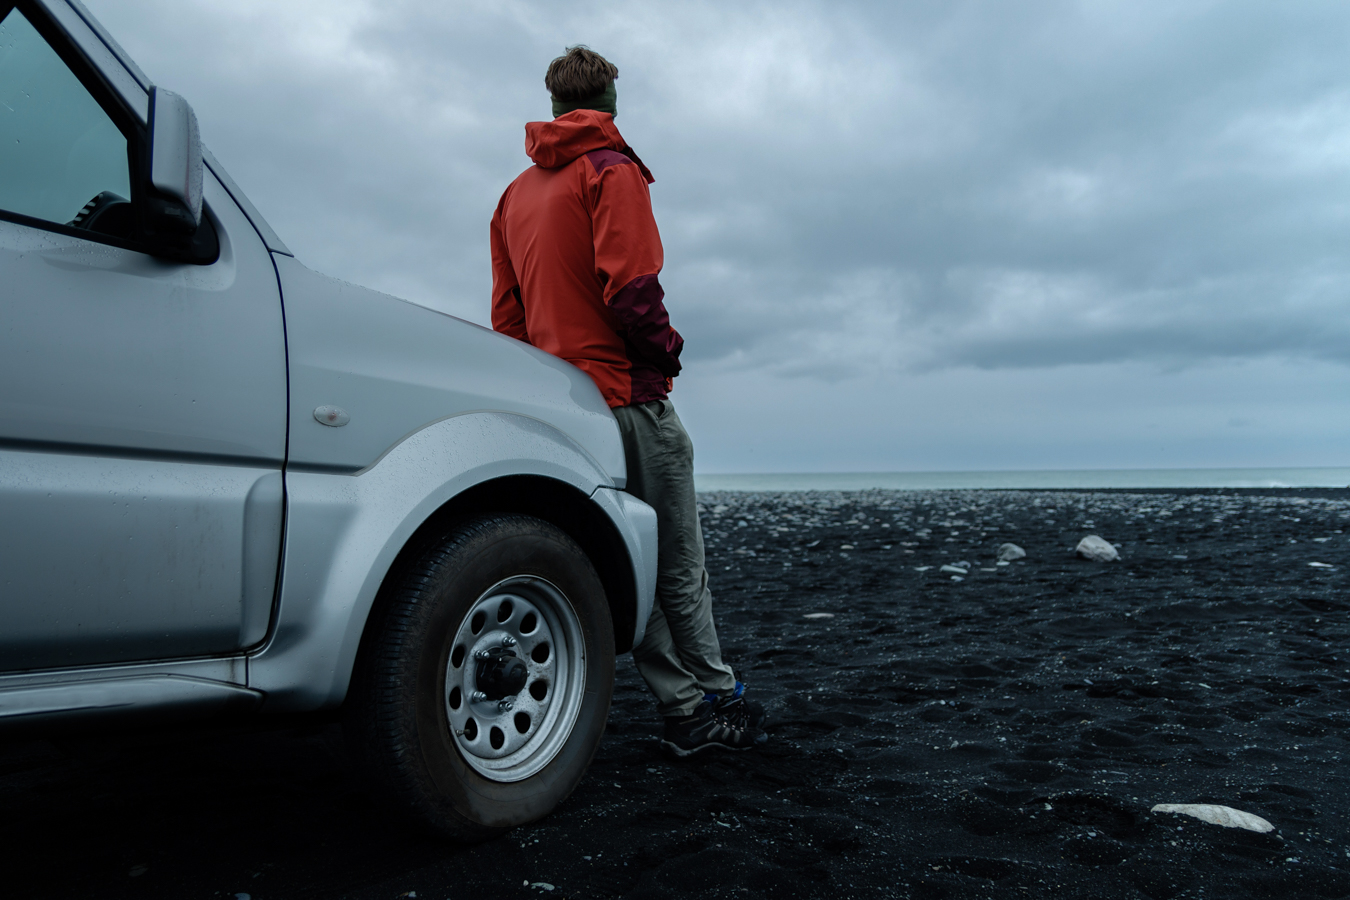
In the before and after we can see the deer originally appearing darker than the sky.
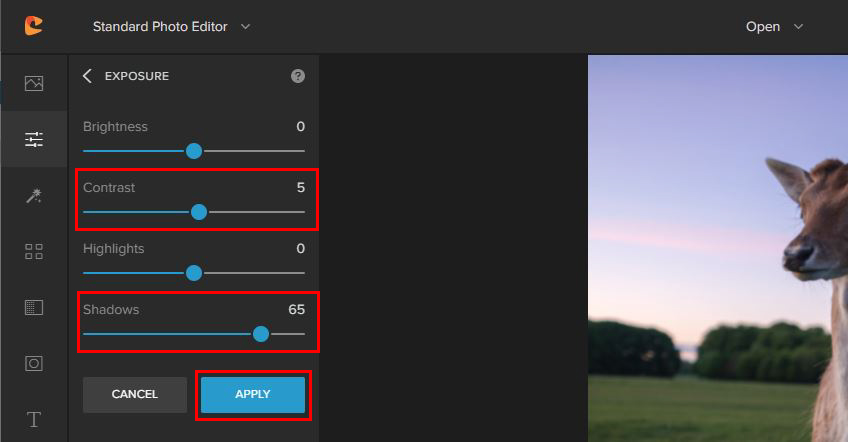
By increasing the Shadows slider I could quickly brighten up the darker areas. This will help even out, or balance the overall brightness of the image.
As with the previous examples, I added a little bit of Contrast to help maintain the balance of the image.
Let’s move on to the final step – saving your image!
Saving Your Image:
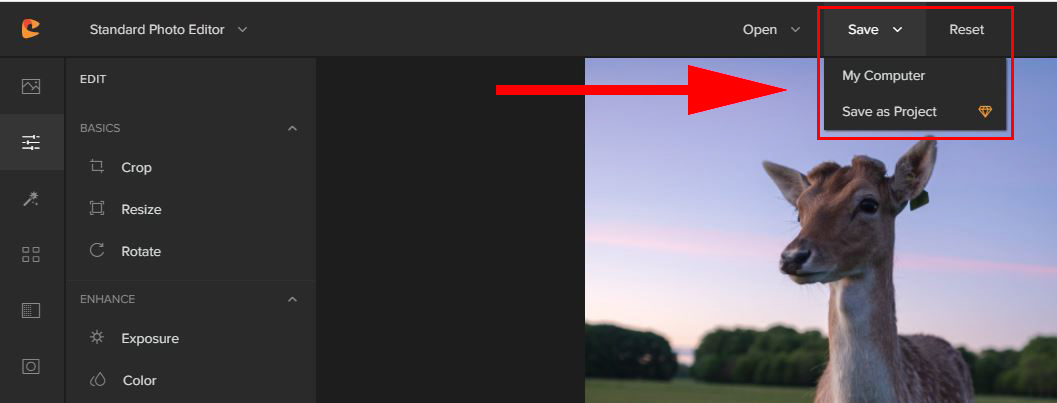
Once you’re happy with your adjustments and have clicked on Apply, you can click on the Save drop-down menu and select the location in which you want to save your image.
Next, name your image, select the file type, (JPG, PNG, PDF), as well as the quality and file size.
I hope you found this tutorial useful and can use some of these methods to help quickly brighten up your underexposed photos! If you’re interested in checking out Colorcinch, we offer a Basic account, which is free to use, requires no registration, and provides access to numerous essential effects and features. Click here to start editing with Colorcinch Basic! 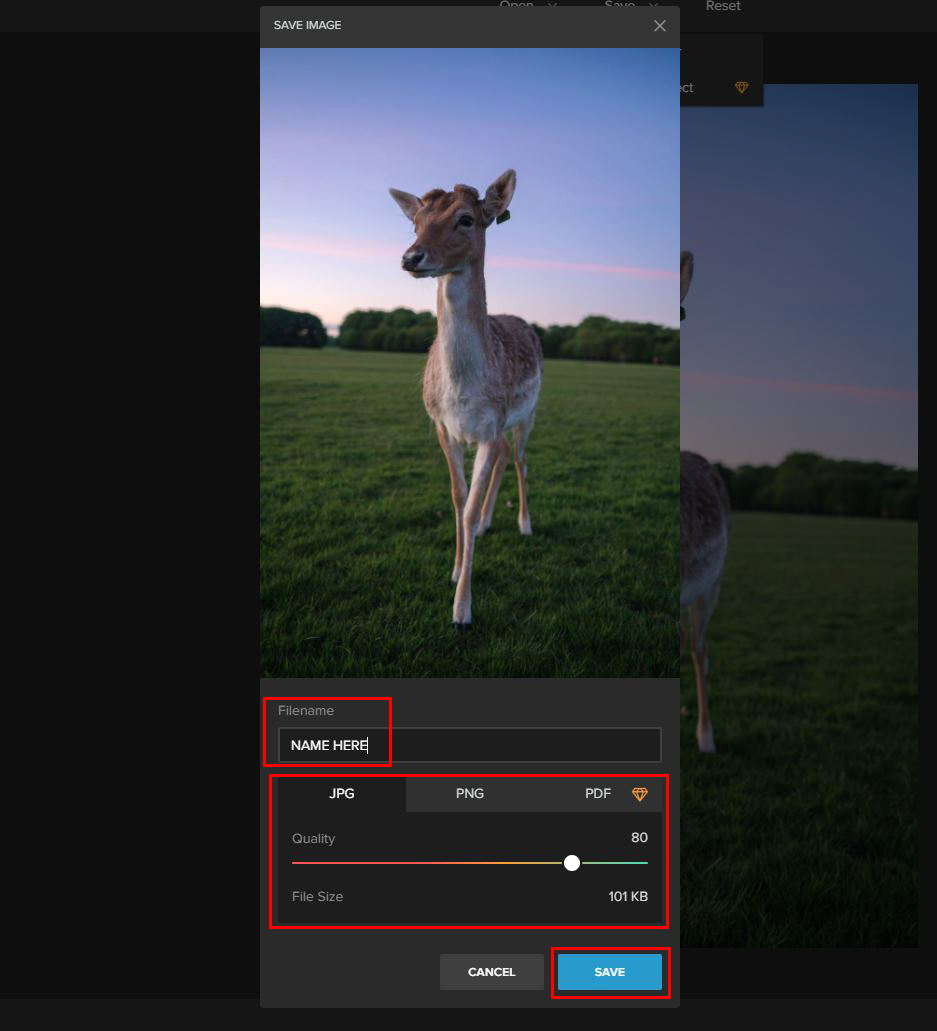
Conclusion: