

You have an image and you are looking for a way to revamp it. You searched on the internet and found texture overlays. However, you learned that it would require you to learn Photoshop and got discouraged.
It’s true that learning to use editing software like Photoshop will require time. For a beginner, this means that you won’t be able to post and share your photos on social media right away.
But we’ve got you covered. In this article, we will be teaching you how to easily apply a texture overlay to your photos without using Photoshop.

What is a Texture Overlay?
A texture overlay is a pattern that is added to a photo. It can be as simple as a solid color, or it could be something really intricate and detailed. The most important thing to remember is that the texture overlay should blend well with your image so they look like they belong together.
The best part about them? They’re easy to create and integrate into your photos! In fact, you’ll learn how to do it in this tutorial!
History of Texture Overlay
The history of texture overlay is not well documented, and chances are that you’ll never find a time machine to travel back in time and witness the birth of texture overlay.
One thing is for sure, texture overlays have been around for a long time. In fact, they were used in the early days of photography and digital photography:
- In the 19th century, photographers would create black-and-white photos by placing an overlay over their photos to provide texture and contrast. This technique was called photomontage.
- Texture overlays are still heavily used today as a way to add interest or realism to a photo using things like fabric patterns, paper textures, or even solid colors (like black). They’re also frequently used in graphic design work.
Types of Texture Overlay
There are a lot of texture overlays you can find on the internet. Common ones are grainy vintage texture, grunge texture, paper texture, wood texture, dust texture, etc.
- Diffuse Texture
These are the simplest textures to use. They’re made from a single color and don’t reflect anything, so they can be used on any background. You can make them any size you want, and they work well in most situations.
- Specular Texture
- These look like smooth metal, plastic, or glass surfaces with reflections that appear as highlights on the edges and corners of the object being photographed or drawn.
- Glossy Texture
These are similar to specular overlays but they have more intense highlights that appear much brighter than those provided by diffuse overlays.
- Bump Map Texture
This type allows you to create bumps along an object’s surface using perspective lines instead of creating 3D geometry.
Adding Texture Overlays To Your Photos Using Colorcinch
We’ll show you two methods of how to overlay images with transparency using a few simple steps.
Method 1: Manual Texture Overlays
For this method, you will need to have a base image and download a texture online.
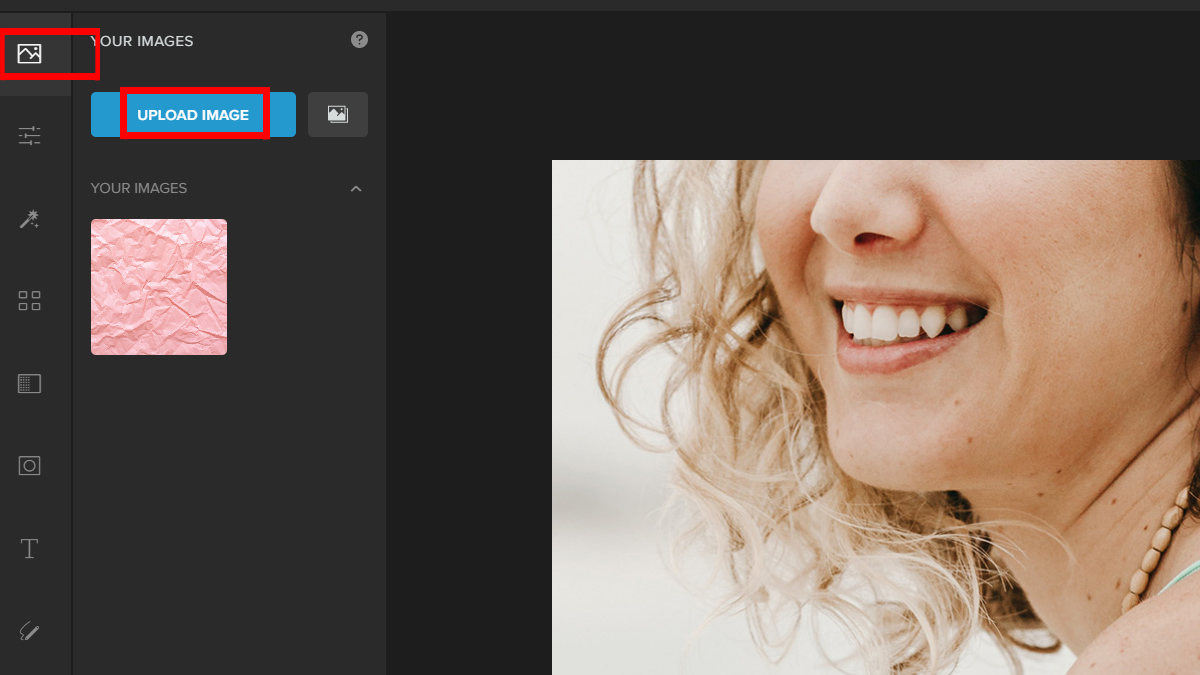
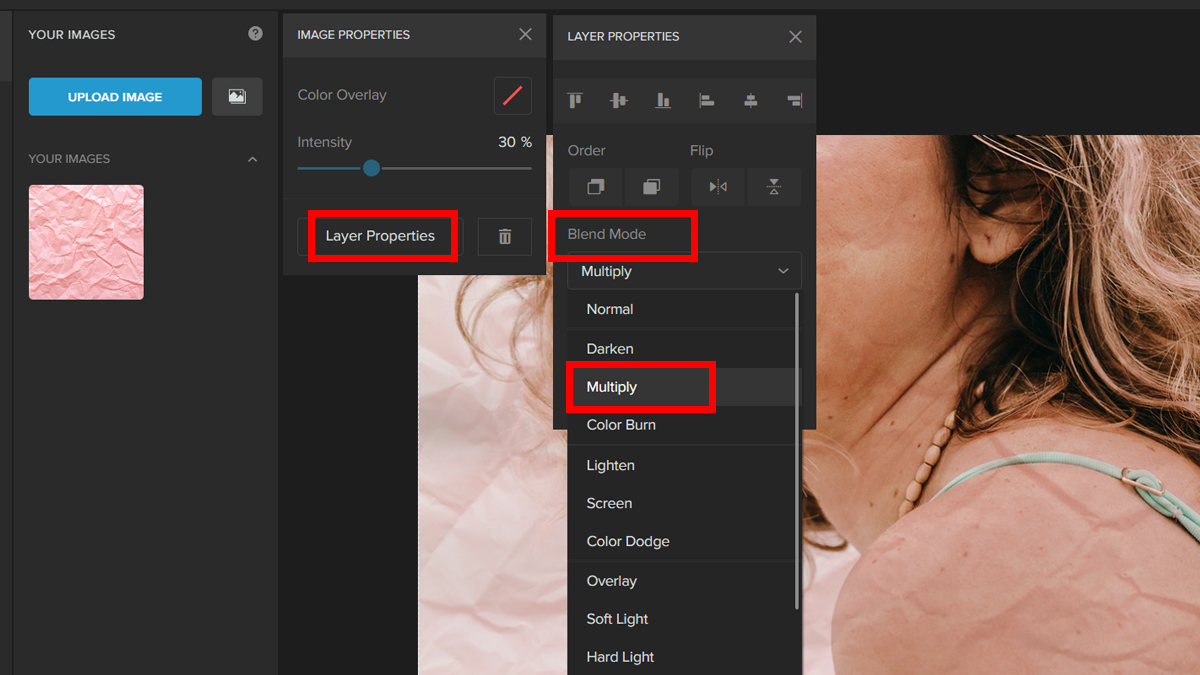
Step 1: Start by opening Colorcinch. Upload a base image.
Step 2: Navigate to Image Manager and click on Upload Image. Choose the texture you downloaded. Once uploaded, the images will appear in Your Images below the Upload Image.
Step 3: Drag your texture on top of the base image and adjust it to fit the base image.
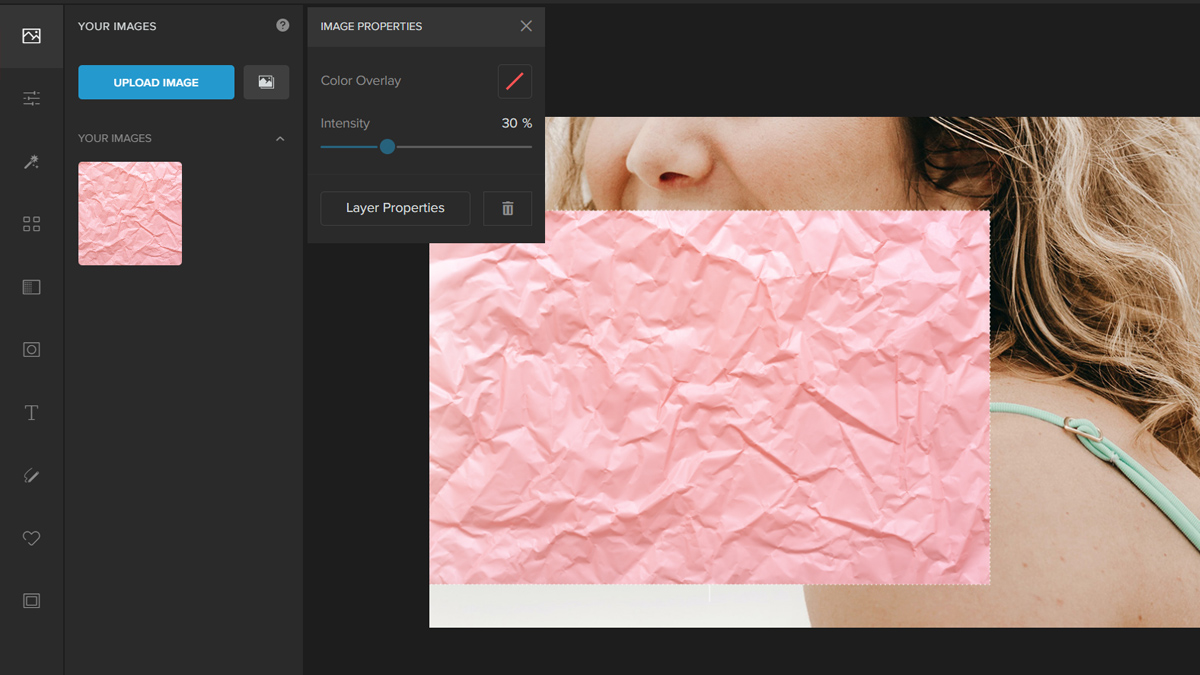
Step 4: Change the Blend Mode by clicking on the Layer Properties button. Navigate to the drop-down menu and try different blend modes until you are satisfied with the outcome. I will be using Multiply for this example.
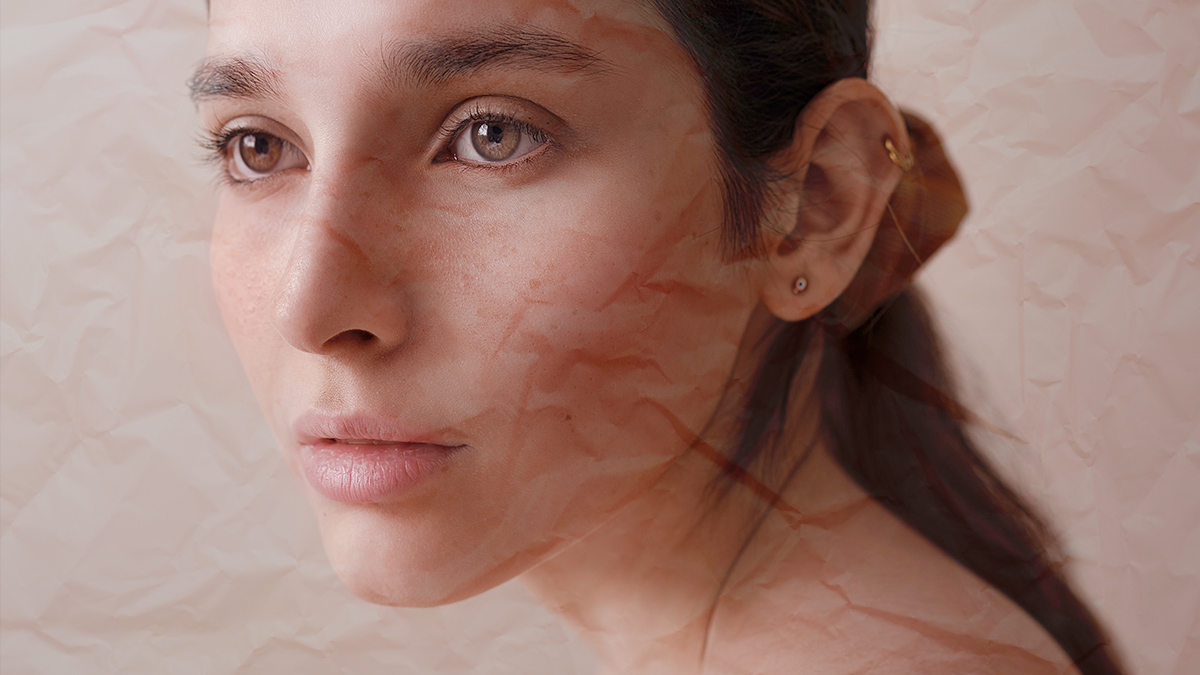
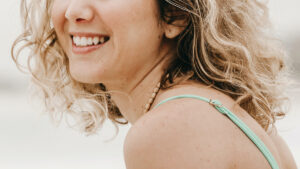
Let’s take a look at the before and after:

Method 2: Using Overlay Texture
This method is much simpler and easy to perform. We will be using overlay filters in Colorcinch.
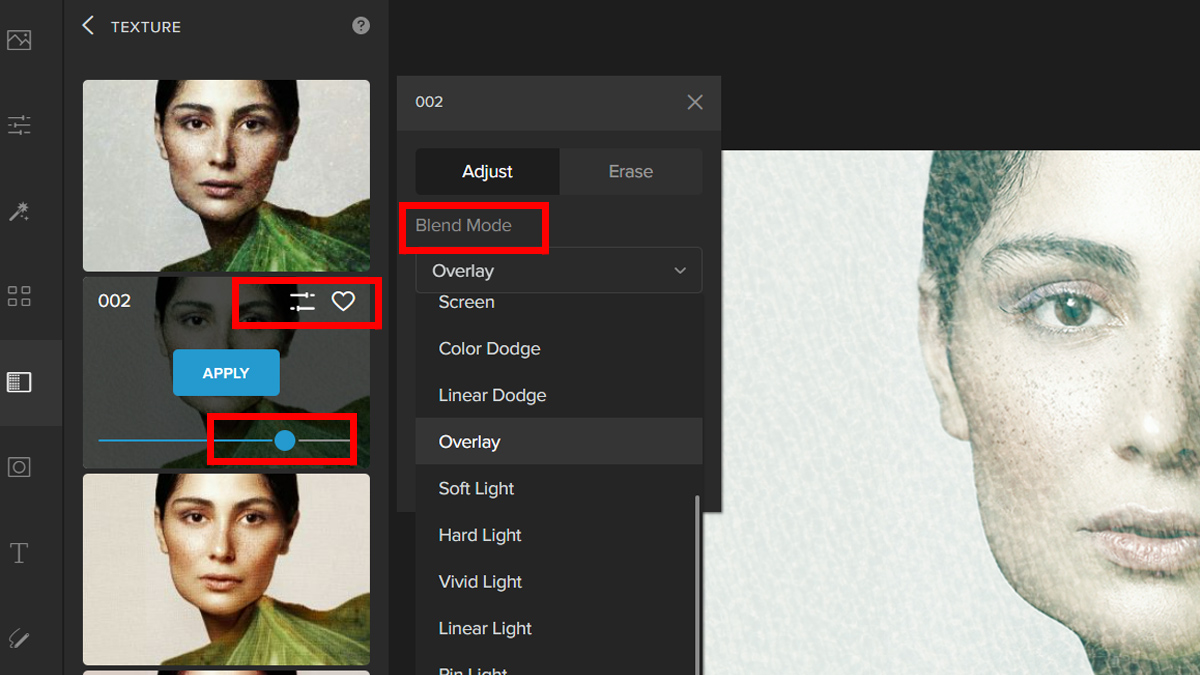
Step 1: Open Colorcinch and Upload an image.

Step 2: Navigate to Overlays on the left side of the panel and click on Texture.

Step 3: Pick a Texture. Adjust the filter by the Slider or by clicking on the settings button and experiment with the different Blend Modes.
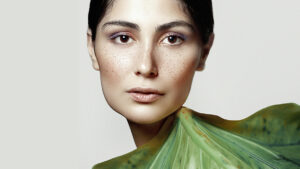
Now that’s simple. Let’s have a look at the before and after:

Summary
Texture overlays are a great way to add a little bit of extra detail to your photos. They can help make your photos look more interesting and provide them with some depth and color.
We hope that you’ve enjoyed this tutorial and learned how to make your photos look more interesting with texture overlays. You can also try using some of our other tutorials, like adding a border around an image or changing the color scheme of an image. If you have any questions or comments, please leave them below!